13-17-621 Page 45
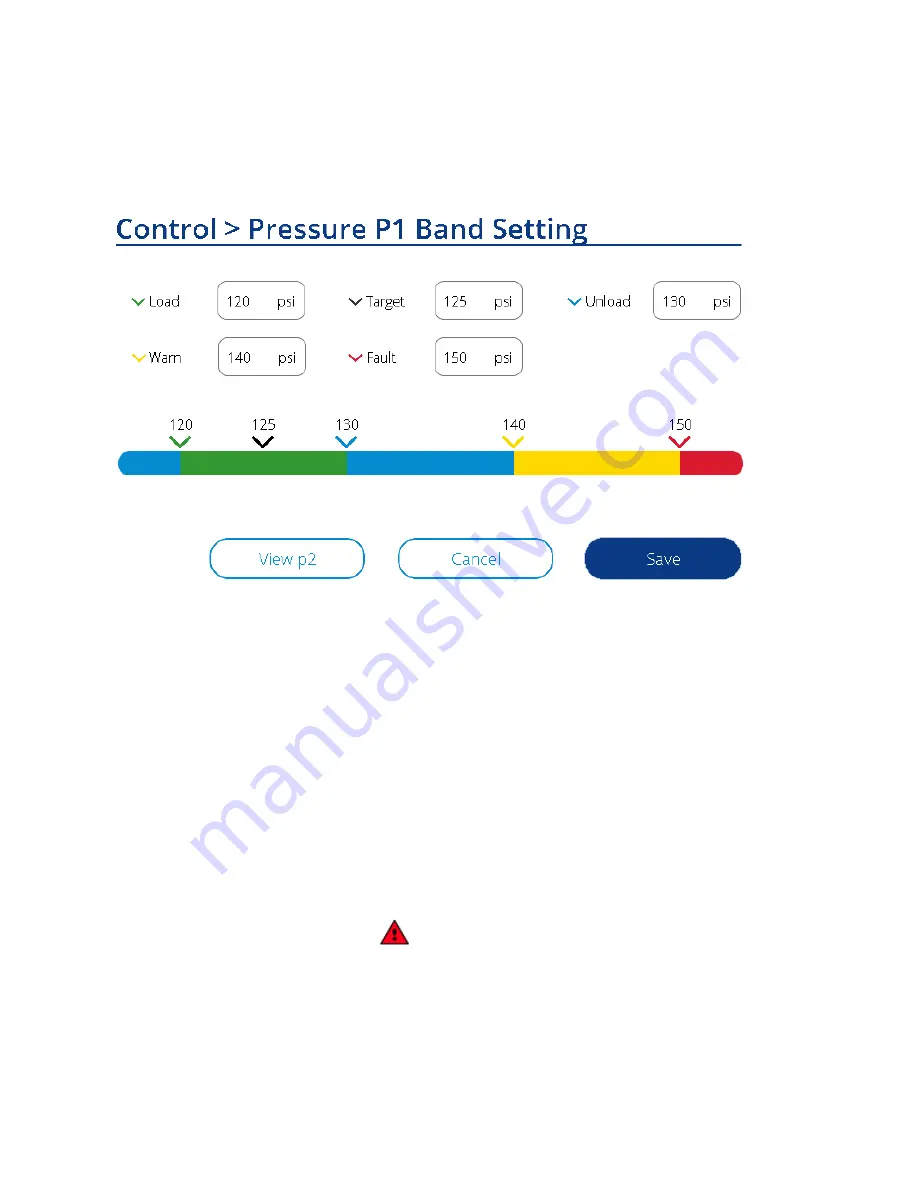
The p1 Pressure Band Setting screen is shown in Figure 57 below. The bar graph gives a visual indication
of the pressure band settings. Press the numerical value boxes to make adjustments as needed. Note that
the minimum and maximum values that will be allowed for each box will change dynamically based on the
design pressure of the machine as well as the values of the other settings. For example, to increase the
Load pressure to 126 PSI in Figure 57, the Unload pressure and Target pressure would first need to be
increased.
Figure 57: Primary Pressure Band Setting
Once you are satisfied with the pressure band settings, press the
Save
button to commit the changes.
One thing to note, when the certain machine settings are changed a (*) will come up next to the changed
setting indicating the changes are made and pending to save. Hit the
Save
button at bottom to implement
the changes and the (*) will go away when changes are confirmed.
3.7 Clearing Alarms
If there are any faults present on the machine, they must first be cleared to allow the machine to be started.
If the machine has been powered on recently and Auto Restart is not enabled, a Power Loss fault will be
present.
If a fault is active on the machine, the Active Alarms screen can be accessed by pressing on the Alarm
triangle on the Message Status Bar on the Home screen, or by navigating to Alarms > Active Alarms through
the Menu. The Active Alarms screen is shown in Figure 58.
If the alarm icon in the Alarm column is an outline, as shown in Figure 58, the alarm is no longer active and
may be reset. If the alarm icon is solid (
), the fault is still active and the condition must be resolved
before it can be cleared.
Once all faults have been resolved, press the
Reset All
button, which will move the alarms to the Alarm
History screen. Once all faults have been reset, return to the Home screen.


