background image

1800 909 909 

www.powertoolsupport.com      email: [email protected]  11/2015

AFTER SALES SUPPORT 

43671

9

2

General Information & Safety Instructions

•  Ensure the hedge trimmer is switched off and is cool before cleaning and 

maintenance.

•  If you are interrupted when operating the trimmer, switch off before  

looking up.

•  Never allow untrained users or children to use the trimmer.
•  Use good quality air cooled 2-stroke engine oil.
•  Wear goggles
•  Wear earmuffs
•  Wear a breathing mask  

•  Keep all parts of your body away from the cutting blade. Do Not remove cut 

material or hold material to be cut when blades are moving. Make sure the 
switch is off and the motor is NOT running when clearing jammed material.  
A moment of inattention while operating the hedge trimmer may result in 
serious personal injury.

•  Carry the hedge trimmer by the handle with the cutter blade and motor 

stopped. When transporting or storing the hedge trimmer, always fit the 
cutter device cover. Proper handling of the hedge trimmer will reduce possible 
personal injury from the cutter blade.

•  Prior to cutting with the hedge trimmer, always check the area to be cut for 

hidden objects. Be observant for fencing wire, Garden stakes, or electrical 
cables. Ensure to remove any of these objects prior to starting.

•  Do not use the hedge trimmer in poor weather conditions.
•  Do not use the hedge trimmer in poor light.
•  Always use both hands when operating the hedge trimmer, one on the rear 

handle and the other on the front handle.

Summary of Contents for Hedge Trimmer

Page 1: ...lsupport com AUS After Sales Support Now you have purchased a Gardenline product you can rest assured in the knowledge that as well as your 3 year parts and labour guarantee you have the added peace o...

Page 2: ...g 11 Contents of carton 11 Assembly 11 Removing Replacing the cover 12 Fuelling 12 Mixing Fuel 12 Recommended Fuels 13 Filling the tank 14 Starting a Cold Engine 16 Stopping the Engine 16 Operation of...

Page 3: ...ng shaping and pruning hedges shrubs and trees NOTE First time users or inexperienced operators pay particular attention to the operation of the Hedge Trimmer including details of starting and stoppin...

Page 4: ...tions for use carefully Choke control Start position choke closed Run position choke open Use at a distance of at least 15m from other people Thrown objects and rotating line can cause severe injury D...

Page 5: ...il 40 1 Spark Plug Torch L7RTC Equivalent spark plugs NGK BPMR7A CHAMPION RCJ6Y Net Weight 5 5kg Noise label rating 84dBA taken at 7 5 metres you must wear ear protection at all times A weighted sound...

Page 6: ...re proceeding with use of the product or recommended maintenance tasks Save these instructions Work area Keep work area clean and well lit Cluttered and dark areas invite accidents Do not operate powe...

Page 7: ...ower tools Such preventive safety measures reduce the risk of starting the power tool accidentally Store idle power tools out of the reach of children and do not allow persons unfamiliar with the powe...

Page 8: ...he hedge trimmer ensure that the motor has been switched off Prevent the spilling of fuel as this may also ignite with the hot motor Never refuel whilst the engine is running Be careful where you stor...

Page 9: ...and the motor is NOT running when clearing jammed material A moment of inattention while operating the hedge trimmer may result in serious personal injury Carry the hedge trimmer by the handle with t...

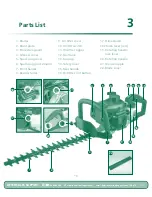
Page 10: ...2 Blunt plate 3 Protective guard 4 Silencer cover 5 Spark plug cover 6 Spark plug not shown 7 Front handle 8 Recoil starter 9 Air filter cover 10 On Off switch 11 Throttle trigger 12 Fuel tank 13 Fue...

Page 11: ...x Tube Spanner Screw driver 1 x Mixing Bottle with 40 1 markings 1 x Blade Cover 1 x Instruction Manual 1 x Warranty Card Details 1 x Quick Start Guide Assembly This hedge trimmer does not require an...

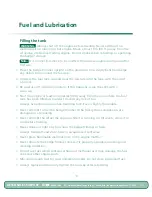
Page 12: ...is NOT for the storage of fuel This container is solely for mixing of fuel only Ensure to keep this container in a safe storage location empty of fuel and out of reach of children WARNING Lack of lubr...

Page 13: ...g 4 Start the engine at least nine metres 30ft away from the area where the fuel tank has been filled up in order to avoid any risk of fire Always use extreme care when handling fuel Fuel is highly fl...

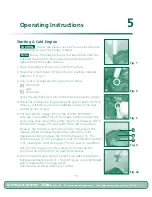
Page 14: ...ir bubbles visible in the fuel discharge line Fig 3 5 Set the throttle trigger 11 to the START POSITION Grip the rear handle 15 of the hedge trimmer and at the same time press down the safety lever 14...

Page 15: ...safety lever 14 Squeeze slightly the throttle trigger 11 and then release the trigger This will disengage the starting trigger lock and allow the motor to idle correctly and disengage the oscillating...

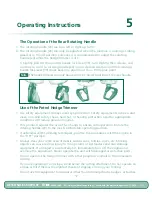
Page 16: ...d of the motor is at idle and at idle the blades are NOT engaged 2 To engage the blades 1 the motor needs to accelerate To increase the speed of the motor press the safety lever 14 down first and then...

Page 17: ...fety equipment such as a dust mask non skid safety shoes hard hat or hearing protection used for appropriate conditions will reduce personal injuries This product requires the use of two hands to ensu...

Page 18: ...s whenever touching the blades If the blades connect with a hard object during operation stop the engine and check the blade for damage Never work towards people or solid objects such as walls trees o...

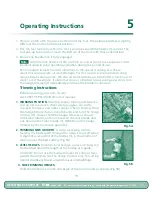
Page 19: ...ge trimmer off immediately and have the problem corrected Trimming Instructions Before operating your unit review ALL SAFETY PRECAUTIONS in this manual 1 WORKING POSITION Maintain proper footing and b...

Page 20: ...using cracked or handles broken or if you see any other condition that may affect the hedge trimmer s operation contact an authorised service centre for repairs before using again 3 Fertilisers and ot...

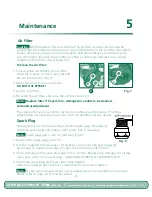
Page 21: ...ace filter if frayed torn damaged or unable to be cleaned Carburettor Adjustment The carburettor is pre set at the factory for optimum performance If further adjustments are necessary take your unit t...

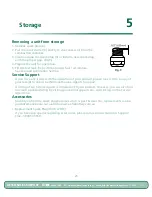
Page 22: ...aspoon of clean 2 stroke oil into the combustion chamber Pull the recoil starter 8 slowly several times to coat the internal components Replace spark plug 6 10 Store the unit in a cool dry place away...

Page 23: ...ervice Support If you have any issues with the operation of your product please take it with a copy of your receipt to one of our National Service Agents for repair A listing of our Service Agents is...

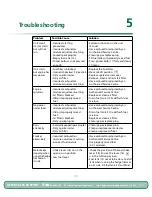
Page 24: ...ain fuel tank 12 add fresh fuel mixture No power under load Incorrect carburettor mixture adjustment setting Old or improperly mixed fuel Dirty spark plug 6 Air filter is blocked Air filter is blocked...

Page 25: ...S U A 1800 909 909 www powertoolsupport com email help powertoolsupport com 11 2015 AFTER SALES SUPPORT 43671 25 This is a blank page...

Page 26: ...S U A 1800 909 909 www powertoolsupport com email help powertoolsupport com 11 2015 AFTER SALES SUPPORT 43671 26 This is a blank page...

Page 27: ...S U A 1800 909 909 www powertoolsupport com email help powertoolsupport com 11 2015 AFTER SALES SUPPORT 43671 27 This is a blank page...

Page 28: ...AFTER SALES SUPPORT MODEL HTKS26 PRODUCT CODE 43671 11 2015 YEARWARRANTY 2 1800 909 909 www powertoolsupport com AUS...

Reviews: