background image


23


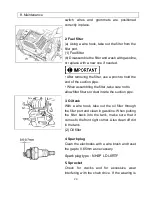
2. Oiling port 

Dismount the guide bar and check the oiling port 

for clogging. 

(1) Oiling port 


3. Guide bar   

When  the  guide  bar  is  dismounted,  remove 

sawdust in the bar groove and the oiling port. 

Grease the nose sprocket  from the feeding  port 

on the tip of the bar. 


8. Maintenance                                                                                                                           

(1) 

Oiling port


(2) 

Grease port


(3) 

Sprocket 


4. Others 

Check for fuel leakage and loose fastenings and 

damage  to  major  parts,  especially  handle  joints 

and guide bar mounting. If any defects are found, 

make  sure  to  have  them  repaired  before 

operating again. 


Periodical service points


1. Cylinder fins 

Dust  clogging  between  the  cylinder  fins  will 

cause  overheating  of  the  engine.  Periodically 

check and clean the cylinder fins after removing 

the  air  cleaner  and  the  cylinder  cover.  When 

installing  the  cylinder  cover,  make  sure  that 

Summary of Contents for GC-4518

Page 1: ...CHAIN SAWS GC 4518 GC 5020 OWNER S MANUAL WARNING Before using our products please read this manual carefully to understand the proper use of your unit...

Page 2: ...are requested to read all such instructions carefully and follow them without fail WARNINGS IN THE MANUAL This mark indicates instructions which must be followed in order to prevent accidents which co...

Page 3: ...ne 3 3 For safe operation 6 4 Installing guide bar and saw chain 11 5 Fuel and chain oil 13 6 Operation 15 7 Sawing 19 8 Maintenance 23 9 Maintenance of Saw Chain and Guide Bar 26 10 Storage 29 11 Tro...

Page 4: ...ion 1 Front hand guard 2 Starter handle 3 Air filter cover 4 Choke knob 5 Throttle trigger lock out 6 Rear handle 7 Throttle trigger 8 Engine switch 9 Fuel tank 10 Oil tank 11 Front handle 12 Saw chai...

Page 5: ...3 Use the chain saw with two hands 4 Warning Danger of kickback 5 Read understand and follow all warnings 2 Symbols on the machine For safe operation and maintenance symbols are carved in relief on th...

Page 6: ...justment screw Position upper left of the rear handle g Shows the directions that the chain brake is released white arrow and activated black arrow Position Front of the chain cover h Shows the direct...

Page 7: ...dead branches which could fall during the felling operation 5 Use safety footwear snug fitting clothing and eye hearing and head protection devices product Before using our products please read this...

Page 8: ...the chain saw when starting the engine or cutting a wood Keep bystanders and animals out of the work area Children pets and bystanders should be a minimum of 30feet 10m away when you start or operate...

Page 9: ...he Operator s Manual should be performed by competent chain saw service personnel e g if improper tools are used to remove the flywheel or if an improper tool is used to hold the flywheel in order to...

Page 10: ...against kickback Kickback is the upward motion of the guide bar which occurs when the saw chain at the nose of the guide bar contacts an object Kickback can lead to dangerous loss of control of the c...

Page 11: ...w As a chain saw user you should take several steps to keep cutting jobs free from accident or injury 1 With a basic understanding of kickback you can reduce or eliminate the element of surprise Sudde...

Page 12: ...A standard saw unit package contains the items as shown below 1 Power unit 2 Guide bar scabbard 3 Guide bar 4 Saw chain 5 Plug wrench 6 Screwdriver for carburetor adjustment Open the box and install t...

Page 13: ...w chain around the bar and sprocket 5 Fit the chain tensioner nut into the lower hole of the guide bar then install the chain cover and fasten the mounting nut to finger tightness 5 While holding up t...

Page 14: ...The engines are lubricated by oil specially formulated for air cooled 2 cycle gasoline engine use If oil is not available use an antioxidant added quality oil expressly labeled for air cooled 2 cycle...

Page 15: ...line into a clean approved fuel container 3 Pour in all of the oil and agitate well 5 Fuel and chain oil 4 Pour in the rest of gasoline and agitate again for at least one minute 5 Put a clear indicati...

Page 16: ...l 3 Engine switch 4 Choke knob 4 Pull out the choke knob The choke will close and the throttle lever will then be set in the starting position When restarting immediately after stopping the engine Set...

Page 17: ...n oil is scattered off as shown in the figure 1 Chain oil The chain oil flow can be changed by inserting a screwdriver in the hole on bottom of the clutch side Adjust according to your work conditions...

Page 18: ...idle adjusting screw T counter clockwise so that saw chain does not turn If idling speed is too slow turn the screw clockwise 4 Make a test cut adjust the H needle for best cutting power not for maxi...

Page 19: ...tch and may cause trouble Be sure to confirm brake operation on the daily inspection How to confirm 1 Turn off the engine 2 Holding the chain saw horizontally release your hand from the front handle h...

Page 20: ...of the safety regulations would not be respected Do not use the chain saw as a lever for lifting moving or splitting objects Do not lock it over fixed stands It is forbidden to hitch tools or applicat...

Page 21: ...fore each use and that the chain be sharp in order to maintain the kickback safety level of this saw Removal of the safety devices inadequate maintenance or incorrect replacement of the bar or chain m...

Page 22: ...h cutting from the opposite side of bending direction to prevent the guide bar from being caught in the cutaway Cutting an unpillowed log Saw down halfway then roll the log over and cut from the oppos...

Page 23: ...aning inspecting or repairing your unit make sure that engine has stopped and is cool Disconnect the spark plug to prevent accidental starting Maintenance after each use 1 Air filter Dust on the clean...

Page 24: ...e port 3 Sprocket 4 Others Check for fuel leakage and loose fastenings and damage to major parts especially handle joints and guide bar mounting If any defects are found make sure to have them repaire...

Page 25: ...e care not to allow filter fibers or dust inside the suction pipe 3 Oil tank With a wire hook take out the oil filter through the filler port and clean in gasoline When putting the filter back into th...

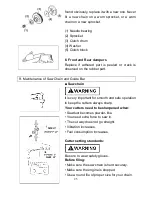
Page 26: ...nance of Saw Chain and Guide Bar Saw chain It is very important for smooth and safe operation to keep the cutters always sharp Your cutters need to be sharpened when Sawdust becomes powder like You ne...

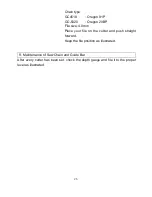
Page 27: ...File size 4 0mm Place your file on the cutter and push straight forward Keep the file position as illustrated 9 Maintenance of Saw Chain and Guide Bar After every cutter has been set check the depth g...

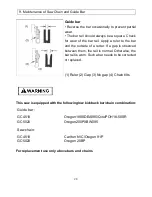
Page 28: ...f kickback or tie strap breakage 1 Appropriate gauge checker 2 Make the shoulder round 3 Depth gauge standard Make sure every cutter has the same length and edge angles as shown below 4 Cutting length...

Page 29: ...tter If a gap is observed between them the rail is normal Otherwise the bar rail is worn Such a bar needs to be corrected or replaced 1 Ruler 2 Gap 3 No gap 4 Chain tilts This saw is equipped with the...

Page 30: ...29 10 Storage 1 Empty the fuel tank and run the engine out of fuel 2 Empty the oil tank 3 Clean the entire unit 4 Store the unit in a dry place out of the reach of children...

Page 31: ...with no choke working Replace with a new plug 2 Lack of power Poor Check fuel for water or Replace with proper fuel acceleration substandard mixture Rough idling Check air filter and fuel Clean filter...

Page 32: ...1 Fuel tank capacity 550ml Chain oil Engine oil SAE 10W 30 Oil tank capacity 260ml Carburetor Diaphragm type Fuel consumption at maximum engine power 560g kw h Idling speed 3200r min Maximum speed wi...

Page 33: ...n empty tanks 5 8kg Cutting head Guide bar Type Sprocket nose Size GC 4518 18in GC 5020 20in Cutting length GC 4518 415mm GC 5020 490mm 12 Specifications Saw chain Type GC 4518 Oregon 91P GC 5020 Oreg...

Page 34: ...33...

Page 35: ...34...

Reviews: