3. PUTTING YOUR WATER COMPUTER INTO OPERATION
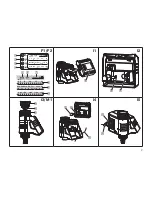
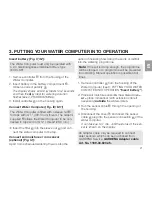
Insert battery [ Fig. I1 / I2 ]:
The Water Computer must only be operated with
a 9 V alkalimanganese (alkaline) battery type
IEC 6LR61.
1. Remove controller
q
from the housing of the
Water Computer.
2. Insert battery in the battery compartment
w
.
Observe correct polarity
N
.
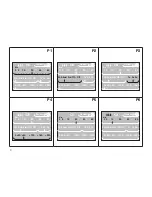
The display shows all LCD symbols for 2 seconds
and then the symbol for watering duration
flashes (see 4. PROGRAMMING).
3. Install controller
q
on the housing again.
Connect Water Computer [ Fig. I3 / M1 ]:
The Water Computer is fitted with a sleeve nut
t
for taps with (G 1" ) (33.3 mm) thread. The adaptor
supplied
e
allows the Water Computer to be con-
nected to taps with a (G ³⁄₄" ) thread (26.5 mm).
v
Insert the filter
r
into the sleeve nut
t
and con-
nect the water computer to the tap.
Connect soil moisture or rain sensor
(optional) [ Fig. I4 ]:
Apart from scheduled watering there is also the
option of including how damp the soil is or rainfall
into the watering programme.
Note: If the soil is damp enough, the programme
will be stopped, or a programme will be prevented
from starting. Manual operation is possible at all
times.
1. Remove controller
q
from the housing of the
Water Computer (see 3. PUTTING YOUR WATER
COMPUTER INTO OPERATION “Insert battery”).
2. Place soil moisture sensor in the watered area –
or – place rain sensor (with extension cable if
necessary) outside the watered area.
3. Run the sensor cable
z
through the opening of
the housing.
4. Disconnect the cover
u
and insert the sensor
cable
z
plug into the sensor connection
i
of the
water computer.
It can take up to 1 min. until the status of the sen-
sor is shown on the display.
An adapter cable may be required to connect
older sensors, which can be purchased from
GARDENA Service, GARDENA Adapter cable
Art. No. 1189-00.600.45.
EN
21


