background image

5

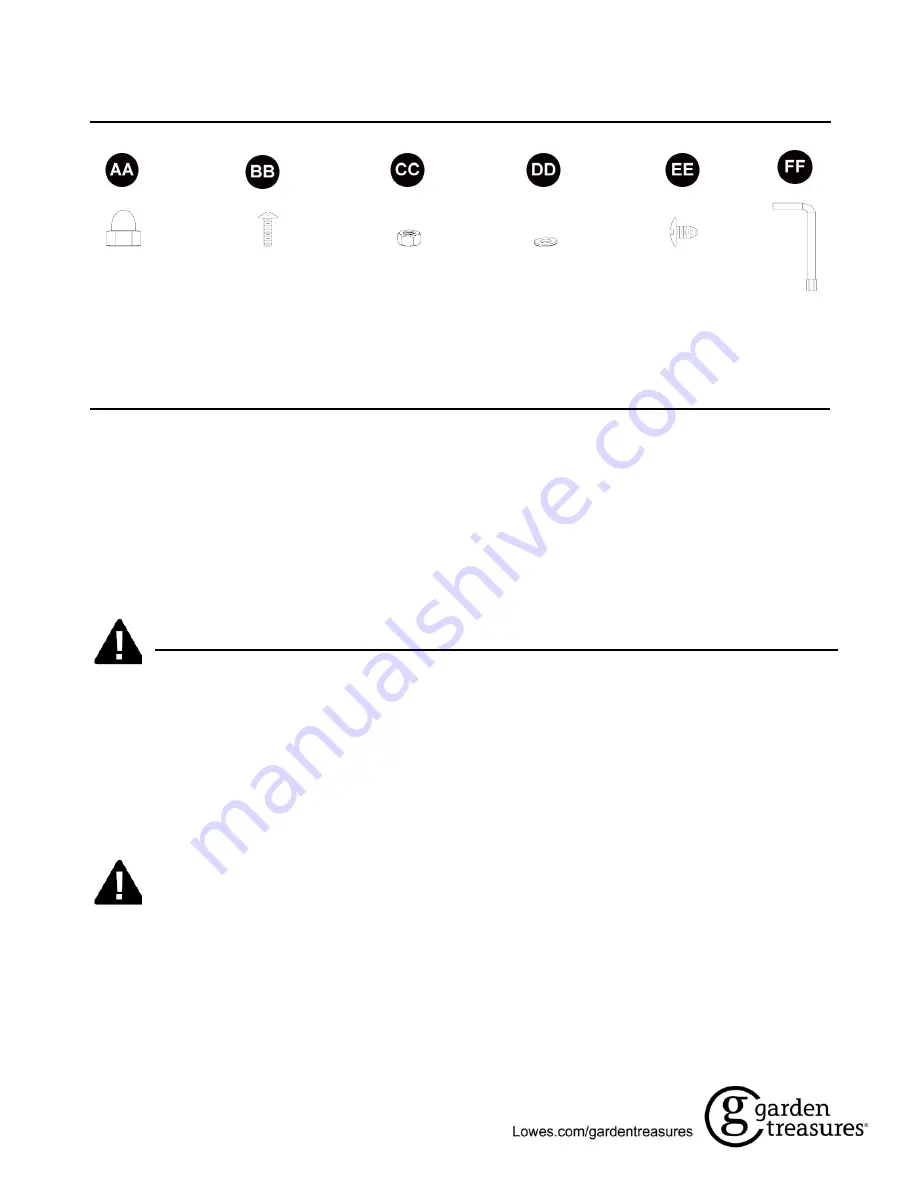
HARDWARE CONTENTS          

PREPARATION                             

Before beginning assembly of product, make sure all parts are present. Compare parts with package 
contents list and hardware contents list. If any part is missing or damaged, do not attempt to 
assemble the product. 

Estimated Assembly Time: 20 minutes. 

Tools Required for Assembly: Phillips screwdriver (not included) / Nut Removal Tool (included)

SAFETY INFORMATION                             


Please read and understand this entire manual before attempting to assemble, operate or install the 
product.

g

  CALIFORNIA PROPOSITION 65 WARNING: Chemicals known to the state of California to cause 

cancer, birth defects or other reproductive harm are created by combustion of propane. 

g

  The installation must conform with local codes or, in the absence of local codes, with the National 

Fuel Gas Code, ANSI Z223.1 /NFPA 54, Natural Gas and Propane Installation Code, CSA 
B149.1, or Propane Storage and Handling Code, B149.2. 

DANGER

g

  Young children should be carefully supervised when they are in the area of the item. 

g

 Keep the ventilation opening(s) of the cylinder enclosure free and clear from debris. Use this 

appliance in a well-ventilated space only. Do not use it in a building, garage or any other enclosed 
area.

g

  Use this appliance in outdoor areas described below: 

(a) With walls on all sides, but at least one permanent opening at ground level and no overhead 

cover.

Acorn Nut 

Qty. 3 

Long Bolt 

Qty. 4 

Nut

Qty. 4

Washer

Qty. 4

Short Bolt 

Qty. 8 

Nut Removal Tool

Qty. 1 

Summary of Contents for PG169T-A

Page 1: ...R RECEIPT HERE Serial Number Purchase Date Questions problems missing parts Before returning to your retailer call our customer service department at 1 800 643 0067 8 a m 8 p m EST Monday Friday ITEM...

Page 2: ...ervice or maintenance can cause property damage injury or death Read the installation operation and maintenance instructions thoroughly before installing or servicing this equipment For Outdoor Use On...

Page 3: ...nches Reflector Diameter 20 4 inches Rated Heat Input 11 000 BTU HR Fuel Propane LP Gas Supply 1 Lb LP Gas Cylinder Manifold Pressure 11 inches W C Injector Size Diameter 0 98 mm Safety Features Tilt...

Page 4: ...IPTION QUANTITY PART DESCRIPTION QUANTITY A Reflector 1 G Black Silicone Ring 1 B Top Wire Guard 1 I Housing Assembly 1 C Emitter Assembly 1 J Plastic Ring 1 D Glass Cap 1 K Base 1 E Wire Guard Assemb...

Page 5: ...tive harm are created by combustion of propane g The installation must conform with local codes or in the absence of local codes with the National Fuel Gas Code ANSI Z223 1 NFPA 54 Natural Gas and Pro...

Page 6: ...al on page 11 Replace the hose assembly prior to the appliance being put into operation if there is evidence of excessive abrasion or wear or if the hose is damaged The pressure regulator and hose ass...

Page 7: ...heater must be replaced prior to operating the heater g More frequent cleaning may be required as necessary It is imperative that the control compartment burners and circulating air passageways of the...

Page 8: ...e guard assembly E to the housing assembly I using short bolts EE 1 3 Nut Washer washer x 4 x 4 Short Bolt x 4 Hardware Used x 4 Short Bolt 1 Remove the door from the housing assembly I by lifting the...

Page 9: ...place glass tube F onto black silicone ring G Close snap gauges 6 5 Attach the emitter assembly C to the wire guard assembly E with long bolts BB as shown leaving the bolts protruding above the surfac...

Page 10: ...until the tank is in an upright position Close the door Caution This appliance uses a 1 lb cylinder only Only a cylinder marked propane can be used HAND TIGHTEN ONLY Be careful not to cross threads w...

Page 11: ...urner is lit rotate control knob to desired heating level If you experience any issues while attempting to light the item turn off the heater and gas supply and refer to TROUBLESHOOTING on page 14 6 V...

Page 12: ...ast 5 minutes to let gas dissipate before attempting to re light burner 3 Repeat Lighting steps 2 and 3 Turning Off 1 Rotate gas control knob to OFF position Note Burner will likely make a slight popp...

Page 13: ...nel or dome g This heater should be thoroughly cleaned on a regular basis g After a period of storage and or nonuse check for leaks burner obstructions and inspect for any abrasion wear cuts to the ho...

Page 14: ...urner doesn t stay lit yet contact customer service at 1 800 643 0067 8 a m 8 p m EST Monday Friday Burner doesn t light Note Heater operates at reduced efficiency below 40 F 1 Gas pressure is low 2 B...

Page 15: ...is warranty The warranty shall be effective from the date of purchase as shown in the purchaser s receipt This warranty is valid for the original consumer purchaser only and excludes industrial commer...

Page 16: ...bly 5203223 6 Nut 2000396 7 Washer 2000399 8 Long Bolt 2001225 9 Glass Cap 5203237 10 Glass Tube 2406517 11 Wire Guard Assembly 2406516 12 Black Silicone Ring 2406518 13 Shroud Cover 5203226 14 Door 5...

Reviews: