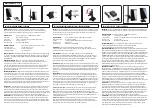
2)
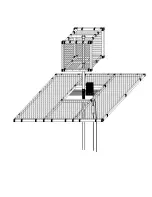
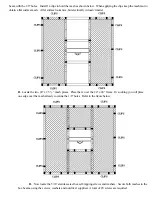
With the help of an assistant tip the collector grid up on one end and rest it against a wall or other similar structure.
This will make it easier to secure the basket. If this is not practical, using the above referenced assistant, lift the
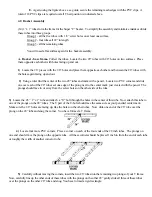
completed basket assembly over the collector grid and line up the 1 ¼” aluminum support with the PVC pipe
secured to the angle bracket. Slide this 1¼”pipe in until it is stopped by the rivet in the PVC.
3)
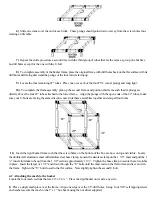
Rotate the aluminum pipe and basket assembly until the hole in the PVC lines up with the hole in the aluminum
mast. Insert a 5/16” stainless steel self tapping screw in and finger tighten. Fully tighten the mount bracket to
secure the PVC to the angle bracket and to prevent the 1 ¼” pipe from turning.
..
6.0 Final Assembly
If you wish to mount the Super “C” on a short mast we have provided you with one. After securing this mast,
simply place the bottom end of your open PVC tube with the rivets over this supplied 1 ¼” mast. Nothing else is
required. As mentioned before you can set the Super “C” on four supports, such as cinder blocks to slightly elevate
the antenna. It is recommended that you slightly elevate the Super “C”, 8” or more to stabilize the antenna and
prevent water from getting into the Relay Box and Isolator.
1)
To complete assembly of the Super “C” locate the Relay Box and Isolator and Super “C” Switch box. The
Relay Box attaches to the 2” x 2” x 24” bracket via (2) ¼” holes in the bracket. Place the Relay Box and its two
protruding studs into the matching holes on the bracket and secure with the stainless steel wing nuts provided.
2)
Remove the 5/16” stainless steel screw from the PVC tube and use it to attach the yellow ring terminal from the
Relay Box to the Super “C” mast. Now you can securely tighten that screw!
3)
Attach your coax feed line to the SO 238 coax connector on the Relay Box.


