


ZN
‐
Y11VE/ZN
‐
NH11VE/ZN
‐
NHW11VE
OSD
Menu
Control
Manual
2010/2
‐
1
02A.00
18
NOTE
:
•
When
using
AC
power
at
a
60Hz
frequency
Line
‐
Lock
synchronization
can
be
used.
•
When
the
power
is
DC
12V,
the
SYNC.
menu
is
fixed
to
the
'INT'
mode.
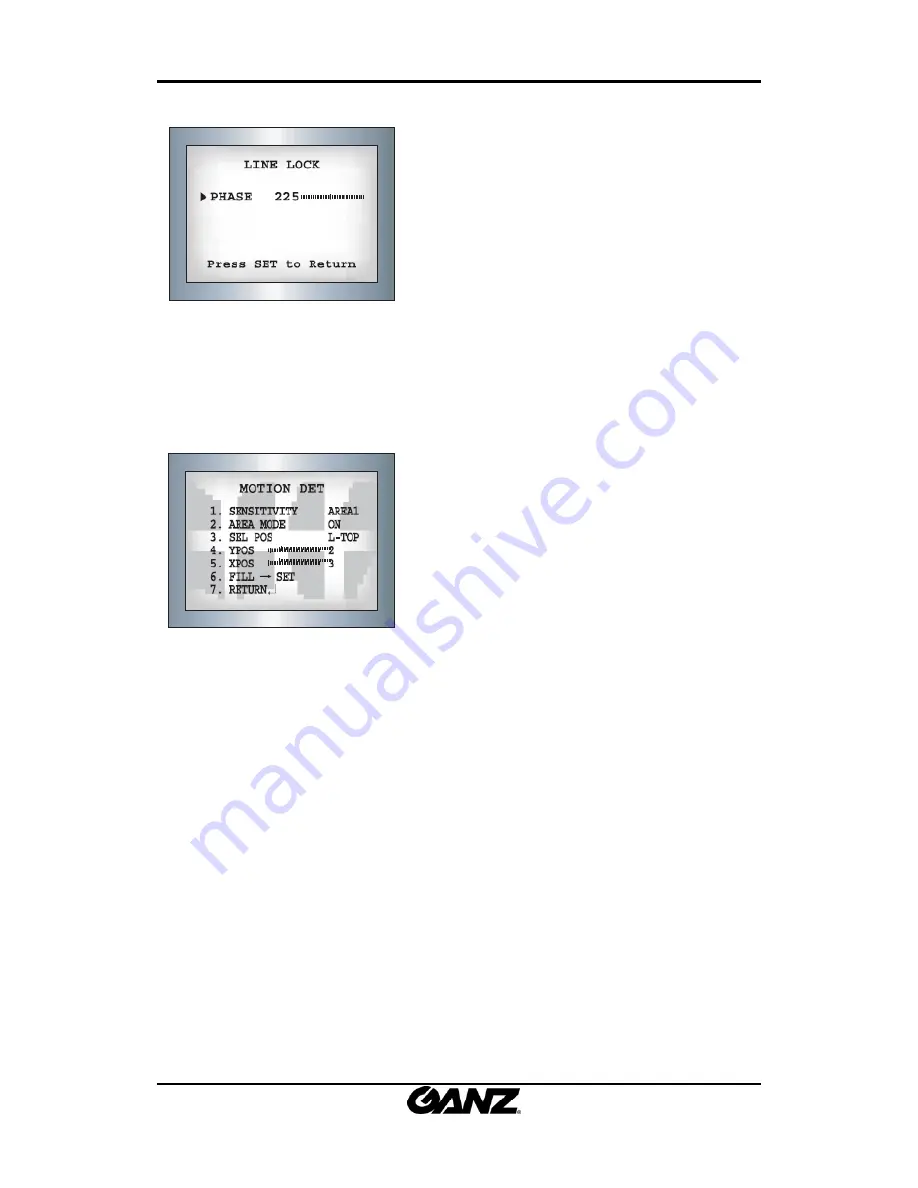
●
MOTION
DET:
This
camera
displays
an
on
‐
screen
message
whenever
motion
is
detected.
①
When
the
SPECIAL
menu
screen
is
displayed,
press
the
Up
and
Down
buttons
so
that
the
cursor
points
to
MOTION
DET.
②
Set
up
the
function
using
the
4
directional
buttons.
‐
SENSITIVITY
:
Select
up
to
eight
MD
areas.
When
the
SENSITIVITY
value
is
high,
motion
detection
sensitivity
is
increased
to
recognize
small
movements.
‐
AREA
MODE
:
Determines
whether
to
use
the
MD
area
selected
in
SENSITIVITY.
‐
SEL
POS
:
Determines
which
of
the
4
vertices
of
each
MD
area
is
to
be
used.
‐
YPOS
:
Determines
the
co
‐
ordinates
of
the
vertical
axis
for
SEL
POS.
‐
XPOS
:
Determines
the
co
‐
ordinates
of
the
horizontal
axis
for
SEL
POS.
‐
FILL
→
SET
:
Fills
in
a
selected
MD
area.
Fill
in
a
selected
MD
area.
The
color
of
filling
is
sequentially
selected
as
brown,
orange,
blue,
cyan,
yellowish
green,
yellow
and
red.
‐
RETURN
:
Select
this
to
save
the
MOTION
DET
menu
settings
and
return
to
the
SPECIAL
menu.
NOTE
:
•
MD
areas
show
only
on
the
MOTION
DET
menu.
Therefore,
MD
areas
are
not
displayed
on
the
monitor
screen.
●
PRIVACY
:
Hide
an
area
so
that
it
is
not
displayed
on
the
monitor.


