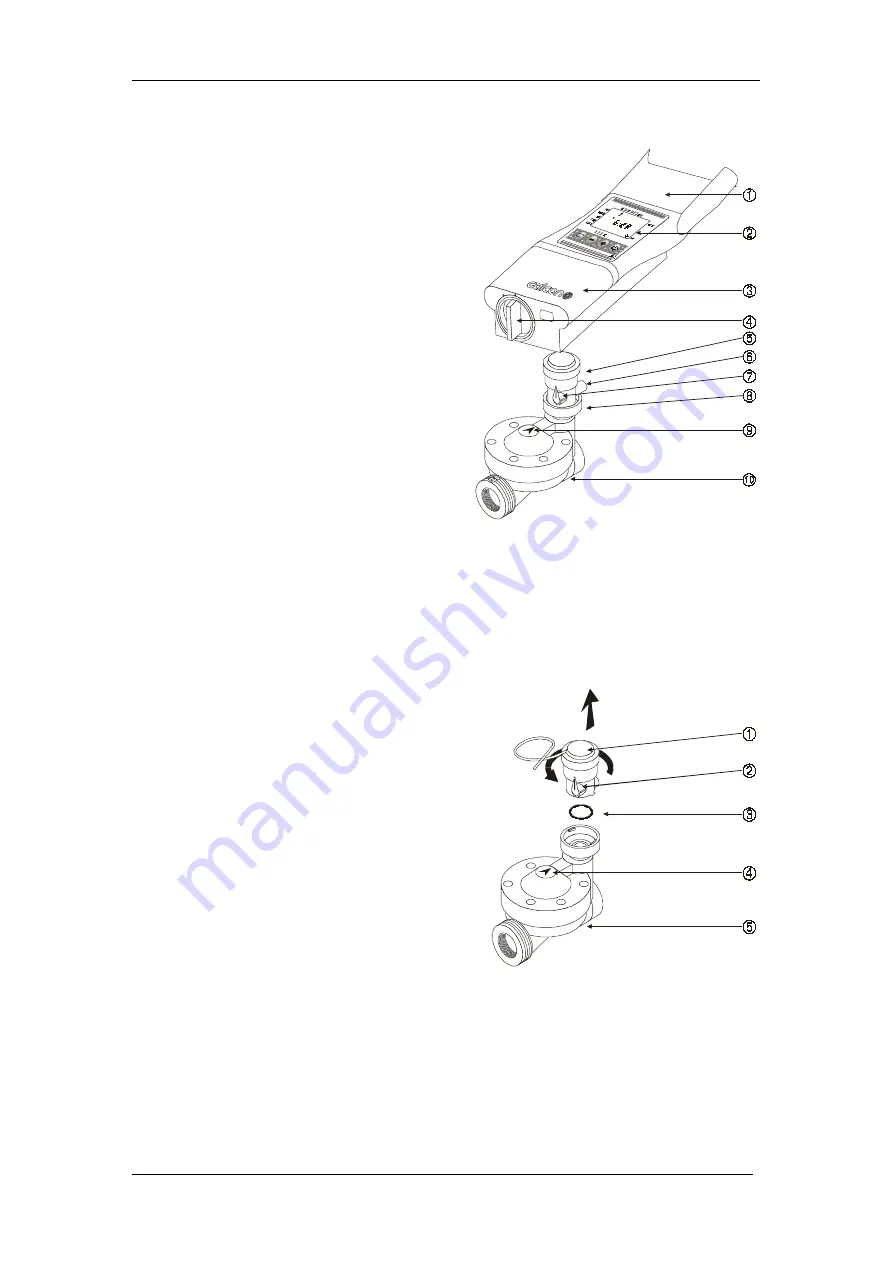
Parts Identification
3
1 .
Parts Identification
1 .
Top Cover
2 .
Controller Display
3 .
Bottom Cover
4 .
Battery Compartment Cover
5 .
Solenoid
6 .
Drainage Openning
7 .
Valve Handle (Orange)
8 .
Bayonet
9 .
Water Flow Direction Arrow
10 . Hydraulic Valve
Figure 1
Before installation: make sure a filter is installed upstream to the
valve. (See list of additional accessories page 27.)
2 .
Setting Up the Irrigation Controller
2 . 1 . Valve and Solenoid Assembly
1 . Shut the main irrigation system valve.
2 . Before installing the hydraulic valve
[5] in the irrigation system, remove the
solenoid [1] from the valve with a 90°
counter-clockwise turn. Be careful not
to loose the seal (O-ring) [3].
3 . Install the hydraulic valve in the
irrigation system, paying attention to
the correct water flow direction, as
indicated by the arrow [4] on the valve
cover.
Figure 2
5 . After installing the hydraulic valve [5], assemble the solenoid with a 90°
clockwise turn. Be sure to place the seal (O-ring) [3] in its proper
location.
Note: A small amount of water is expelled from the drainage opening on the
solenoid during valve activation (manual or automatic).


