background image


pressure fluctuations.                                               
These can result from toilets being flushed or 
taps being turned on and off.                                    

When this happens your showering 
temperature will be held within a controlled 
band, provided that the minimum pressure 

required by the shower is maintained (page.4)                                                       
If the water pressure falls below the minimum 
pressure required, it is likely that the pressure 
switch will turn off the power to the heating 

elements, resulting in a cold shower.  


DO NOT

 place items such as soap, shampoo 

or other such bottles on top of the unit.                 
Liquid could leak through the joint between 
the cover and backplate, and possibly damage 

the sealing rubber.    


WARNING:  
ALL WIRING AND INSTALLATION 
MUST BE SUPERVISED BY A 
SUITABLY QUALIFIED PERSON. 


DO NOT INSTALL THIS SHOWER 
WHERE IT MAY BE SUBJECTED TO


FREEZING CONDITIONS.


We recommend that the installation is done in 
the following sequence. 


a. Fixing the shower to the wall 
b. Plumbing 
c. Electrical connections 


a.


FIXING THE SHOWER TO THE WALL 


1.


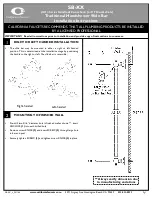
Position the riser rail at a convenient height 
for majority of users (fig.1) and mark its 

position.  

For accessory details see fig.9 for 

White Models, or see Sheet provided for 

Chrome Models. 


2.


Position the heater so that the showerhead 

cannot be immersed in the bath or shower 
tray when hanging down.                                     
Choose a flat piece of wall to avoid the 

possibility of distorting the backplate thus 
making the front cover a poor fit. 


3.


Adjust the position to get the most 
convenient arrangement taking the following 
into account. 


DO NOT MOUNT THE UNIT IN 

THE DIRECT HANDSET SPRAY. 


The handset must not be able to come into 

contact with used water in the cubicle, bath 
or basin.  If it can, even after the hose has 
been retained by the soap-dish (figs.1&9),      

a vacuum breaker must be fitted. 


4.


Fix the riser rail with screws provided. 


5.


Remove the front cover by undoing the 
retaining screws at the top and bottom of 
the unit and lifting the cover off.                             


6.


Remove the detachable lower section by 

undoing the 2 x fixing screws (fig.2)


7.


Decide the position of the electrical cable 
into the unit.  Your shower offers the ability 

Summary of Contents for 3000M

Page 1: ...IMPORTANT This booklet should be left with the user after installation and demonstration Installation and User Guide 3000M 3500M 3500Msi White and Chrome Models SMART ELECTRIC SHOWERS...

Page 2: ...unting into steam rooms or steam cubicles Isolate the mains electrical and water supply before removing the appliance front cover DO NOT fit any sort of tap or control on the appliance outlet The appl...

Page 3: ...a FIXING THE SHOWER TO THE WALL 1 Position the riser rail at a convenient height for majority of users fig 1 and mark its position For accessory details see fig 9 for White Models or see Sheet provide...

Page 4: ...minimum flow rate of 8 litres minute The maximum static pressure must be no greater than 1000kPa 10 bar 150 psi Minimum running pressure must be obtained at 9 litres minute for 9 5kW WARNING BEFORE C...

Page 5: ...shower Blockage in the water ways particularly the handset and inlet filter will prevent the heater working properly Note You may be charged for a service call if it is due to incorrect installation 5...

Page 6: ...71 WARNING FAILURE TO COMPLY WITH THESE INSTRUCTIONS COULD RESULT IN FAILURE OF THE TERMINAL BLOCK WARNING THE UNUSED SUPPLY TERMINAL BLOCK MUST NOT BE USED FOR ANY OTHER PURPOSE 5 Refit the detachabl...

Page 7: ...7 9 White Models See sheet provided for Chrome Models...

Page 8: ...on to the unit Your shower has 2 control knobs and a push button fig 12 Knob A controls the power selection High Full power Eco Half power Cold No heat Knob B controls the temperature of the water But...

Page 9: ...shower has recently been used ADJUSTING THE SHOWER HANDSET To enhance your shower experience your shower has a multi spray pattern handset and these patterns can be adjusted by simply rotating the sp...

Page 10: ...Y 2 YEARS WITH OUR APPROVED PART WARNING IN ORDER TO MAINTAIN THE PERFORMANCE OF YOUR SHOWER YOU MUST CLEAN THE SHOWER HANDSET REGULARLY CLEANING THE FILTER The filter can be cleaned in order to maint...

Page 11: ...n the 3500M Model The shower includes a shutdown feature that means water will continue to flow for around 6 seconds after Button C is pressed Broken parts Please contact our after sales service depar...

Page 12: ...ncoming Water Temperature Changes The required water temperature is achieved by adjusting the rate of water flow The diagram shows the principle involved in relating temperature rise to flow rate The...

Page 13: ...Solenoid Valve f Pressure Switch g Terminal Block x 2 h Detachable Backplate Section i Water Inlet j Water Outlet k Wall Fixing Key Hole Slot l Alternative key Hole slot m Wall Fixing Slot n Relay 350...

Page 14: ...5 WRAS Water Isolating Valve Cat No 93793757 All Chrome Flexi Fit Accessories Kit Cat No 83595345 White Chrome Flexi Fit Accessories Kit Cat No 83595344 White Chrome Premium Accessories Kit Cat No 83...

Page 15: ...PLEASE SEE BELOW AND DETAIL ON PAGE 6 Ensure power select Knob is aligned to the cold graphic 9 o clock position whilst the Flat in the product is aligned as shown figs 7 Ensure temperature Knob is al...

Page 16: ...guarantee has no effect on the expiry date The guarantee on any exchanged parts or product ends when the original guarantee period ends EXCLUSIONS This guarantee DOES NOT cover damage or defects aris...

Reviews: