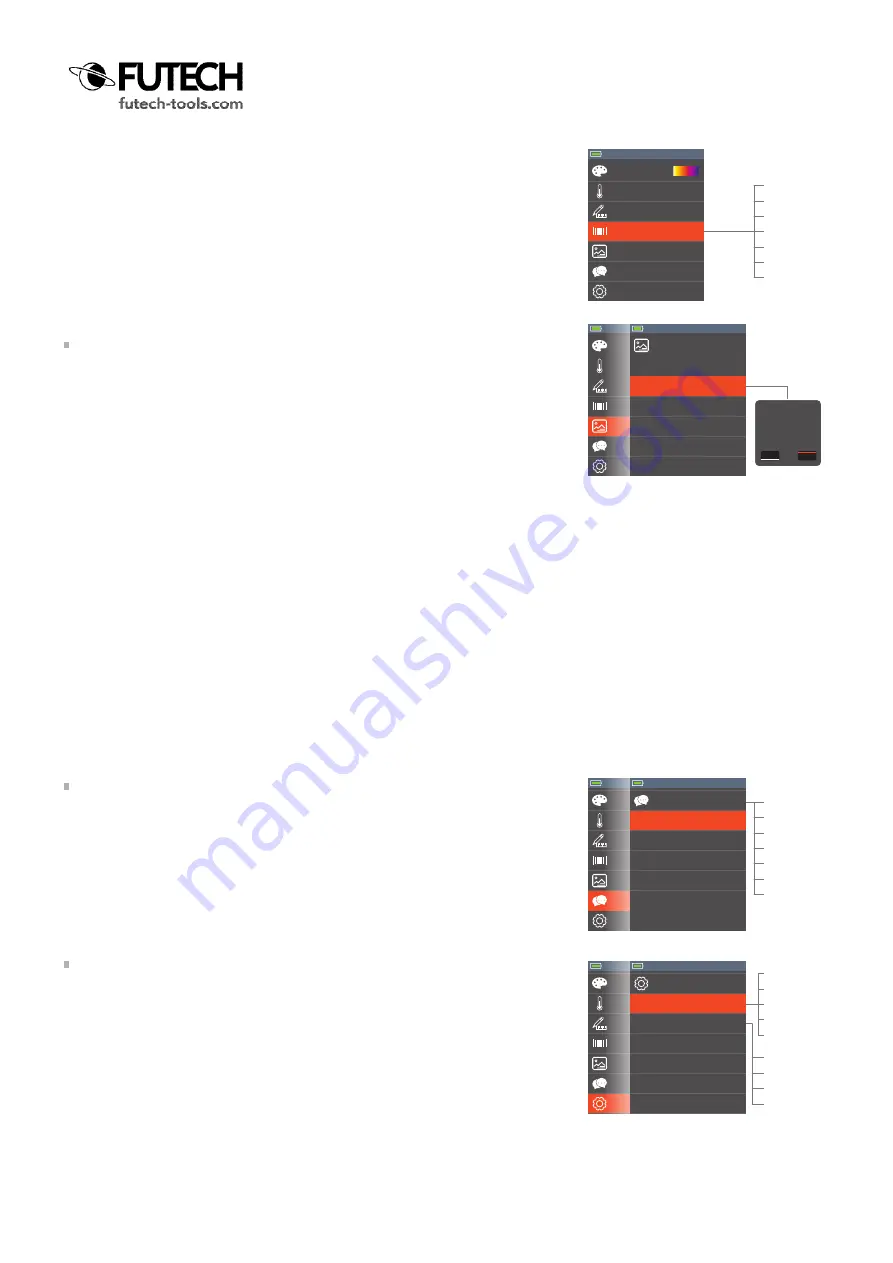
· Navigate to the option “Emissivity” in the settings menu and press the OK but-
ton [2] to select.
· Use the Up [4] or Down [5] arrow to select the correct emissivity and confirm
with the OK button [2]
MEMORY
In this part of the menu you can review saved pictures or delete them.
· Navigate to the option “Memory” in the settings menu and press the OK button
[2] to select.
· Navigate to “Delete Photos” if you like to delete all saved photos on the
memorycard and press the OK button [2].
If you like to delete one single image, please see “Photo review” in the mem-
ory submenu.
Highlight “YES” in red using the Left [3] and Right [7] key and push the OK
button [2] to delete all saved pictures.
(Pushing the OK button [2] with “NO” highlighted in red takes you back to
the Memory submenu.
· Navigate to “Photo review” if you like to see saved image and confirm with
OK. The last saved picture will be shown on the screen.
Use the Left [3] and Right [7] key to navigate between all saved pictures.
If you like to delete one single image, navigate to this image and push the
OK button [2]. Delete will be visible at the bottom right of the screen.
Push the OK button [2] to delete and confirm by highlight “YES” in red using
the Left [3] and Right [7] key and push the OK button [2].
(Pushing the OK button [2] with “NO” highlighted in red takes you back to
the selected photo.
LANGUAGE
The default language of the Tempviewer 6400 is English. Multiple languages are
available.
· Navigate to the option “Language” in the settings menu and press the OK but-
ton [2] to select.
· Use the Up [4] or Down [5] arrow to select the language you prefer and confirm
with the OK button [2].
SETUP
In this part of the menu you can choose the brightness of the screen and (de-)
activate the Auto Power OFF.
· Navigate to the option “Language” in the settings menu and press the OK but-
ton [2] to select.
· Navigate to “Brightness” if you like to change the brightness of the screen
and press the OK button [2].
Use the Up [4] or Down [5] arrow to select the brightness you prefer and
confirm with the OK button [2].
· Navigate to “Auto Power OFF” if you want the device to turn off automatically
after a specified time (to safe battery) and press the OK button [2].
Use the Up [4] or Down [5] arrow to select the Auto Power OFF time you
prefer and confirm with the OK button [2].
Information
Factory Set
>
>
0.01
0.02
0.03
...
0.97
0.98
0.99
Information
Factory Set
>
>
Palette
Temp Unit
Measure
Emissivity
Memory
Language
Setup
°C
>
0.95
>
>
>
Palette
Temp Unit
Measure
Emissivity
Memory
Language
Setup
°C
>
0.95
>
>
>
Information
Factory Set
>
>
Delete all the
photos?
Yes
No
Memory
Photo Review
Delete Photos
<
Time/Date
Information
Factory Set
>
>
>
Time/Date
Information
Factory Set
>
>
>
English
Italiano
Español
Deutsche
Français
Português
Nederlands
Palette
Temp Unit
Measure
Emissivity
Memory
Language
Setup
°C
>
0.95
>
>
>
Language
English
Italien
Español
Deutsch
French
Português
<
ü
Time/Date
Information
Factory Set
>
>
>
Time/Date
Information
Factory Set
>
>
>
10%
20%
...
90%
100%
OFF
15 min.
30 min.
60 min.
Palette
Temp Unit
Measure
Emissivity
Memory
Language
Setup
°C
>
0.95
>
>
>
Setup
Brightness
Auto Power OFF
80%
OFF
<


