2
Select an option:
• Turn the dial to highlight a source.
• Select repeatedly to highlight a source.
3
Press the dial to select the source.
Adjusting the Volume
1
Use the dial to adjust the volume.
2
If necessary, press the dial to switch between zones.
TIP:
To control all zones at the same time, press the dial until
all zones are highlighted.
Adjusting the Tones
1
Select >
Settings
>
Tone
.
2
Use the dial to adjust the level.
3
Press the dial to switch to a different tone.
Speaker Zones
You can group speakers in one area into speaker zones. You
can then control the audio level of the zones individually. For
example, you might want the audio quieter in the cabin and
louder on deck.
Zones 1 and 2 are powered by the on-board, Class D amplifier.
To use the four line outputs and the four subwoofer outputs, you
must connect external amplifiers.
You can set the balance, volume limit, subwoofer level, and
name for each of the available zones. Up to two pairs of
speakers can be connected per zone in parallel to increase the
amplifier output.
Setting up Speaker Zones
1
Select >
Settings
>
Zone
.
2
Select a zone.
3
Select one or more options:
NOTE:
Not all options are available for all zones.
• To disable the zone and remove it from the audio level
pages, select
Enabled
to clear the check box. When a
zone is disabled, you cannot change any of the settings
for that zone.
• To link zones 1 and 2, select
Link to Zone 1
to fill the
check box.
• To adjust the right and left speaker balance of this zone,
select
Balance
, and use the dial to set the balance.
• To limit the maximum volume output of this zone, select
Volume Limit
, and use the dial to set the limit.
• To set the subwoofer level for this zone, select
Sub Level
,
and use the dial to set the level.
TIP:
To open the subwoofer level from any screen, press
and hold the dial for three seconds.
• To give the zone a specific name, select
Name
(
).
• To allow the volume of this zone to be controlled by
another amplifier or stereo and provide a fixed line level
output, select
Volume Control
to clear the check box.
Linking Zones
1
Select >
Settings
>
Zone
>
Zone 2
.
2
Select
Link to Zone 1
to fill the button.
When zones 1 and 2 are linked, appears between zones 1
and 2 on the volume screen.
Disabling the Internal Amplifiers
When you use external amplifiers for zones 1 and 2, you can
disable the internal amplifiers to reduce power consumption.
1
Select >
Settings
>
Zone
.
2
Select
Amps On
to clear the check box.
Adjusting the Subwoofer Filter
You can use the subwoofer filter setting to control the subwoofer
cutoff frequency, which can enhance the blend of the sound
produced by the speakers and the subwoofer. Audio signals
above the selected frequency are not passed to the subwoofer.
The setting applies to all subwoofer outputs.
1
Select >
Settings
>
Zone
>
Subwoofer Filter
.
2
Select a frequency.
3
Press the dial to save the selection.
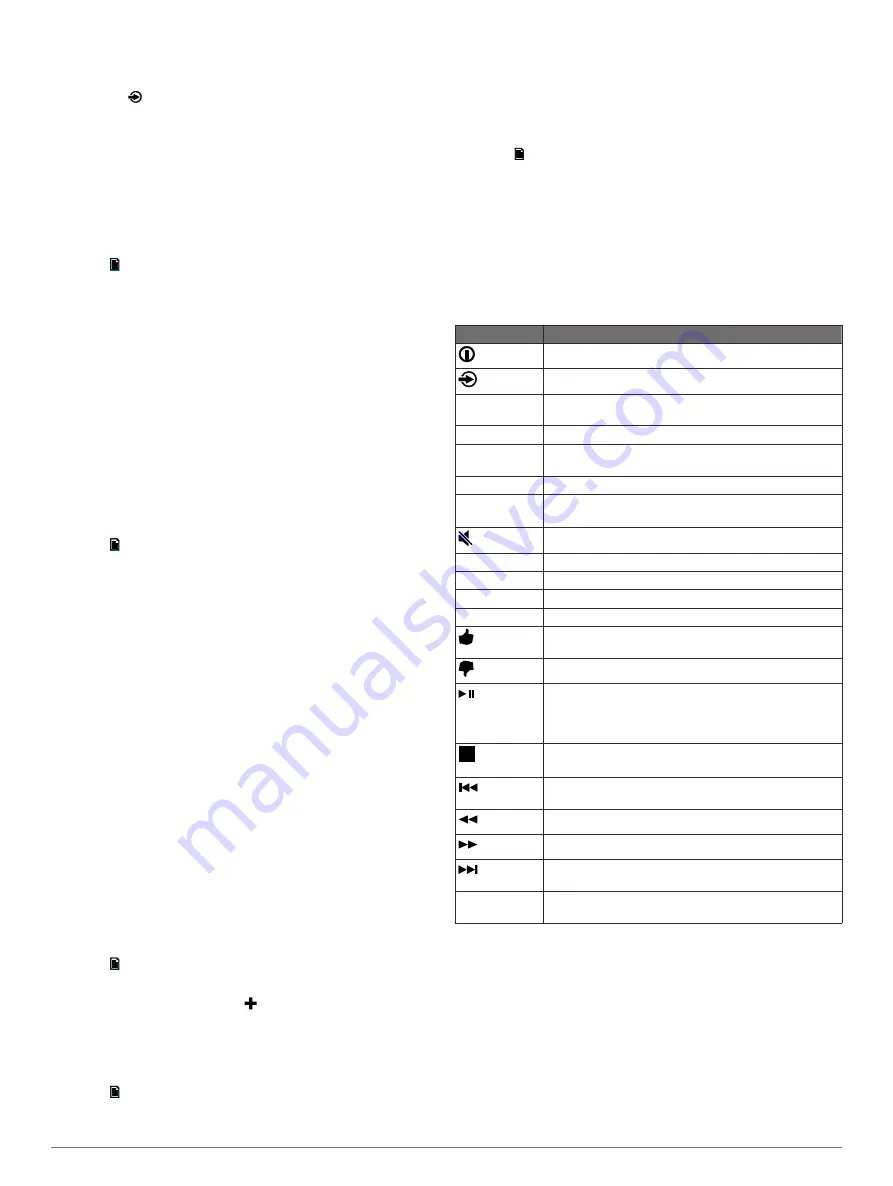
Infrared Remote Control
You can use the infrared (IR) remote control to control the AV
stereo. The remote buttons function similarly to the device
buttons. The result of a button press varies based on the active
media source.
NOTE:
The remote is included only with AV models.
Button
Function
Turns the device on and off.
Cycles the available sources.
DSP
Displays the CD track, DVD chapter, and title you are
watching or listening to on the connected TV.
ZOOM
Zooms in on the DVD picture.
SUB-T
Cycles through the available subtitle languages for the
DVD.
DVD
Opens the DVD setup menu on the connected TV.
MNU
• Opens the navigation menu.
• DVD source: Opens the menu in the connected TV.
Mutes and unmutes the audio.
Arrows
Moves through the menus and settings.
SEL
Selects the highlighted option or setting.
RPT
Repeats the current selection.
RDM
Plays tracks or chapters in a random order.
Tells Pandora you like this track and would like more
tracks similar to this played on this station.
Tells Pandora not to play this track.
• Pauses or resumes the current track, when using an
applicable source.
• Cycles through the tuning modes (auto, manual, and
presets), when using an applicable source.
Press once to stop the play.
Press twice to return to the beginning.
Skips to the previous channel, preset, or track, when
using an applicable source.
Skips back (rewinds) in the track or chapter.
Skips ahead (fast forward) in the track or chapter.
Skips to the next channel, preset, or track, when using
an applicable source.
Numeric
buttons
Allows you to enter numbers and numeric information,
such as specific track numbers.
Bluetooth Device Playback
You can pair the stereo to up to eight Bluetooth media devices.
You can control the playback using the keys, but you cannot
browse the music collection. You should select the song or
playlist on the media device.
The availability of song information such as song title, artist
name, and track duration depends on the capability of the media
player and music application. Album cover artwork and the
shuffle and repeat status icons are not supported over Bluetooth
wireless technology.
Bluetooth Device Playback
3


