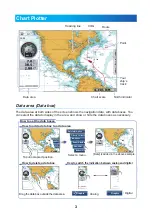


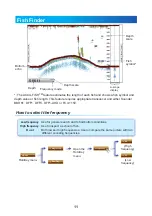


2
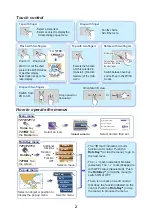
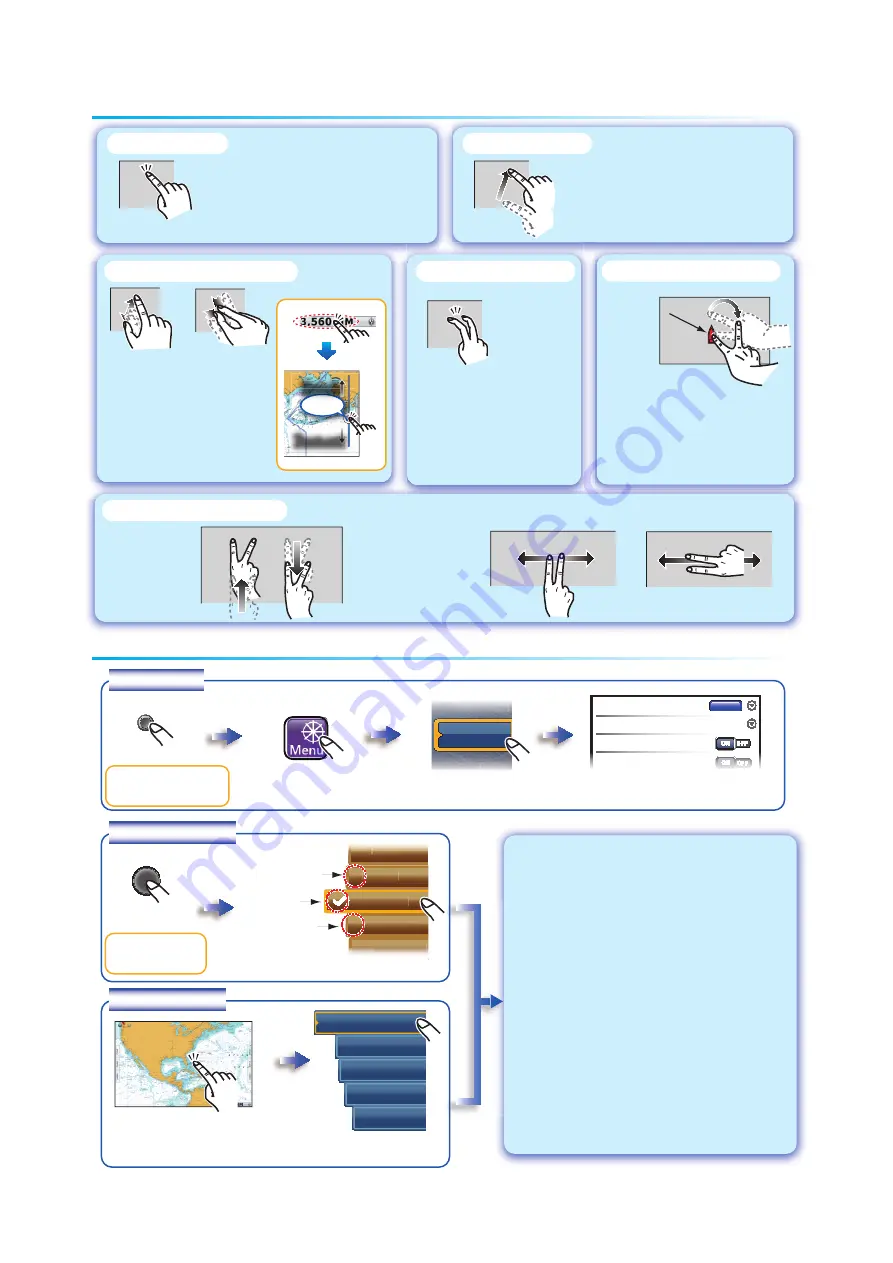
Touch control
Touch control
Tap with finger
- Select a menu item.
- Select an object to display the
corresponding pop-up menu.
- Pan the charts.
- Scroll the menu.
Zoom in
Zoom out
or
Orientate 3D view.
Execute the function
which is selected in
[General] - [Function
Gesture] of the main
menu.
Switch between head up
and north up in the 2D/3D
modes.
Drag with finger
Pinch with two fingers
Drag with two fingers
Tap with two fingers
Rotate with two fingers
- The “
” mark indicates a multi-
function soft control. Push the
RotoKey
TM
(or tap the menu) to go to
the next level.
- The “
” mark indicates ON status
(selected). The “
” mark disappears
with OFF status (deselected). Push
the
RotoKey
TM
(or tap the menu) to
switch ON or OFF.
- There is no mark on a soft control
that does the function labeled on the
control. Push the
RotoKey
TM
(or tap
the menu) to process the menu.
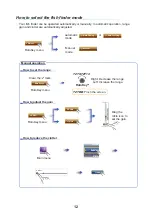
How to operate the menus
How to operate the menus
Home
key
Select a menu.
Select an item then set.
Select an icon.
elect a men
l
t
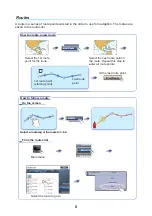
Ship & Track
Points
Routes
Routes
Main menu
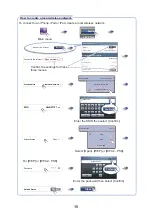
RotoKey
TM
M
Select a menu.
Additional
functions
Function
ON
Function
OFF
Auto Range
A-scope
◄ Adjust
◄
◄
M
Mo
d
de
Fis
Fis
h A
h A
lar
lar
m
m
RotoKey menu
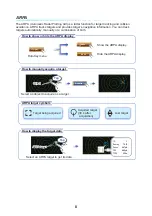
Select an object or position to
display the pop-up menu.
Select a menu.
Pop-up menu
Put one finger on the
boat icon then rotate
the other finger.
Put one finger on the
boat icon then rotate
the other finger.
Boat icon
Boat icon
New Point
Go To
New Route
Lat/Lon
◄
Orientation
Drag upward or
downward.
Switch from
2D to 3D.
- Zoom in or out the chart
scale in the 2D/3D modes
or weather display.
- Select radar range on the
radar display.
Default Route Color
Route Thickness
2
Navigate with AutoPilot
A t
A t
Auto
Auto
Auto
Auto
Auto
Pil
Pil
Pilo
Pilo
Pilo
Pilo
Pilo
t N
t N
t Na
t Na
t Na
t Na
t Na
D t
D t
vDat
vDat
vDat
vDat
vDat
I
I
a In
a In
a In
a In
a In
crem
crem
crem
crem
crem
t
t
ent
ent
ent
ent
ent
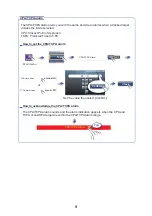
TZTBB
: Tap
the
Home
icon.
TZT9/TZT14
:
TZT9/TZT14
:
TZTBB
: Tap
the screen.
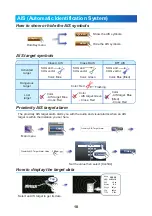
RADAR
R
AR
A
RADAR
AR
AR
R
R
AR
R
DATA
2
AT
T
AT
A
DATA 2
AT
T
AT
A
RADAR
R
R
A
DATA
2
AT
AT
Drag
A1A
1
ATA
DATA
DAT
AT
A
A
D
D
D
D
ATA
AT
DAT
AT
A
A
DA
DA
D
D
D
D
D
A1
DATA
DATA
TA
DATA
DAT
AT
DA
DA
DA
D
D
D
Dr
ag
Zoom in
Zoom in
Zoom out
Zoom out
For TZTBB:
For TZTBB:
For TZTBB:
For TZTBB:
For TZTBB: