2. WIRING
2-12
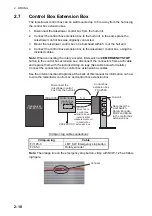
2.5
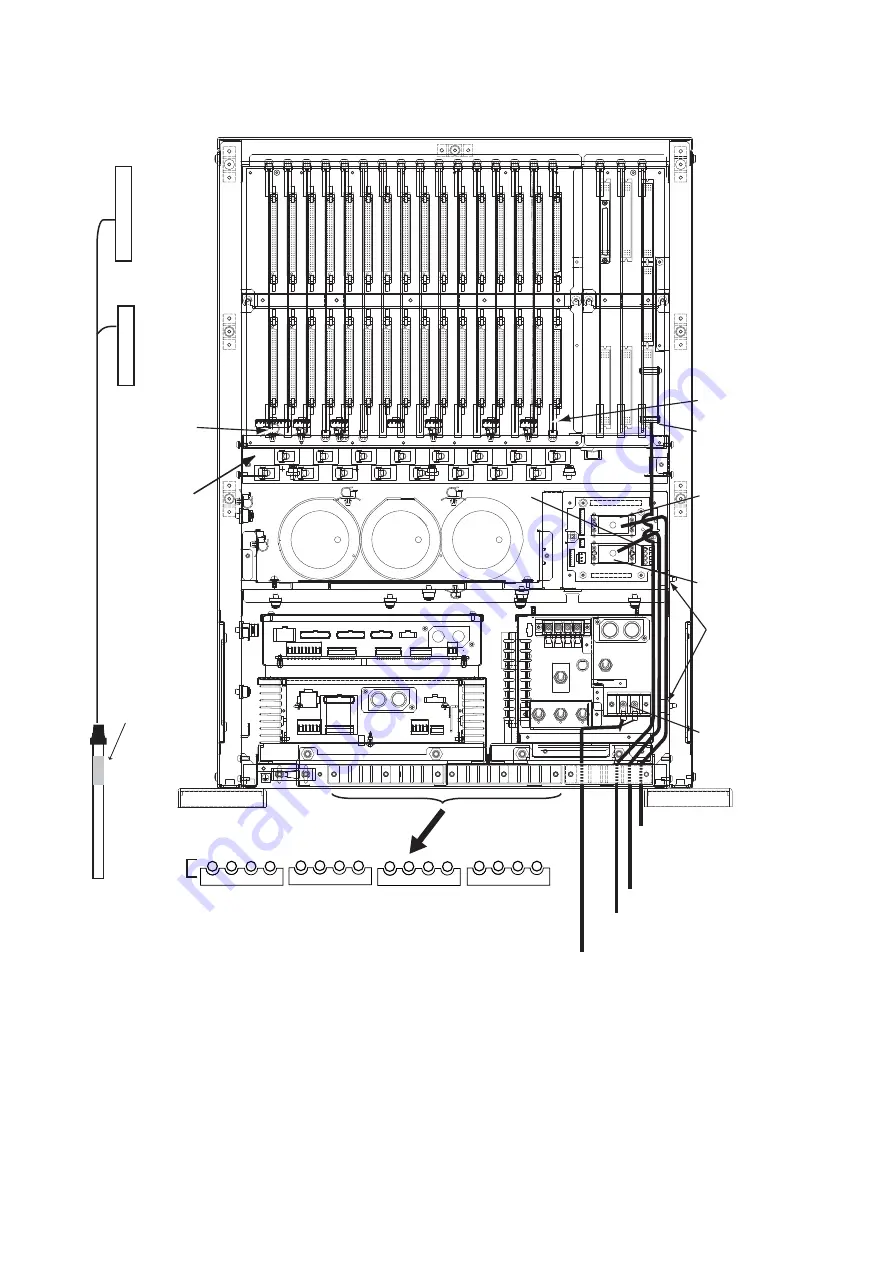
Transceiver Unit
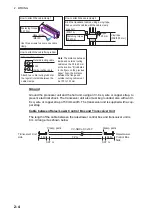
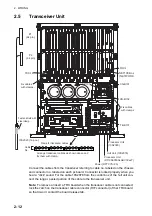
Connect the cables from the transducer referring to cable no. labeled on the chassis
and connector no. labeled on each pc board. Connector is locked properly when you
hear a “click” sound. For the cable 10S2078 from the control box of the hull unit con-
nect the longer, peeled portion of the cable to the transceiver unit.
Note:
To remove or insert a TRX board when the transducer cable is not connected,
lock the catch on the transducer cable connector (HIF connector) of that TRX board
so that it won’t contact the board release tab.
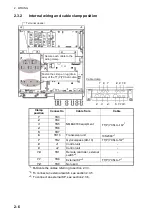
Hull Unit (10S2078)
Processor Unit
(10S2380)
TB-B101
CN-B102
CN-B101
Processor Unit
(DTIC5E350SLABVCVxxT)
CN-B103
TRX-16
P2
(64 pin)
P1
(64 pin)
1
2
3
4
5
6
7
8
9
10
11
12
13
14
15
16
Fix cables
with clamps.
Fasten shield with
steel clamp.
10S2320 (16 pcs.)
Clamp for transducer cables
Arrange transducer cables as shown above and
fix them with clamp.
Cable
No.
Power (DPYCYS-2.5)
Fix cables
with clamps
TRX-1
NET100 Boa
(NETWORK
Summary of Contents for FSV-85-MARK-2
Page 34: ...1 HOW TO INSTALL THE SYSTEM 1 26 This page is intentionally left blank ...
Page 58: ...2 WIRING 2 24 This page is intentionally left blank ...
Page 86: ...D 1 7 Jul 2021 H MAKI ...
Page 87: ...D 2 7 Jul 2021 H MAKI ...
Page 88: ...D 3 7 Jul 2021 H MAKI ...
Page 89: ...D 4 7 Jul 2021 H MAKI ...
Page 90: ...D 5 7 Jul 2021 H MAKI ...
Page 91: ...D 6 7 Jul 2021 H MAKI ...
Page 92: ...22 Apr 2014 H MAKI D 7 ...
Page 93: ...D 8 24 Jun 2021 H MAKI ...
Page 94: ...D 9 24 Mar 2021 H MAKI ...
Page 95: ...D 10 24 Jun 2021 H MAKI ...
Page 96: ...D 11 24 Jun 2021 H MAKI ...
Page 98: ...D 13 17 Feb 2021 H MAKI ...
Page 99: ...28 Apr 2018 H MAKI D 14 ...
Page 100: ...D 15 13 Sep 2011 Y NISHIYAMA ...
Page 101: ...D 16 13 Sep 2011 Y NISHIYAMA ...
Page 102: ...D 17 13 Sep 2011 Y NISHIYAMA ...

