background image

PC Settings

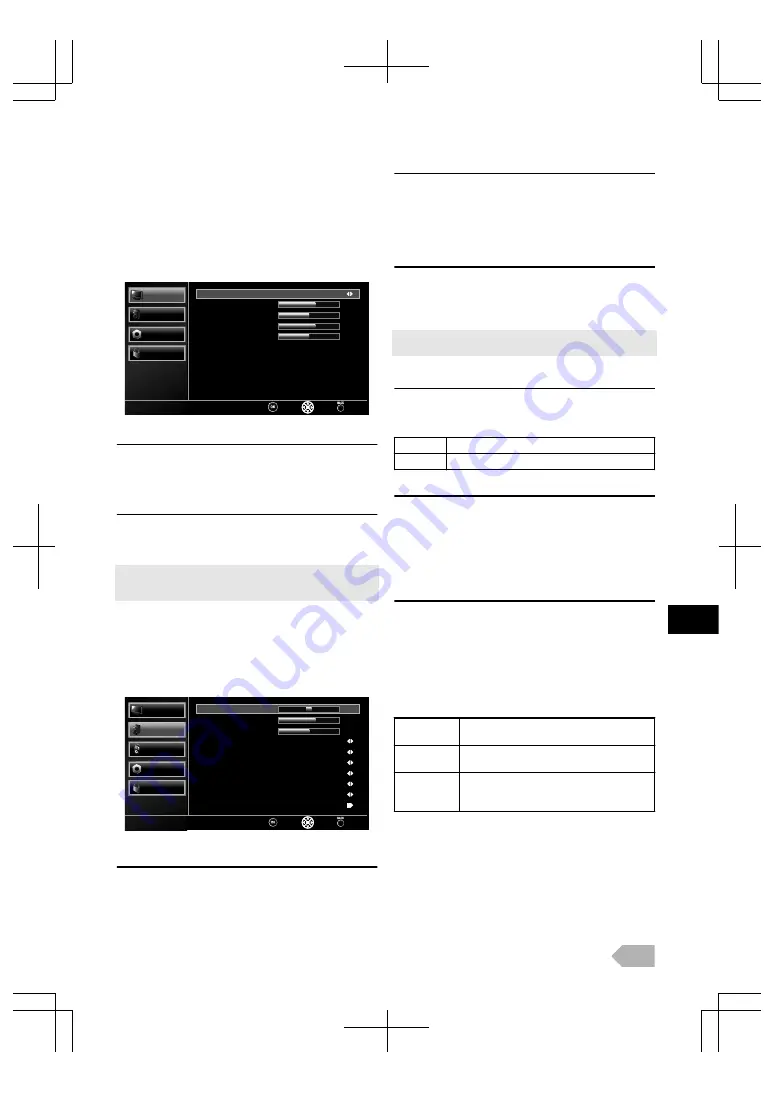
You can adjust the PC screen position, clock and phase.

Before you begin: You must connect your PC to this unit and

select [PC] at 

[Select Input]

. Refer to “Switching the Input

Mode” (p. 9).

1

Use 

K

 / 

L

 to select 

[Picture]

, then press 

OK

.

2

Use 

K

 / 

L

 to select 

[PC Settings]

, then press 

OK

.

63

50

20

130

Back

Select

OK

PC Settings

Clock

Phase

Vertical Position

Horizontal Position

Auto Adjustment

Parental

Others

Sound

Picture

Auto Adjustment

3

Use 

K

 / 

L

 to select 

[Auto Adjustment]

, then press 

OK

.

Each setting will be adjusted automatically.

Horizontal Position / Vertical Position / Phase / Clock

3

Use 

K

 / 

L

 to select the item you want, then adjust the

settings according to your personal preference.

After press 

OK

 and appear the settings display, you can adjust them.

You can select your favourite PC screen size at “Changing the TV

Screen Display Mode” (p. 13).

Sound Adjustment

You can adjust the sound settings according to your personal

preferences.

1

Use 

K

 / 

L

 to select 

[Sound]

, then press 

OK

.

63

0

50

-

Back

Select

Adjust

On

Standard

Off

Off

Audio Description

Audio Type

TV Speakers

Auto Volume Control

Digital Audio Output

Sound Mode

Virtual Surround Sound

Treble

Bass

Balance

Parental

Others

TV

Sound

Sound

Picture

PCM

Balance / Bass / Treble

You can set left/right speaker setting.

2

Use 

K

 / 

L

 to select the item you want, and then adjust

the setting using 

0

 / 

1

.

Virtual Surround Sound

You can set to the sound modes for more spatial or

surround sound reproduction.

2

Use 

K

 / 

L

 to select 

[Virtual Surround Sound]

, and

then select 

[On]

 or 

[Off]

 using 

0

 / 

1

.

Sound Mode

2

Use 

K

 / 

L

 to select 

[Sound Mode]

, and then select

[Standard]

[Movie]

[Music]

, or 

[Game]

 using

0

 / 

1

.

You can change sound mode easily using 

SOUND MODE

.

Press 

SOUND MODE

 repeatedly to select sound mode you want.

Digital Audio Output

2

Use 

K

 / 

L

 to select 

[Digital Audio Output]

, and then

select 

[Auto]

 or 

[PCM]

 using 

0

 / 

1

.

Auto

Dolby Digital (if available)

PCM

PCM

Auto Volume Control

If set to 

[On]

, sudden changes in volume will be reduced

automatically, for example, during commercials or when

switching channels.

2

Use 

K

 / 

L

 to select 

[Auto Volume Control]

, and then

select 

[On]

 or 

[Off]

 using 

0

 / 

1

.

TV Speakers

Select the audio output from the unit’s speakers, or not. If

your amplifier is HDMI link function compatible and

connected by an HDMI cable to this unit, some sound

operations such as volume up can be changed by using this

unit’s remote control. Make sure 

[fun-Link Control]

 is set

to 

[On]

 (p. 21).

2

Use 

K

 / 

L

 to select 

[TV Speakers]

, then select

[On]

[Off]

, or 

[Ext.Amp]

, using 

0

 / 

1

.

On

The sound will be output from the unit’s

speakers.

Off

The sound will not be output from the

unit’s speakers.

Ext.Amp

You can control audio output from your

connected HDMI link devices by using this

unit’s remote control.

EN

15

Summary of Contents for LED40-H9200M

Page 1: ...ED LCD HD television LED LCD HD Television Telewizor LED LCD HD Deutsch Bedienungsanleitung Français Manuel du propriétaire Español Manual del propietario Italiano Manuale del proprietario Português Manual do proprietário Nederlands Gebruikershandleiding Ελληνικά Εγχειρίδιο οδηγιών Svenska Användarhandbok English Owner s Manual Polski Instrukcja obsługi ...

Page 2: ...nnect the mains plug to switch off when the unit becomes faulty or not in use 10 The mains plug shall remain readily operable 11 Read the manual instructions to ensure correct and safe installation and interconnection of the unit in multimedia systems 12 Keep a distance of 20cm around the ventilation openings of the unit 13 Batteries battery pack or batteries installed shall not be exposed to exce...

Page 3: ...n health For more detailed information about the collection and recycling programmes available in your country please contact your local city office or the shop where you purchased the product Battery Precautions Be sure to follow the correct polarity as indicated in the battery compartment Reversed batteries may cause damage to the device Do not mix different types of batteries together e g Alkal...

Page 4: ...Make sure not to put the AC power cord between the base and the unit At least 2 people are required for this step 2 Drive Phillips head screws into the 4 threaded holes at the rear of this unit until they are tight To remove the base from this unit Unscrew the Phillips head screws on step 2 After the screws are removed move the unit up from the base Be careful not to drop the unit when you remove ...

Page 5: ...erminals 23 PC VGA Input jack p 7 24 USB terminal p 10 Data input from USB flash memory only User should not connect any devices to the USB terminal such as digital camera keyboard mouse etc because these will not work The software update is in most cases handled by an authorized service person or in some circumstances the user may be asked to do the software update themselves 25 CI slot p 19 26 H...

Page 6: ...al audio output of the device you connect Make sure the device outputs the digital audio Audio sometimes makes no sound if you select Bitstream etc Dear Customer By connecting an HDMI cable to your Funai LCD TV you have to use only a certified HDMI cable to guarantee a sufficient immunity against parasitic frequency radiation A certified HDMI cable can be identified by the HDMI logo on the cable o...

Page 7: ...ски Česky Dansk Deutsch Eesti Ελληνικά English Select Exit 3 Use K L to select the location then press OK Select at Home this unit is set to maximise the energy efficiency for home setting and it can be adjusted through a choice of picture and sound quality according to your preference Select Retailstore this unit will be set up with predefined setting for retail displays If you select Retailstore...

Page 8: ...the unit to go into standby mode after an incremental period of time 1 Press SLEEP repeatedly to change the sleep time period Each time you press SLEEP the timer increases from 10 minutes up to 120 minutes Press SLEEP repeatedly until Off appears to cancel the sleep timer If the unit goes into standby mode the sleep timer will be cancelled ECO Mode When you set ECO Mode to On backlight brightness ...

Page 9: ...mme which you set the parental lock or channel lock 15 ATV broadcast e is displayed when it receives analogue TV broadcast DTV broadcast i is displayed when it receives digital TV broadcast Radio service h is displayed when it receives digital audio broadcast 2 Press BACK to exit EPG Electronic Programme Guide DTV You can easily find a channel or see the detailed channel information EPG gives you ...

Page 10: ... Use K L to select Thumbnail Size and then press OK then use K L to select the thumbnail size Small Middle or Large Display all files Use K L to select Display all files then press OK to display all files All files may not be displayed even if you select Display all files due to the amount of files folders the length of their file folder name or the capacities When you want to display each folder ...

Page 11: ... files Use K L to select Display all files then press OK to display all files All files may not be displayed even if you select Display all files due to the amount of files folders the length of their file folder name or the capacities When you want to display each folder or file select Display current folder files and then press OK Track09 mp3 00 00 58 00 04 49 9 17 Katana F Project Best Hits Roc...

Page 12: ...n be recognised up to 3 000 files in the USB flash memory This unit may not be recognised if the length of the file names is too long Only English characters can be recognised This unit does not support MTP Media Transfer Protocol or the file other than FAT and FAT32 file system If the file is not supported error message appears When the unit does not recognise the USB flash memory try reconnectin...

Page 13: ...at its original size Sidebars appear on both edge of the TV screen 14 9 Displays a 4 3 picture at a 14 9 size Sidebars appear on both edge of the TV screen This crops out the top and bottom of the picture Full Displays a 4 3 picture at a 16 9 size the picture is stretched horizontally to fill the TV screen Zoom Displays a 4 3 picture at a 16 9 size at its enlarged size without changing its horizon...

Page 14: ... change the colour tone of the picture 2 Use K L to select Colour Temperature and then select Warm Normal or Cool using 0 1 Advanced Picture Adjustment You can adjust the detailed picture settings according to your personal preference 1 Use K L to select Picture then press OK 2 Use K L to select Features then press OK 100 Back Select Features On On Mid Mid Backlight Adaptive Luma Control Flesh Ton...

Page 15: ...ker setting 2 Use K L to select the item you want and then adjust the setting using 0 1 Virtual Surround Sound You can set to the sound modes for more spatial or surround sound reproduction 2 Use K L to select Virtual Surround Sound and then select On or Off using 0 1 Sound Mode 2 Use K L to select Sound Mode and then select Standard Movie Music or Game using 0 1 You can change sound mode easily u...

Page 16: ...1 or Dual 2 using 0 1 While watching a programme you can change the audio language easily using AUDIO when it is available Channel Settings You can edit the channels 1 Use K L to select TV then press OK 2 Use K L to select Channel then press OK Back Select Search Channel Fine Tune Channel Decode Channel Edit Channel Sort Channel Skip Update Scan Manual Scan DTV Manual Scan ATV Auto Scan Parental O...

Page 17: ...ou want then press OK 5 Use K L to select Channel Number and enter the number you want using the Number buttons then press OK 6 Use K L to select Name and enter the character using the Number buttons then press OK Using alphabet by the Number buttons correspondence table shown below Using 0 to erase 1 character ATV 6 Use K L to select Frequency MHz and enter frequency you want using the Number but...

Page 18: ... turned on for 4 hours In spite of this setting the unit goes into standby mode automatically if there is no signal input from the antenna terminal and no user operation for 15 minutes 3 Use K L to select Auto Power Off and then select On or Off using 0 1 Subtitle Settings You can change the subtitle settings used for TV programmes 1 Use K L to select Others then press OK 2 Use K L to select Subti...

Page 19: ...ide the teletext press SLEEP 3 Press BACK to turn off the teletext decoder Common Interface CI DTV This unit is equipped with a CI slot You can enjoy additional services with this function for example Pay TV The access restrictions menu will appear on the TV screen when a CI module is installed 1 Go into standby mode and unplug from an AC outlet 2 Insert the CI module straight to the CI slot of th...

Page 20: ... appear automatically Back Select Parental Factory Reset Change PIN Code Maturity Rating Channel Lock Parental Others TV Sound Picture OK Channel Lock You can set particular channels to be invisible When you select the locked channel you need to enter the PIN Code to watch If you want to unlock the locked channel select OK to set by using K L then the PIN Code again 3 Use K L to select Channel Loc...

Page 21: ...ted fun Link device Off This unit stays standby mode even if you turn on your connected fun Link device Device Control You can operate some functions such as disc playback or call up the menu of the connected devices by using this unit s remote control 3 Use K L to select Device Control then select On or Off by pressing OK On B C H G F E D p B K L 0 1 OK BACK the Number buttons RED GREEN YELLOW BL...

Page 22: ...r broken wire Adjust Contrast and Brightness control Surrounding temperature is too low Lines or Streaks in Picture Try a new channel if OK then possibly due to poor channel reception If outside antenna is being used check for broken wire Check for local interference Ghosts in picture Try a new channel if OK then possibly due to poor channel reception Is antenna connected to terminal on the back o...

Page 23: ...umption 99 W standby less than 0 5 W Dimensions Protruding parts excluded without base H 577 0 W 956 0 D 40 0 with base H 621 0 W 956 0 D 240 0 Weight without base 13 1 kg with base 15 6 kg Trademark Information Manufactured under license from Dolby Laboratories Dolby and the double D symbol are trademarks of Dolby Laboratories HDMI the HDMI Logo and High Definition Multimedia Interface are tradem...

Page 24: ...er exterior surfaces of the unit with a soft cloth Never use a solvent or alcohol Do not spray insecticide liquid near the unit Such chemicals may cause damage and discoloration to the exposed surfaces Panel Cleaning If the LCD panel should require cleaning wipe it with a cotton or soft cloth Before cleaning the panel disconnect the power cord Servicing Should your unit become inoperative do not t...

Page 25: ...r in all copies of the Software and that both the above copyright notice s and this permission notice appear in supporting documentation THE SOFTWARE IS PROVIDED AS IS WITHOUT WARRANTY OF ANY KIND EXPRESS OR IMPLIED INCLUDING BUT NOT LIMITED TO THE WARRANTIES OF MERCHANTABILITY FITNESS FOR A PARTICULAR PURPOSE AND NONINFRINGEMENT OF THIRD PARTY RIGHTS IN NO EVENT SHALL THE COPYRIGHT HOLDER OR HOLD...

Page 26: ...Web Site http www funai eu 1EMN28019 A13P0EP ...

Reviews: