background image

Color monitor C551

8 - English

A26361-K610-Z100-3-5E19

15°

45°

45°

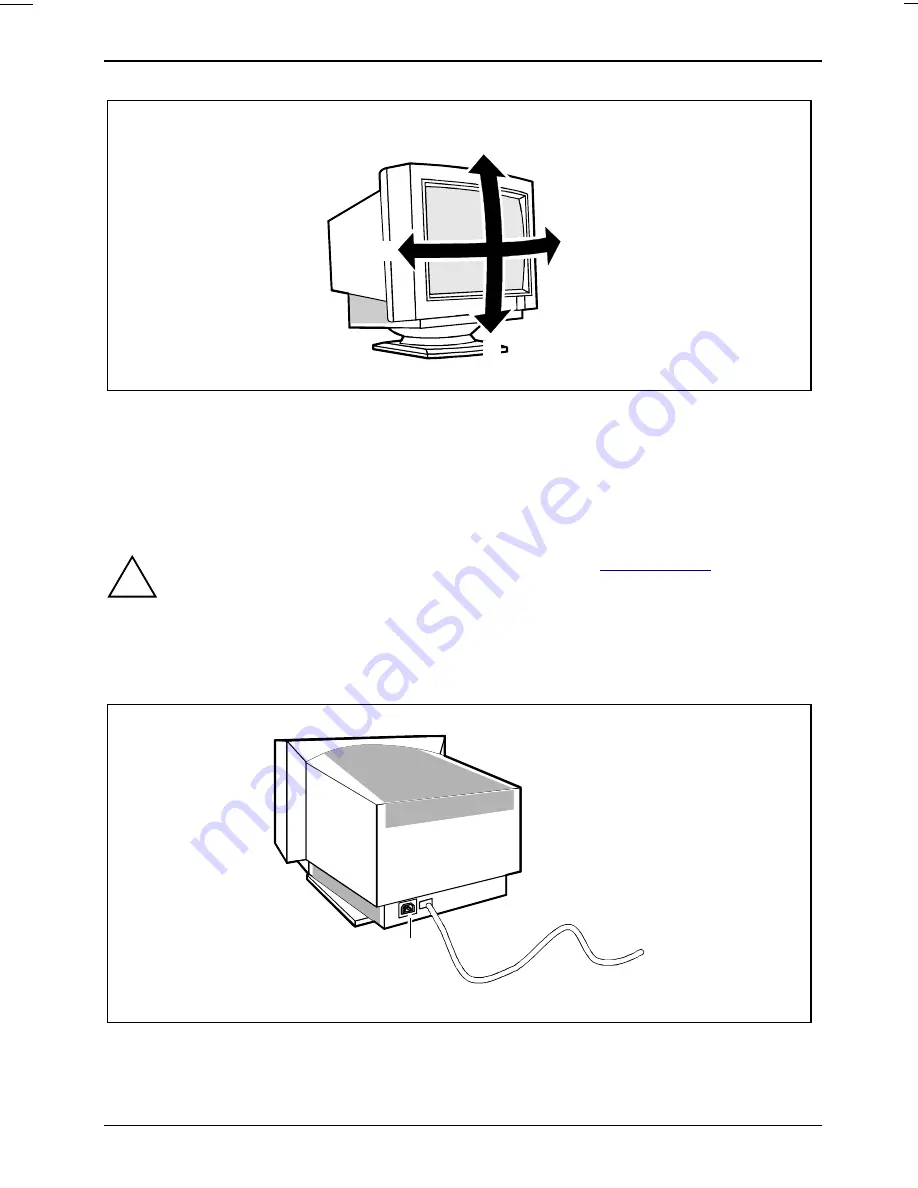
Tilting and turning area: The specified tilting area refers to the zero position of the monitor foot
marked with an arrow.

Connecting the monitor

See your PC's operating manual for details of the ports on the system unit.

!

Please note the safety information provided in the chapter "

Important notes

" in the

Operating Manual of the PC.

Do not cover the ventilation openings of the monitor.

If you are assembling monitors beside each other, there must be a minimum distance of
25 cm between monitors of the same constructional type, to avoid image distortion. With
different monitors, the distance must be increased, if necessary.

1

2

1 = Power connector

2 = Data cable

Ê 

Be sure that the monitor and the system unit are switched off.

Summary of Contents for C551

Page 1: ...1 C551 C551 C551 Bildschirm Moniteur Monitor Sk rm Beeldscherm BETRIEBSANLEITUNG BETRIEBSANLEITUNG BETRIEBSANLEITUNG BETRIEBSANLEITUNG OPERATING MANUAL OPERATING MANUAL OPERATING MANUAL OPERATING MANU...

Page 2: ...zu unseren Produkten Tipps Updates usw finden Sie im Internet http www fujitsu siemens com Is there any technical problem or other question you need clarified Please contact our Help Desk see Guarant...

Page 3: ......

Page 4: ...eciclado Questo manuale stato stampato su carta da riciclaggio Denna handbok r tryckt p recyclingpapper Dit handboek werd op recycling papier gedrukt Herausgegeben von Published by Fujitsu Siemens Com...

Page 5: ...or monitor Moniteur couleur Monitor de color Monitor a colori F rgsk rm Kleurenbeeldscherm Betriebsanleitung Operating Manual Deutsch English Fran ais Espa ol Italiano Svenska Nederlands Ausgabe Juli...

Page 6: ...oder GM Eintragung Lieferm glichkeiten und technische nderungen vorbehalten Copyright Fujitsu Siemens Computers GmbH 2000 VESA DDC and DPMS are registered trademarks of Video Electronics Standards As...

Page 7: ...Checking the contents of the consignment 6 Installing an ergonomic video workstation 6 Attaching the monitor base 7 Connecting the monitor 8 Operation of the monitor 9 Switching the monitor on 9 Swit...

Page 8: ......

Page 9: ...ntroller The screen controller the associated driver software is responsible for setting the modes resolution and refresh rate Target group You don t need to be an expert to perform the operations des...

Page 10: ...device automatically sets itself to the correct voltage within the range from 100 V to 120 V and 200 V to 240 V Ensure that the local mains voltage lies within these limits The device must be install...

Page 11: ...ed there is a risk of implosion Manufacturer s notes Energy Star The Fujitsu Siemens Computers color monitor C551 is designed to conserve electricity by dropping to less than 10 W when it goes into st...

Page 12: ...rease the separation between equipment and the receiver Connect the equipment into an outlet on a circuit different from that to which the receiver is connected Consult the dealer or an experienced ra...

Page 13: ...ith the following code Green and Yellow Earth Blue Neutral Brown Live As the colours of the wires in the mains lead of this appliance may not correspond with the coloured markings identifying the term...

Page 14: ...ent comprises one monitor with data cable one power cable one monitor base this Operating Manual Should you discover that the delivery does not correspond to the delivery note notify your local sales...

Page 15: ...d be approximately 50 cm Keep ventilated areas clear Remember to maintain correct posture Attaching the monitor base Your monitor is shipped with a base which allows you to rotate and tilt the monitor...

Page 16: ...e note the safety information provided in the chapter Important notes in the Operating Manual of the PC Do not cover the ventilation openings of the monitor If you are assembling monitors beside each...

Page 17: ...e supplied into the power connector of the monitor Plug the power cable into the monitor connector at the rear of the system unit Plug the power connector of the system unit into a properly grounded p...

Page 18: ...d to 10 W Reduced to 10 W Reduced to 5 W If your PC detects inactivity no input it sends an appropriate signal to the monitor to reduce the power consumption If there is still no input power consumpti...

Page 19: ...he function indicator above the symbol lights up As long as the indicator remains on the setting buttons for the selected function are active Use the or button to make the desired setting The function...

Page 20: ...is when the sides of the screen display are bent inward or outward Trapezoid distortion is when the length of the top and bottom of the screen display differ from each other Pincushion correction Ben...

Page 21: ...following table Background Characters black white purple blue cyan green yellow red black white purple blue cyan green yellow red Color combination very suitable light background colors are only suita...

Page 22: ...ompatible VGA interface VESA DDC Video Electronics Standard Association Display Data Channel is used as the communications interface between the monitor and the PC If your PC is equipped with a VESA D...

Page 23: ...Hz 1 Hz 85 0 Hz 1 Hz 60 0 Hz 1 Hz 720 x 400 640 x 480 640 x 480 720 x 400 640 x 480 800 x 600 800 x 600 1024 x 768 For ergonomic reasons we recommend a refresh rate of at least 75 Hz and a maximum re...

Page 24: ...units Flickering picture Set an ergonomic refresh rate 75 Hz using the PC software see documentation for your PC or your screen controller graphics card Ensure that the monitor is kept at a distance o...

Reviews: