11
Installation
1F02 2481
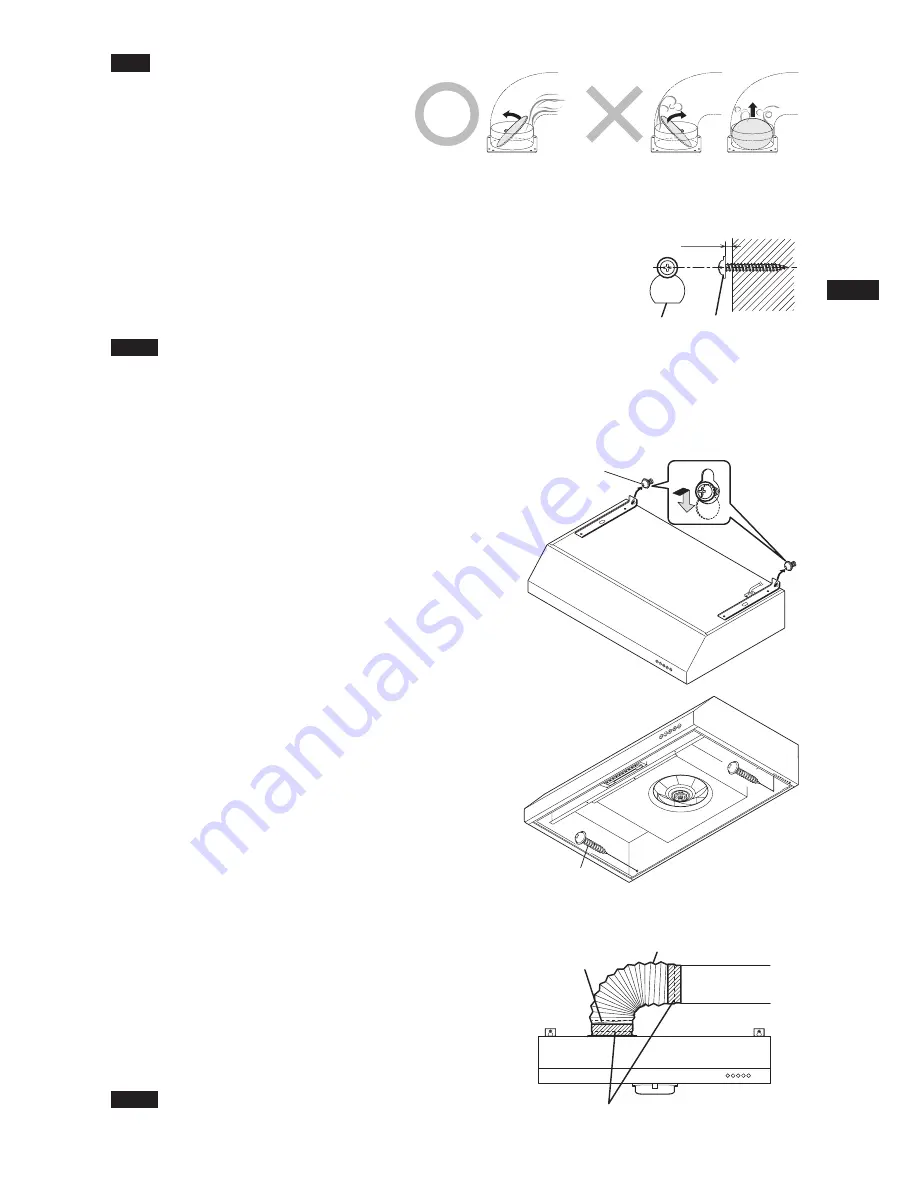
Correct
Wrong
Note
When attaching the exhaust port, pay
attention to its shutter opening direction.
If it's installed incorrectly, it may cause
bad discharge, abnormal noise, etc.
Note
Please use suitable accessories during installation (refer to page 7).
May add or opt for other accessories as reinforcement when necessary.
6
Screw in washer-head wood screws on the wall
Referring to "Confirmation of the installation location" on
page 9, insert the washer-head wood screws (
∅
5.1×45)
into the mounting wall for the left and right keyholes of the
mounting bracket. Allow about 5mm space between the
wall and screwheads for hanging the cooker hood.
Washer-head
wood screw
Keyhole
5mm
7
Mount the cooker hood
1) Hook the keyholes of the cooker hood on
the washer-head wood screws, and tighten
the screws.
Washer-head
Wood screw
Washer-head
Wood screw
2) Put 2 washer-head wood screws to the rear of
the cooker hood and tighten them securely.
8
Connection of duct and exhaust port
(FR-FS1870V/1890V only)
Connect
∅
150 flexible tube duct or the like with the
exhaust port.
Make the exhaust port secure and air-tight using
non-flammable tape such as aluminium tape, etc.
(not supplied)
Note
The longer the exhaust duct, the lower the ventilation.
Exhaust port
Flexible tube duct
Taping with nonflammable materials
(Aluminum tape, etc.)


