background image

Œ、õö÷EG

tøK

Lx¶'

MNd,'›

:OPõö÷E

QGt。

R、öùEø

K:

STk

öù=ö

UV9

Xguö。

Y、ö

ZEø

K:

STLδ

ZŒx,@ýþö

Z,

]^。

\

]^àG

_

e,£dd`

Ëa

。b

eöZc

8*+,d

‰ýþöZ

@ýþe

 [,'ÿ

 ,(câf

Ó

=>]^úuûEöüâ

f。

7

g、

hiEø

3

STLjR¥

3hiŒx(™

klm,-./ø

3)。

\k( )

n

†op

、qr

,‘k( )n

b

e¢$s

tu

Ec

8*+†#¢

$s

、(ÆZ

,

dk( )v

[wx

hiy

†hi

1     ,

2                               ,

3                 ,

(

) 1

(

) 2

(

) 3

( )

1

( )

2

( )

3

7

1 Hood surface cleaning

After each use wipe the range hood s external surface with a soft cloth

2 Oil tray cleaning

It is recommended that the oil tray be emptied regularly

3

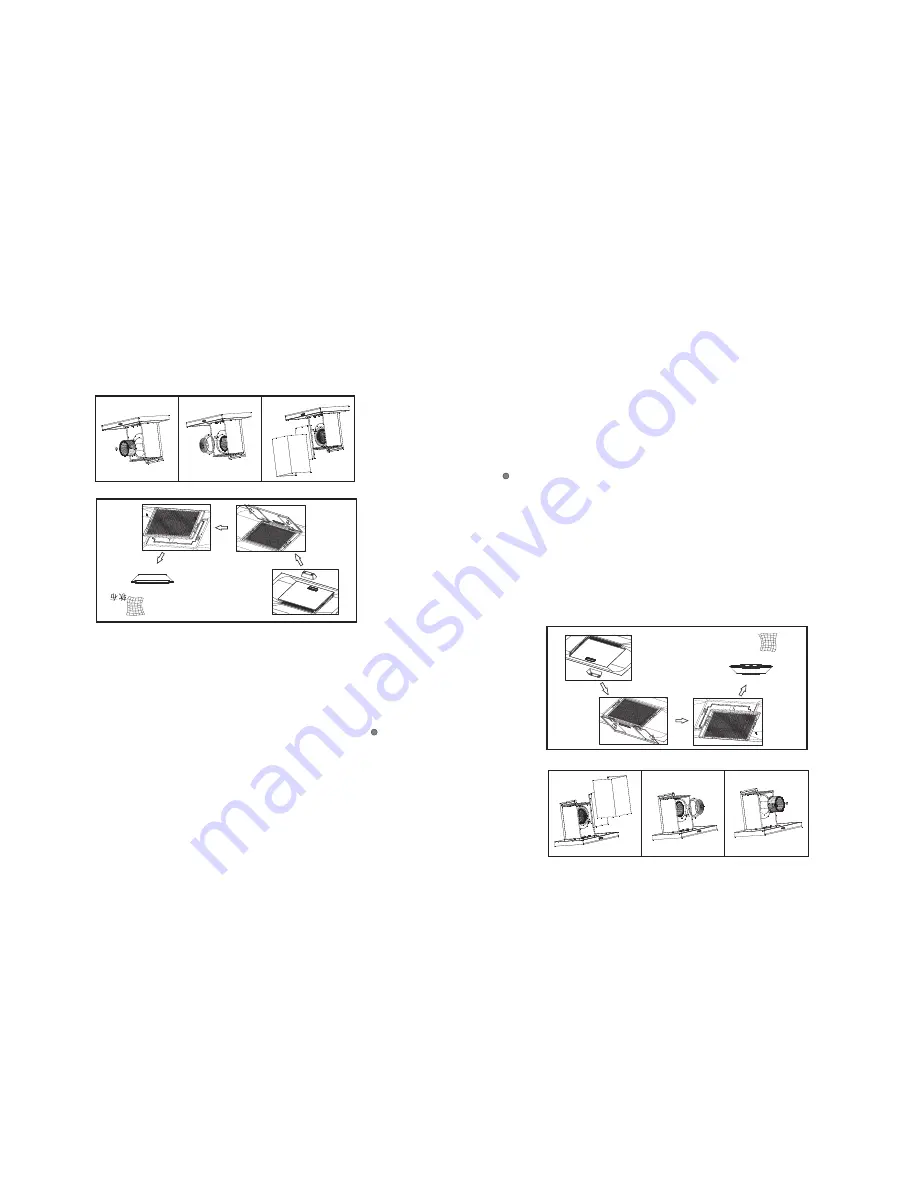
Filter cleaning

It is recommended that the filter be cleaned once a month

Remove

the rectifier panel before removing the filter by first pulling down the
front part of rectifier panel to open it and then detach the back part from the

clip. Loosen the filter mounting screws so that the filter can be removed.

Always use both hands to carefully grasp all parts being removed to prevent

them from falling and becoming damaged.
Please watch out for oil that has collected in the rectifier panel.

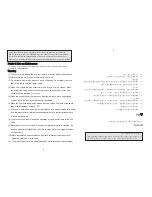
4.  Fan cleaning

It is recommended that the fan be cleaned once a year (this has to be
performed by a trained technician). As indicated in Diagram (1), first
remove the duct cover and the case cover plate, then, as indicated in
Diagram (2), loosen the bell mouth and the fan casing mounting screw
to remove the bell mouth and the fan guard and then finally, as indicated
in Diagram (3), turn the fan cap in a clockwise direction to remove the
fan.

.

:

,

'

.

.

:

.

.

.

Soft cloth

(12) The range hood is intended to be installed over a hob with up to four hob

elements or burners, no more than total 5.2kW.

12                      1        4

、Ãõö÷'

{|¥zÅ

} œ½ì

~Eñ

=|,

€z

@

5.2kW

Summary of Contents for FJS-900V

Page 1: ......

Page 2: ......

Page 3: ......

Page 4: ......

Page 5: ...from the drawing the actual parts shall prevail as the correct parts Fan guard Fan cap Fan Motor Fan casing Case cover plate Bell mouth Upper duct cover Lower duct cover PCB cover Capacitor PCB Exhaust port Case Top plate Elcetrical case base Top plate support frame Connector plate Smoke collector cover Filter Rectifier panel Oil tray Switch Glass panel LED light 3 FJS 900V V 8uF 500V 50Hz 60Hz 8u...

Page 6: ...stalling an upper duct cover first install the duct cover bracket at an appropriate height on the wall Pull up the upper duct cover to the height of the bracket and use 4 Installation Diagram 48mm 595 680 920 390 327 750 260 45 Duct cover bracket mounting holes 620 Main unit hanger mounting holes fig 1 fig 2 Installation 1 ST3 2 8 2 X 89 2 ABCDEF G H CD IJ 89 ST4X10 4 4 8 m m 595 680 920 390 327 7...

Page 7: ...button can be set to turn off after a delay of 1 to 9 minutes The countdown clock will begin once the flashing has stopped When the clock reaches 0 the unit will turn off automatically accompanied by a beeping sound The default delay time is 5 minutes The delay function can be turned off by gently touching Connect Ø180 flexible duct to the exhaust port then fix the exhaust port and the duct with t...

Page 8: ...ely manner When removing the oil tray use both hands to grasp both ends of the oil tray and gently pull down towards your chest 5 When the cooker hood is being use to clear fumes from a stove flaming gas or other fuels the room must be kept well ventilated 6 When the light bulb is damaged please replace it with a light bulb of the same type with a maximum rating of 1 5W 7 If the power cord is dama...

Page 9: ...oosen the filter mounting screws so that the filter can be removed Always use both hands to carefully grasp all parts being removed to prevent them from falling and becoming damaged Please watch out for oil that has collected in the rectifier panel 4 Fan cleaning It is recommended that the fan be cleaned once a year this has to be performed by a trained technician As indicated in Diagram 1 first r...

Page 10: ...l circuit malfunction or damaged switch 3 Faulty weld on connection board short circuit Possible cause Solution Lamp comes on Motor does not run Motor run Light does not come on Motor does not run Light does not come on Unit vibrates 1 Check whether the socket has power or insert loose plug securely into socket 2 Repair or replace 3 Repair or replace 1 Control switch faulty 2 Motor burnt out 3 Cap...

Page 11: ...r the power plug is not in proper contact with the receptacle When consulting the shop inform the shop the type model of cooker hood requiring repair and the date when it was purchased The minimum retention period of performance parts for repairing the cooker hood is 5 years after termination of manufacturing of the cooker hood The performance parts refer to those parts for required to maintain th...

Page 12: ...e 368357 Tel 65 6286 3286 Fax 65 6285 3285 E mail fit fujioh com sg www fujioh com Southeast Asia Regional Headquarters UWXY FUJIOH INTERNATIONAL TRADING PTE LTD 130 Joo Seng Road 05 05 Singapore 368357 Tel 65 6286 3286 Fax 65 6285 3285 E mail fit fujioh com sg www fujioh com ÔÕÖº ÔÕÖº ...

Reviews: