


Fuji IP-10 Digital Passport System: Quick Reference Guide
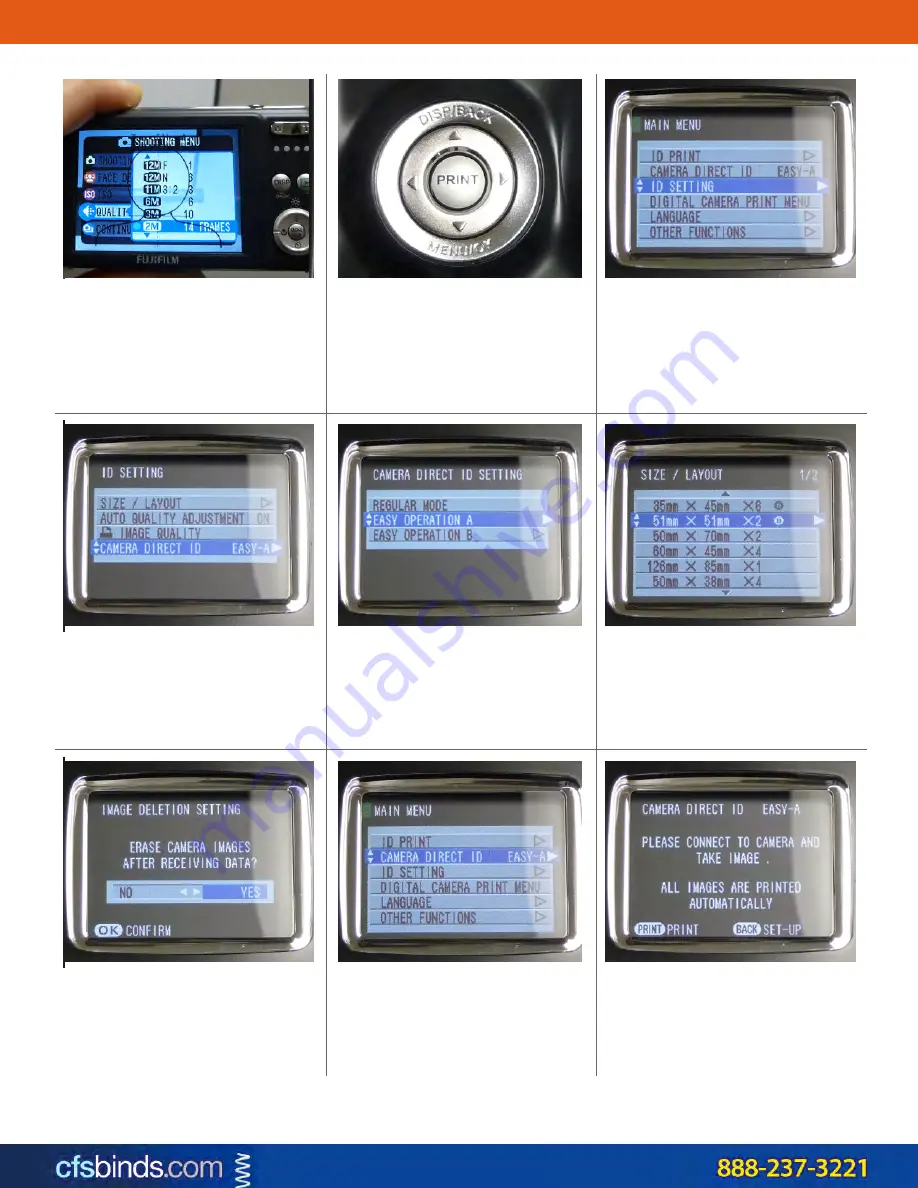
11. Using the printer’s navigation
cursor ring/buttons, press
▼
down
to select ID SETTING.
12. Press MENU/OK to open setting.
10. Select 2M and press MENU/OK
again to confirm.
14. Select EASY OPERATION A to
auto print ALL photos stored in the
camera. Choose EASY OPERATION B
to be able to select which photos
will be printed. Press MENU/OK to
confirm.
15. For the size/layout select the
51mm X 51mm X2 option and
press MENU/OK to confirm.
13. Press
▼
down to select
CAMERA DIRECT ID. Press MENU/OK
to open setting.
17. At the MAIN MENU, select the
CAMERA DIRECT ID EASY A (or B)
and press MENU/OK to confirm.
18. The EASY-A mode will tell you
to take your images, then with the
camera plugged into the printer,
press the PRINT button. This will
automatically print all images
stored on the camera.
16. If prompted, choose whether to
delete photos from camera upon
printing - or to leave them stored in
the camera. Press MENU/OK to
confirm.
Copyright 2011 CFS Products, Inc. All rights reserved.
Summary of Contents for IP-10
Page 1: ......


