7
FEATURES AND FUNCTIONS
1
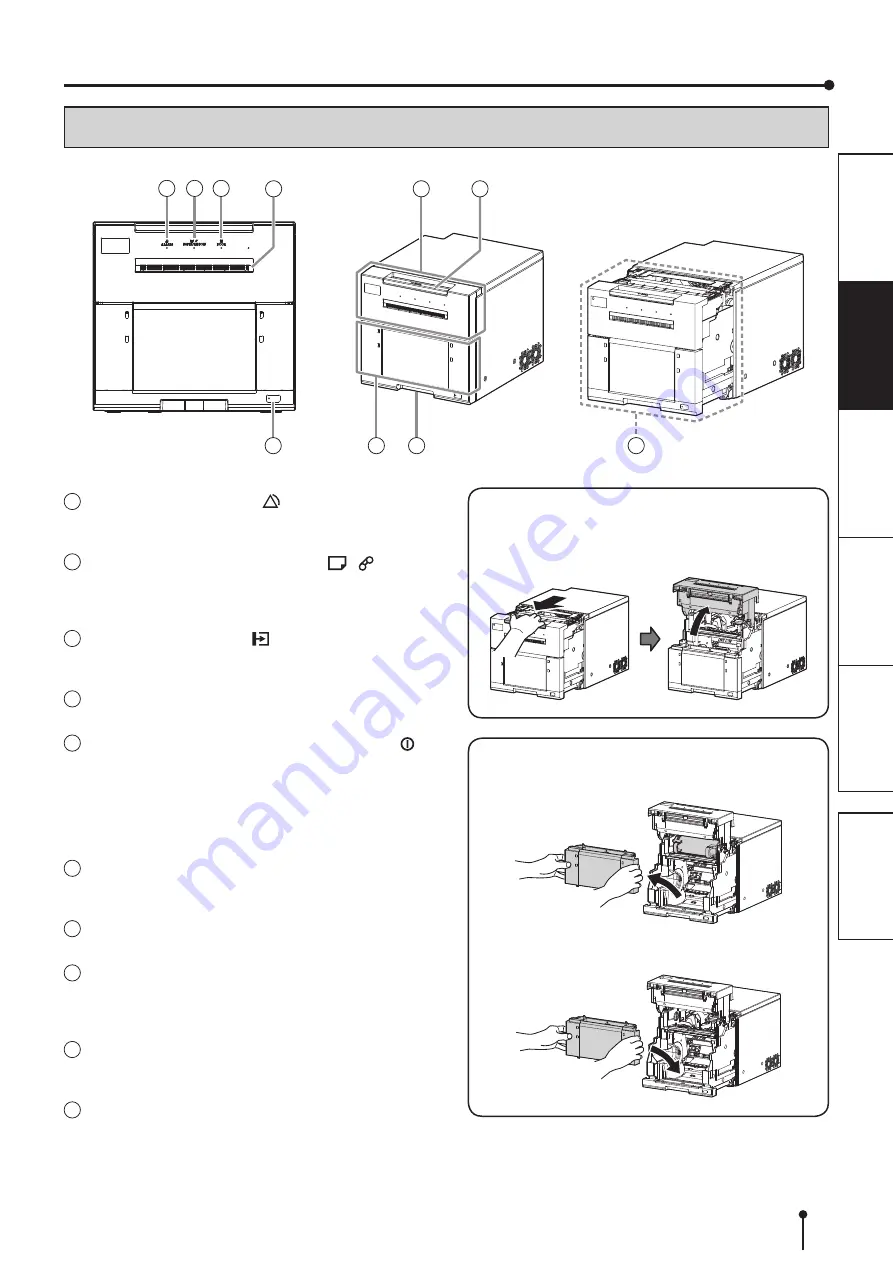
ALARM INDICATOR ( )
This indicator blinks when the paper strip bin is not
installed or a paper jam occurs.
2
PAPER/RIBBON INDICATOR (
)
When an error concerning the ink ribbon or print paper
occurs, this indicator illuminates or blinks.
3
DOOR INDICATOR ( )
This indicator blinks when the door is not completely or
4
PRINT OUTLET
The printed paper comes out here.
5
POWER BUTTON (POWER INDICATOR )
Pressing this button while the power is off will turn on
the power. Holding it down for two seconds or longer
while the power is on will turn off the power. When the
power is on, the indicator will be lit. When the printer is
in power-save mode, the indicator will blink slowly.
6
DOOR
The door will automatically open up when the printing
unit is pulled out.
7
LATCH BAR
Press the latch bar to open the printing unit.
8
PAPER STRIP BIN
Holds the paper strips generated by margin cut. Empty
the bin frequently to prevent jamming the strips at the
print outlet.
9
HANDLE FOR TRANSPORTING
When carrying or moving the printer, use both the front
and rear panel handles for a strong grip.
10
PRINTING UNIT
Open to load print paper or ink ribbon. Press the latch
bar and pull forward to open.
OPENING THE DOOR
Press the horizontal latch bar, pull the printing unit
forward all the way, and release the bar. The door will
automatically open up.
PAPER STRIP BIN
Grab the paper strip bin and lift it up to remove it.
To install the paper strip bin, place the paper strip bin
into the slot.
FRONT PANEL
9
5
4
1
2
3
8
10
6
7


