background image

Chapter 1: Introduction

1.3 Audiometer Type

The Colt audiometer conforms to US and international standards ANSI S3.6-2010 and  

IEC 60645-1 and meets the requirements for a type 1A audiometer.  

1.4 Service

Contact Frye Electronics, Inc., P.O. Box 22391, Tigard, Oregon 97281 -3391, U.S.A.  
Shipments to 9826 SW Tigard St., Tigard, Oregon 97223. 
Telephone: (503) 620-2722; Fax (503) 639-0128; 
E-mail: [email protected]. Or contact your local FONIX representative.

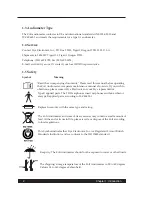
1.5 Safety

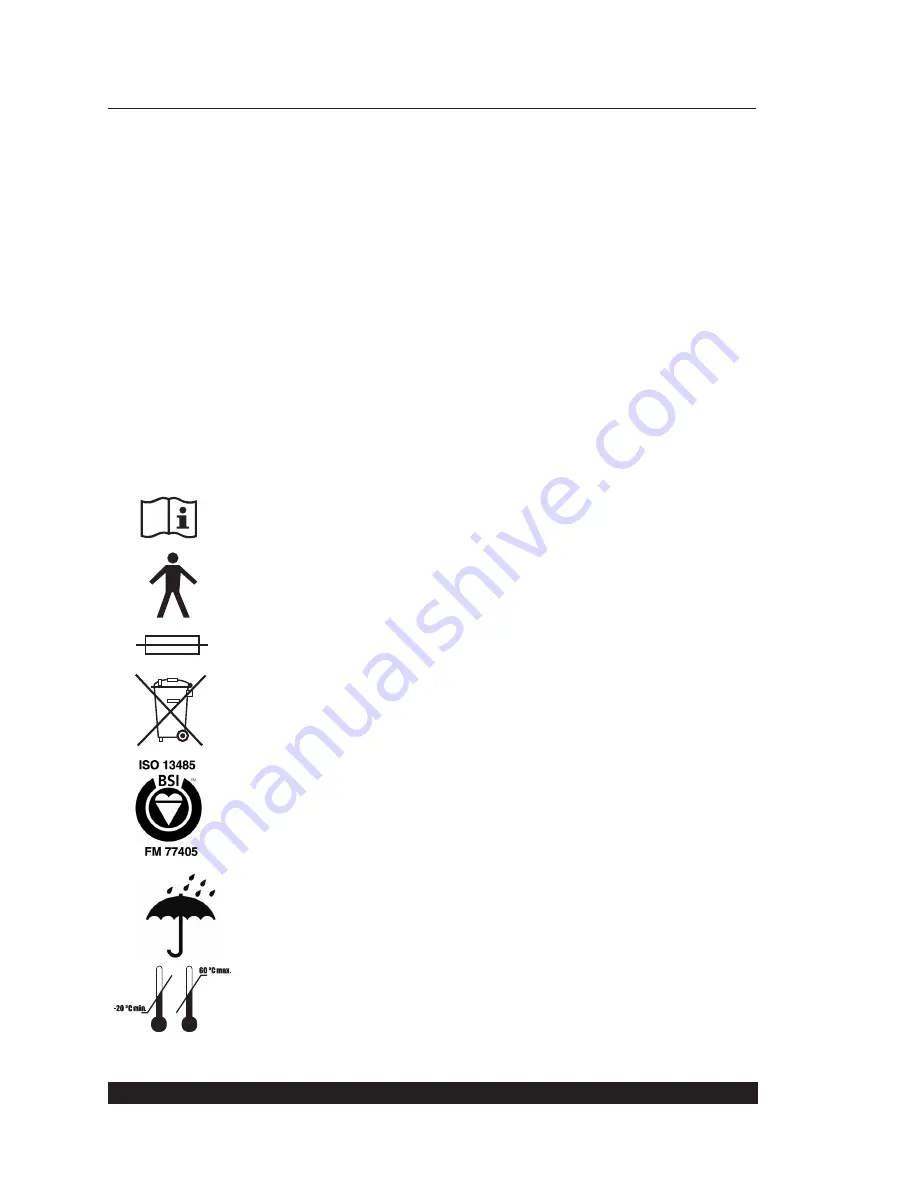
Symbol    


Meaning

"Read the accompanying documents." Please read this manual before operating 

the Colt Audiometer. A separate maintenance manual also exists. If you wish to 

obtain one, please contact Frye Electronics or your Frye representative.

Type B applied parts. The TDH earphones, insert earphones and bone vibrator 

are type B applied parts, according to IEC 60601-1.

Replace fuses only with the same type and rating.

The Colt Audiometer and some of its accessories may contain a small amount of 

lead. At the end of its useful life, please recycle or dispose of the Colt according 

to local regulations.

This Symbol indicates that Frye Electronics, Inc. is a Registered Firm of British 

Standards Institution, and we conform to the ISO 13485 standard.

Keep dry. The Colt Audiometer should not be exposed to water or other fluids.

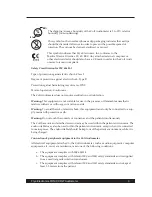
The shipping/storage temperature of the Colt Audiometer is -20 to 60 degrees 

Celsius (-4 to 140 degrees Fahrenheit).

Summary of Contents for FONIX COLT

Page 1: ...FONIX COLT Clinical Audiometer Operator s Manual 2017 Frye Electronics Inc All Rights Reserved Rev 5 2017...

Page 2: ......

Page 3: ...resent various tones masking and speech sounds using the Colt Audiometer but do not contain all of the steps needed to obtain the patient s actual threshold levels and other audiometric information FO...

Page 4: ......

Page 5: ...Line Power Failure 16 2 6 Changing the Android Tablet Sleep Settings 16 2 7 Powering Down the Colt Audiometer Base 16 2 8 Powering Down the Android Tablet 16 2 9 Visual warnings and information signa...

Page 6: ...ave button 30 3 2 8 Send button 30 3 2 9 Option 30 3 2 10 Tests 30 Chapter 4 Customizing the Colt operation The Preferences Menu 33 Chapter 5 Notes on using the Speech Screen s Master Hearing Aid 37 5...

Page 7: ...le center knob is used to control frequency It should be noted that all touch screen functions continue to be active as well as the mechanical controls when the tactile option is present A dual speech...

Page 8: ...also exists If you wish to obtain one please contact Frye Electronics or your Frye representative Type B applied parts The TDH earphones insert earphones and bone vibrator are type B applied parts acc...

Page 9: ...uitable for use in the presence of flammable anaesthetic mixture with air or with oxygen or nitrous oxide Warning To avoid the risk of electric shock this equipment must only be connected to a sup ply...

Page 10: ...o cor rect it by one or more of the following measures 1 Relocate or reorient the receiving antenna 2 Increase the distance between the Colt Audiometer and the receiver 3 Connect the Colt Audiometer t...

Page 11: ...nufacturer of the ear cushions recommends the use of any OSHA Occu pation Safety and Health Agency recommended anti bacterial soap Disposable acoustically transparent covers are also available commerc...

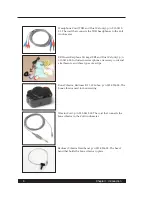
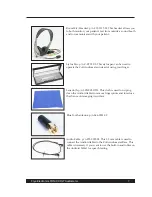
Page 12: ...only p n 015 0416 00 Includes insert earphones necessary cords and attachments and three types of ear tips Bone Vibrator Radioear B 71 100 ohm p n 015 0226 00 The bone vibrator used for bone testing V...

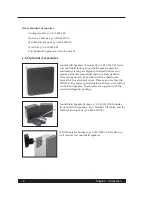
Page 13: ...te the Colt Audiometer instead of using your finger Lenscloth p n LENSCLOTH This cloth is used for wiping clean the Android tablet to remove fingerprints and to reduce the chance of damaging its surfa...

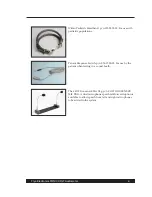
Page 14: ...specialized devices and require particular sound field spectrum characteristics They cannot usually be purchased off the shelf from a normal hi fi or electronics store Please also note that the FONIX...

Page 15: ...diatric populations Patient Response Switch p n 076 1700 02 For use by the patient when testing in a sound booth The COLT Gooseneck Mic Pkg p n COLT GOOSENECK MIC PKG A dual microphone speech talkforw...

Page 16: ......

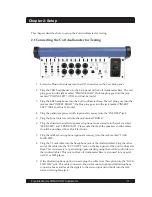
Page 17: ...the jack marked BONE 6 Plug the shielded sound field speakers optional accessories into the jacks marked SPKR LEFT and SPKR RIGHT Please note that both the speakers and the cables should be purchased...

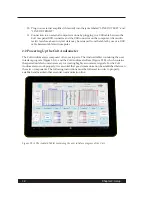
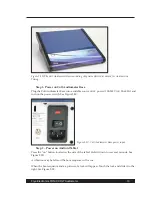
Page 18: ...ering Up the Colt Audiometer The Colt Audiometer is composed of two main parts The Android tablet containing the user interface program Figure 2 2A and the Colt Audiometer Base Figure 2 2B which conta...

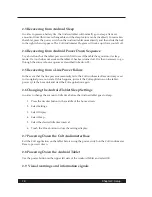
Page 19: ...e of AC power 100 240 VAC 50 60 Hz and turn on the power switch See Figure 2 2C Figure 2 2C Colt Audiometer Base power input Step 2 Power on Android Tablet Press the on button located on the side of t...

Page 20: ...Figure 2 2F Android tablet home screen Step 3 Open the Colt Audiometer Program Touch the Colt icon on the screen to open the Colt Audiometer Program See Figure 2 2G Figure 2 2G Colt Audiometer Icon Fi...

Page 21: ...udiometer Program Tone Screen Test the control by pressing the Stimulus button on either the right or left channels A tone will be heard in the monitor headset If the Colt is equipped with the Tactile...

Page 22: ...from a Line Power Failure In the event that the line power momentarily fails the Colt Audiometer Base unit may reset to its original power on state If this happens just exit the Colt application on t...

Page 23: ...tooth LED blue steady state blue Bluetooth communication is active blinking blue Bluetooth communication has been lost 2 9 2 Android Tablet Signals Two forms of indicators occur with the tablet Backgr...

Page 24: ......

Page 25: ...powered up the Colt starts operation in the tone screen If the Colt is equipped with the tactile option then knobs are placed on the front panel that can control the frequency and amplitude of the co...

Page 26: ...big screen that can be used for illustration of the test results to the patient Appendix B describes how this display can be used 3 1 Audiogram Tone Screen 3 1 1 Using a Tone Input You can use a tone...

Page 27: ...he bottom of the display three horizontal lines select Preferences and choose Dual Frequency This will add a second frequency slider one for each channel If the output is set to a hearing level that e...

Page 28: ...r option cannot be used when using masking See Section 3 1 1 for instructions on how to change the dual frequency selection 3 1 3 Changing the Output Selection Audiometric testing can be performed usi...

Page 29: ...the patient response switch is accepted after stimulus presentation is controlled by the preference setting See chapter 4 patient response time window and can be set to be from 0 to 2 seconds If addit...

Page 30: ...nnel is displayed and operated on the right side of the audiometer If you wish to temporarily reverse this so that the right and left channels are switched use the Output Reverse button This may be pa...

Page 31: ...the patient s test data directly to the computer 3 1 14 Reference This section contains a short description of each button in the Tone screen Patient Contains the patient ID number User Name of the p...

Page 32: ...nnel Frequency Change the frequency of the tone and any narrow band noise Save Used for saving the audiometric test data to the Android tablet Send Used for sending an audiogram to a connected compute...

Page 33: ...e REVERSE tab for the test channel Leave the stimulus in the other channel off Touch the PULSE tab to enable the action Adjust the level frequency and the desired dB resolution 1 2 or 5 see section 3...

Page 34: ...le 2 Choose IntFile1 for the Left and Right Channel Inputs 3 Choose the Audiometric Speech Test in the folder selection at the top of the Speech screen See Figure 3 2 1 Figure 3 2 1 Folder and track s...

Page 35: ...he Tracking button to control both Hearing Level sliders simultaneously Use the 10 dB Boost button to increase the maximum to 120 dB HL on the Hearing Level slider s scale See Section 3 1 8 Use the dB...

Page 36: ...creen controls to their default settings 3 2 6 Aided button The Aided button is used to indicate that the test was performed with a hearing aid 3 2 7 Save button Pressing the Save button will store th...

Page 37: ...Frye Electronics FONIX COLT Audiometer 31 SRT Speech Reception Threshold MCL Most comfortable level UCL Uncomfortable level SDS Speech discrimination Score...

Page 38: ......

Page 39: ...ttom of the main screen Then touch Preferences When finished with the menu touch the tablet s return button at the far left hand bottom of the screen The Preferences Menu list Set talk forward as togg...

Page 40: ...to operate with different frequencies on the two channels Setting this check box adjusts operation to allow two frequencies to be presented simultane ously An additional frequency slider is shown on...

Page 41: ...is option is chosen indicat ing that the communication between tablet and base unit is not functional Patient Response Window Normally it is desirable to allow for the patient response switch to be ac...

Page 42: ......

Page 43: ...or Estimating the Required 2cc Coupler Full on Gain and Response 1 Obtain a rough estimate of the patient s Most Comfortable Level MCL for speech using the Off setting of the Hearing Aid Simulator Cla...

Page 44: ...Hearing Aid Simulator While presenting speech materials or monitored live voice as close as possible to 0 VU raise and lower the Hearing Level dial until the patient indicates that the speech is at a...

Page 45: ...ropriate number in Table 5 2 from the Hearing Level dial setting to get the suggested full on gain or look up the suggested full on gain in Table 5 1 Table 5 2 Selecting Full on Gain For this setting...

Page 46: ...f the test ear side only until maximum clarity is achieved This adjustment changes the level of the high frequencies while maintaining a constant SPL for the lower frequencies as Figure 5 2 1 on the n...

Page 47: ...his level For speech tests of comfort discomfort the measured UCL LDL or HCL can roughly be converted to 2cc coupler SPL by adding 15 dB to the HL level you do not want the hearing aid to exceed Choos...

Page 48: ......

Page 49: ...ns the following ColtToneLast csv ColtSpeechLast csv ColtTone patient ID csv ColtSpeech patient ID csv The Colt audiometer starts up with pure tone and speech screens settings with data results as rec...

Page 50: ...the Colt audiometer A typical file name COLTAudiometer V2 00B apk A1 3 ColtDocuments Contains the Colt operator s manual and its index ColtOpManual index ColtOpManual pdf A1 4 Audio Audio contains th...

Page 51: ...and the Windows computer Place the tablet in its home mode of operation Different tablets employ different ways to allow the com puter to connect A3 1 ACER tablet For the Acer just plug the supplied...

Page 52: ......

Page 53: ...area of the graph for the tone you want to pres ent When the tone is being presented the graph background will turn green indicating that the tone is being presented For safety reasons tones at or ab...

Page 54: ...48 Appendix B Big Graph Screen B 2 Both Ear display...

Page 55: ...Colt If you have a Google Account the Colt can send a copy of the current screen to your Google account or send it to a printer if you have it configured to accept Google Cloud printing To print a scr...

Page 56: ......

Page 57: ...tor And the six Speech Volume Controls Left Microphone Right Microphone IntFile1 IntFile2 External1 and External2 To change the amount of gain a volume control has available press and hold the volume...

Page 58: ...press and hold the Speech volume control for longer than two seconds The calibraton dialog for the selected control will appear allowing you to change the overall gain To change the Left Microphone v...

Page 59: ...tion is used for the right channel Input You only need to change the calibration for one of the channels Patient Response Switch Tone Volume When the Patient Response Switch is pressed a Tone is prese...

Page 60: ......

Page 61: ...Frye Electronics FONIX COLT Hearing Evaluator 55 Appendix E Colt Manual The Colt Operators Manual is available on the tablet To see the manual press the menu button then the Help icon on the menu bar...

Page 62: ......

Page 63: ...support for help you may be asked for certain information about your Colt such as serial number and software version number The informatin is available by pressing the menu button then pressing the A...

Page 64: ......

Page 65: ...nhance the communication of the Tablet with the Colt base unit Choose the appropriate tablet from the list below and follow instructions 1 Acer tablet Model number A200 page 60 62 2 Acer tablet Model...

Page 66: ...roid Version 4 0 Turning off the WIFI The WIFI must be turned off to prevent interrupting the operations of the Tablet by searching for networks and updates To turn the WIFI off do the following 1 Fro...

Page 67: ...N turn it OFF by swiping the ON button to the left Changing the Bluetooth Visibility Time Out Follow the instruction bellow to change the visibility timeout 1 On the same screen select Bluetooth 2 If...

Page 68: ...uetooth Instructions 3 At the top right locate three dots Click on them From the drop down menu select Visibility Timeout 4 From that window select 2 Minutes 5 To exit from settings click the arrow on...

Page 69: ...Turning off the WIFI The WIFI must be turned off to prevent interrupting the operations of the Tablet by searching for networks and updates To turn the WIFI off do the following 1 From Home screen ta...

Page 70: ...let Wifi and Bluetooth Instructions 4 Now you can exit the Settings by tapping on the arrow shown in the bottom center twice Bluetooth Visibility Time Out The Bluetooth visibility for this tablet is t...

Page 71: ...ion 4 4 Turning off the WIFI The WIFI must be turned off to prevent interrupting the operations of the Tablet by searching for networks and updates To turn the WIFI off do the following 1 From Home sc...

Page 72: ...uetooth Visibility Time Out Follow the instruction bellow to change the visibility timeout 1 From home screen go to Settings 2 If the Bluetooth is OFF turn it ON by swiping the button to the right 3 C...

Page 73: ...tronics FONIX COLT Hearing Evaluator 67 5 From the drop down menu select Visibility Timeout 6 From that window select 2 Minutes 7 To exit from settings click the arrow on the bottom center of the scre...

Page 74: ...d Version 4 2 2 Turning off the WIFI The WIFI must be turned off to prevent interrupting the operations of the Tablet by searching for networks and updates To turn the WIFI off do the following 1 From...

Page 75: ...y timeout 1 From same screen as before select Bluetooth 2 If the Bluetooth is OFF turn it ON by swiping the button to the right 3 At the top right locate three dots Click on them From the drop down me...

Page 76: ......

Reviews: