


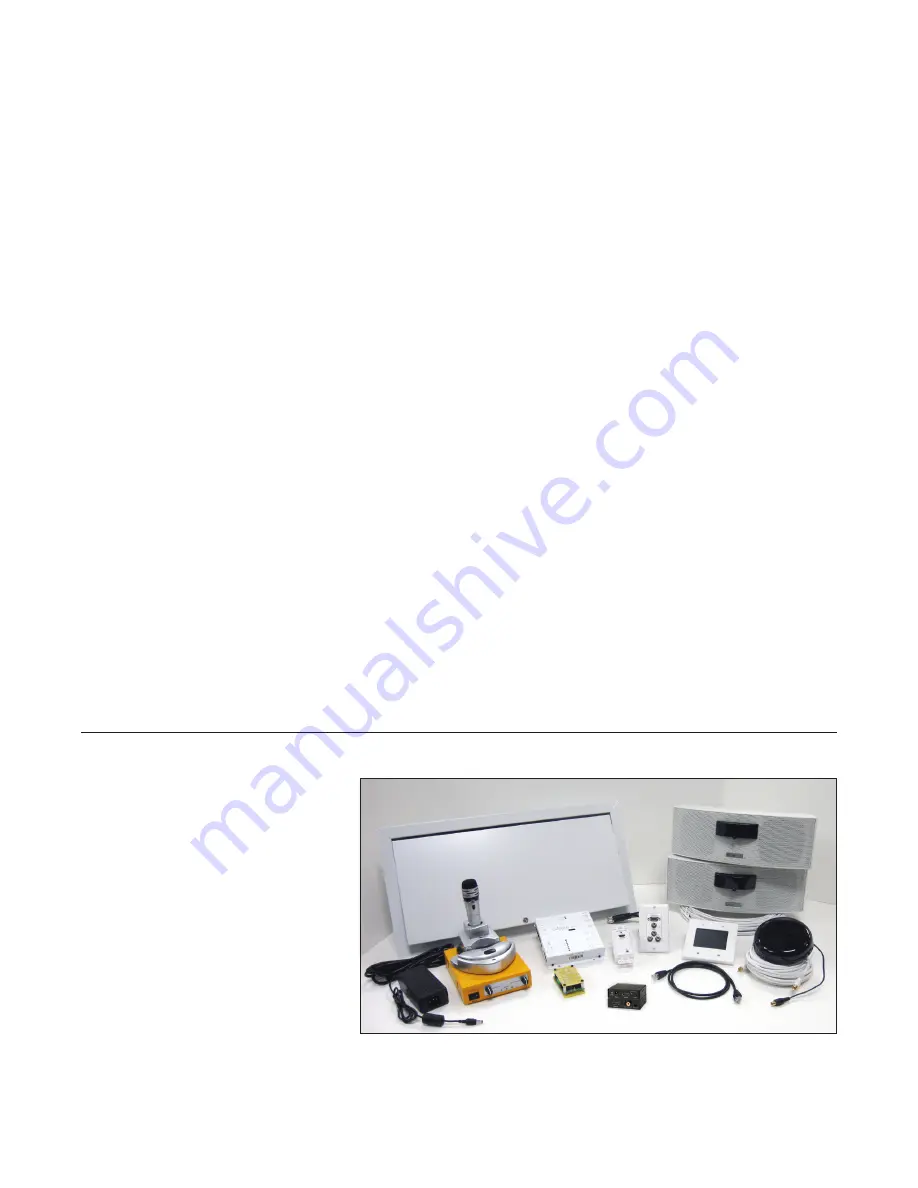
FrontRow ezRoom Installation
Introduction
To install a Frontrow ezRoom you will be following these general installation steps. They do not necessarily need to be in the
order below, rather this is meant as a guide for estimating installation time and effort. These steps assume that the projector is
already mounted, if not then the projector installation time and effort needs to be factored in.
The general scope of work required to install the grant room:
• Identify the ezRoom parts, make sure you have everything that is needed.
• Apply power to the ezRoom and load the CB6000 config file, adjust the CM3000 serial port Baud rate to match the
projector if necessary.
Note: If using a CB2000, follow the same instructions as you would for setting up and configuring
the CB6000 except use the CB2000 or CB2050 configuration files, and of course adjust the holes you cut for the control
panel accordingly. The complete CB6000 and CB2000 installation guides are also available on the web site.
• Adjust the CB6000 and CM3000 IP addresses and network settings to those provided by the schools IT department.
• Make sure that the Macro Definition setting of the CB6000 is targeted to the IP address of the CM3000.
• Install the Encore software onto the teacher’s desktop (if the computer is accessible).
• Physical installation:
1.
Cut two dual gang holes, one for the CB6000 and one for the AV wall plates.
2.
Pull cables to their destinations.
3.
Mount the CB6000 and AV wall plates.
4.
Install the ceiling speakers (in some installations these may be wall mounted).
5.
Mount the ezRoom (typically located near the projector).
6.
Mount the IR dome sensor (near the center of the room with no line-of-site obstructions to the teachers microphone).
7.
Attach cables and plug in the ezRoom AC power cord.
8.
Test the room.
FrontRow ezRoom with wall-mount speakers
Step 1: Preparation
•
Gather documents and configuration
files from Frontrow tech services, make
sure you have these available while
installing.
• Bring a laptop with the normal
installation tools and equipment.
• Have available the technical manual
of the projector that will be controlled.
Even if the configuration file has
already been created, you will need to
know the Baud rate of the projectors
serial port.
• It is also useful to have the remote
control of the projector available in
case you need to navigate through
the menus.
• Load the project configuration file into the CB6000 and make adjustments to the CM3000 as necessary.
1


