Frontline Technical Support: Phone +1-434-984-4500 or email [email protected]
5 Selecting a Data Capture Method
Now that the devices are on and the ComProbe 802.11 configured, the next step is to
run the ComProbe software and select the data capture method.
Open (double click on) "Frontline ComProbe Protocol Analysis System" from the Start
menu or from the “Frontline ComProbe Protocol Analysis System [version #] “ desktop
folder. Ensure that you have selected the latest ComProbe software if you have
multiple versions installed.
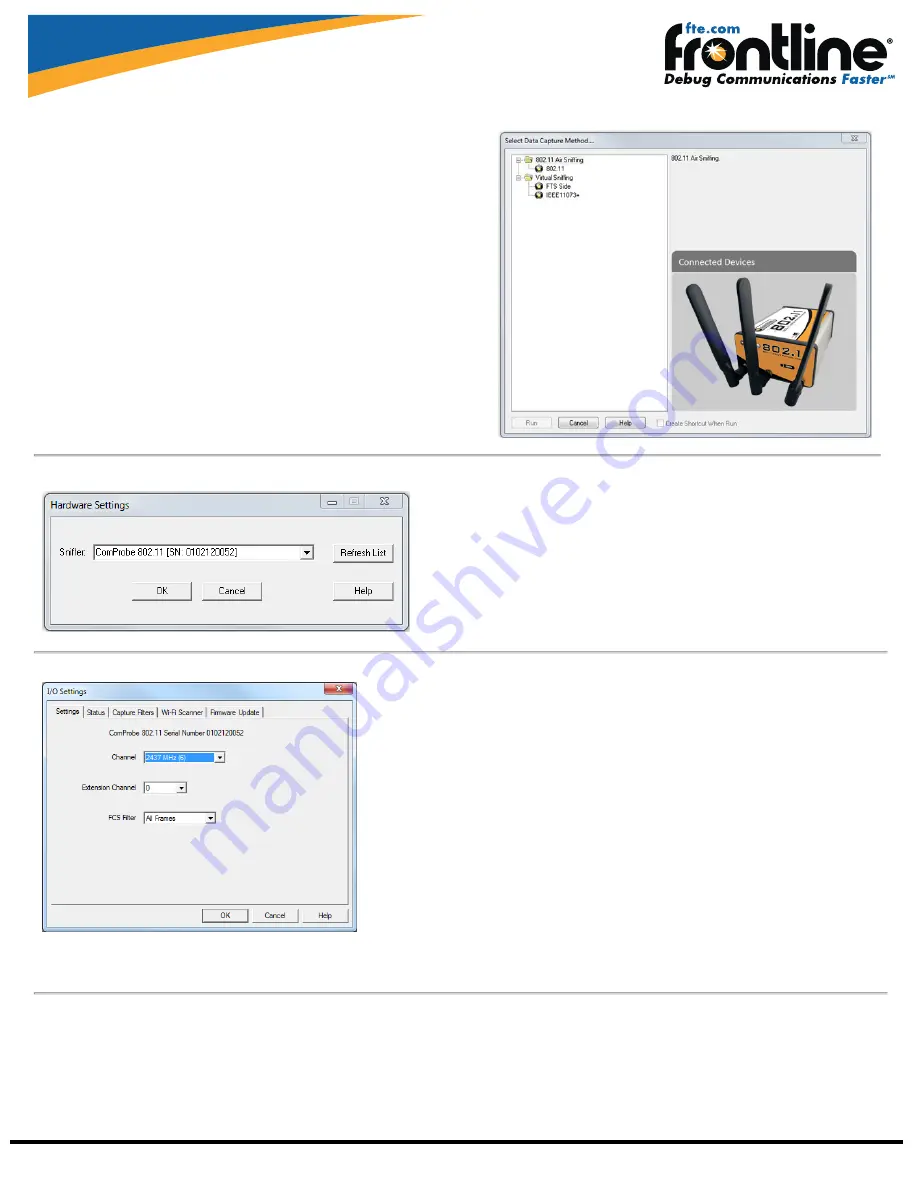
ComProbe software detects the hardware you have plugged in and automatically
presents the appropriate shortcuts. If you have just a ComProbe 802.11 plugged in,
you’ll see only the
Virtual Sniffing
and
802.11 Air Sniffing
options presented:
1.
Select
802.11
.
2.
Click on the
Run
button.
ComProbe software will open with the
Control
Window .
6 Hardware Settings
From the
Control Window
, select
Hardware Settings
from the
Options
menu.
Verify that your ComProbe 802.11 appears in the
Sniffer
field. If the 802.11 does not
appear then click on the
Refresh List
button.
Click on the
OK
button.
7 IO Settings
From the
Control Window
, select
I/O Settings
from the
Options
menu.
Channel
- Select the channel you wan to capture from the drop-down.
Extension Channel
- Allows you to extend the range of channels available
0 = Standard 1-14 Wi-Fi channels
-1 = Expanded channels below the standard range
+1 = Expanded channels above the standard range
FCS Filter
- The Frame Check Sequence (FCS) filter selects whether or not frames with
invalid FCS should be captured. Options are
All Frames
,
Valid Frames only
, and
Invalid
Frames only
.
These settings are sufficient to begin a capture session. Additional I/O settings tabs provide
refined capture options beyond these fundamental settings. Refer to the ComProbe User
Manual provided with the installation package or on FTE.com.


