


64
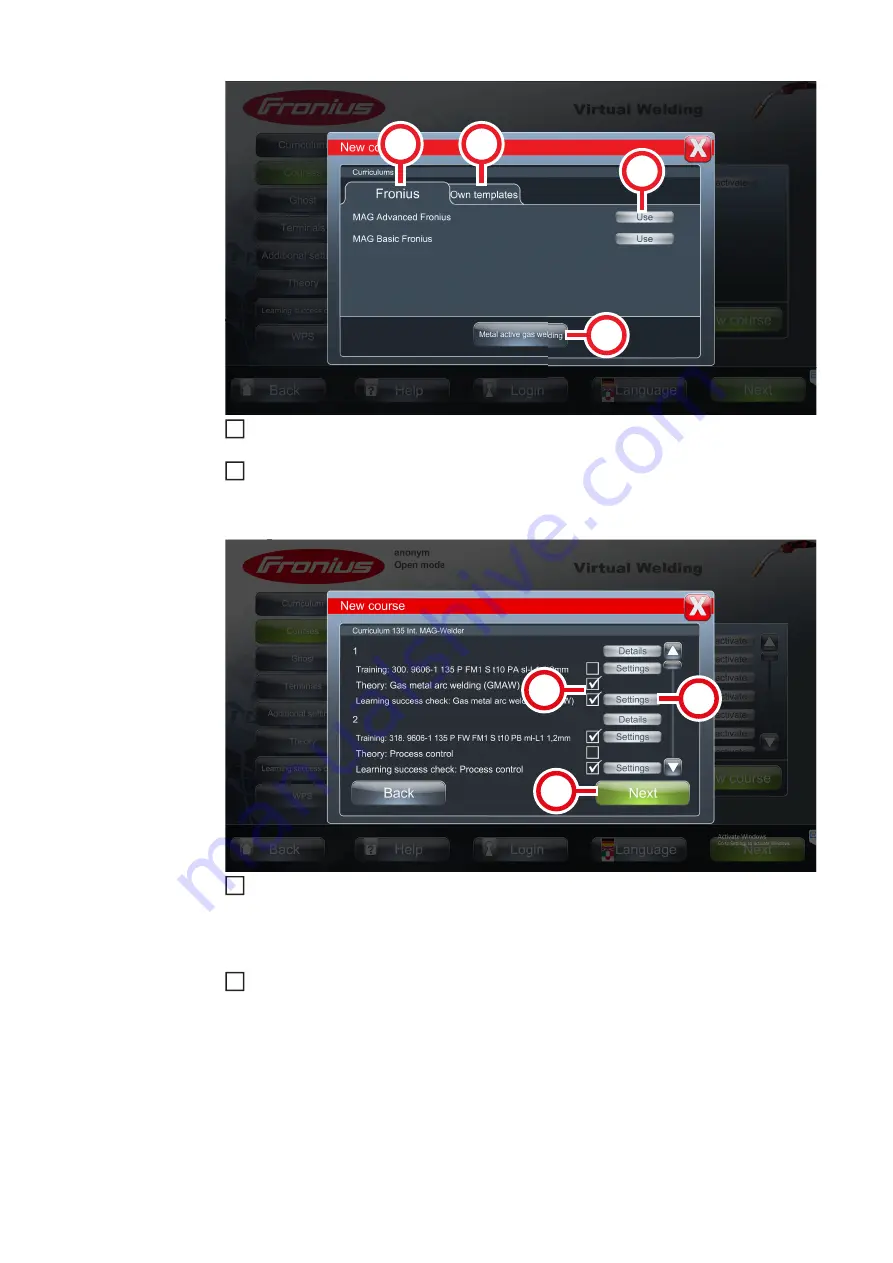
Make sure the correct welding process is selected
-
If necessary, select the button (6) to change the welding process
Select a curriculum to use as the basis for the course. For example (9)
-
Fronius curricula are displayed under the tab (7)
-
Self-created curricula are shown under the tab (8)
Select the content you want to add to the course (10)
-
You can use the settings button (11) to
-
Disable tasks in the curriculum
-
Set the acceptable deviations of the tasks
-
Set the acceptable deviations and time limits during the knowledge check
Select button (12)
(6)
(7)
(8)
(9)
6
7
(10)
(11)
(12)
8
9
Summary of Contents for Virtual Welding 2.0
Page 2: ...2...
Page 6: ...6...
Page 13: ...General information...
Page 14: ......
Page 20: ...20 Robotics function package MMA function package...
Page 21: ...Operating controls connections and mechanical components...
Page 22: ......
Page 28: ...28 2 Ventilation openings at the rear of the device 2 2 2...
Page 29: ...Installation...
Page 30: ......
Page 34: ...34 Top of StandUp Terminal side view 2 mounting bracket 3 screws with washers 2 3 3 3 3 2...
Page 45: ...Commissioning...
Page 46: ......
Page 69: ...Ghost...
Page 70: ......
Page 72: ...72 Use the arrow keys to make the desired settings Select button 4 Select button 5 4 4 5 5 6...
Page 74: ...74...
Page 75: ...Available modes on the Virtual Weld ing system...
Page 76: ......
Page 84: ...84...
Page 85: ...Calibration...
Page 86: ......
Page 90: ...90 Select tab 3 Select button 4 Follow the instructions on the touch screen glasses 4 5 6...
Page 92: ...92 Follow the instructions on the touch screen 6...
Page 94: ...94 Follow the on screen instructions 6...
Page 95: ...Other settings...
Page 96: ......
Page 104: ...104...
Page 105: ...Setup Menu...
Page 106: ......
Page 127: ...127 EN US Make the desired settings Select button 2 2 3 4...
Page 128: ...128...
Page 129: ...Troubleshooting maintenance and disposal...
Page 130: ......
Page 135: ...Update...
Page 136: ......
Page 138: ...138 Use button 3 to select the iso file that is located in the update folder 3 VWUPDATE 10...
Page 139: ...139 EN US Select GPT with button 4 4 VWUPDATE 11...
Page 141: ...141 EN US Enter VWUPDATE in field 6 6 VWUPDATE 13...
Page 143: ...143 EN US Select Checkbox 9 and 10 VWUPDATE 9 10 15...
Page 144: ...144 Select button 11 VWUPDATE 11 16...
Page 149: ...Technical data...
Page 150: ......


