background image

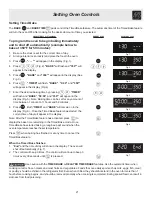
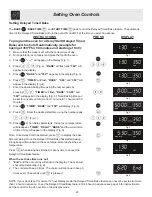
Stopping or Interrupting a Self-Cleaning cycle:

If it becomes necessary to stop or interrupt a Self-Cleaning cycle
due to excessive smoke or fire in the oven:

1.

Press 

.

2.

Once the oven has cooled down for approximately 1 HOUR and
the "DOOR LOCKED" icon is no longer displayed,the oven door
can then be opened (Fig. 7).

Fig.7

When the Self-Clean cycle is done:

1.

The time of day,"DOOR LOCKED" and "CLEAN" icon will remain
in the display.

2.

Once the oven has cooled down for approximately 1 HOUR, and
the "DOOR LOCKED"  icon is no longer displayed, the oven
door can then be opened.

IMPORTANT NOTES when using the Self-Clean feature:

1. The Self-Clean feature will not operate whenever a radiant surface remains ON.

2. A Self-Clean cycle cannot be started if Oven Lockout feature is active.

3. If a Self-Cleaning-Cycle has started but not finished and a power failure occurs, the appliance may not have thoroughly

cleaned. Once power is restored, the Cooktop will remain locked. To unlock the cooktop press and hold the 

 pad for 3

seconds. The red cooktop lock icon will disappear from the display.  Then set for another Self-Clean cycle to finish.

4. If your clock is set for normal 12 hour display mode the Delay Self-Clean cycle can never be set to start more than 12
hours in advance. To set for a delayed Self-Cleaning cycle 12-24 hours in advance see page 16 for instructions to set the
control for the 24 hour time of day display mode.

INSTRUCTIONS

PRESS

DISPLAY

Self-Cleaning

33

Summary of Contents for PLEFZ398ECE

Page 1: ... Oven Controls 6 Setting Surface Controls 7 12 Surface Cooking 13 Warming Drawer Controls 14 Control Pad Features 15 Setting Oven Controls 16 30 Self Cleaning 31 33 Adjusting Oven Temperature 34 General Care Cleaning 34 37 Before You Call Solutions to Common Problems 38 39 Warranty Back Page Visit the Frigidaire Web Site at http www frigidaire com Questions 1 800 944 9044 United States 1 800 668 4...

Page 2: ...ce possible Your satisfaction is our number one priority We know you ll enjoy your new range and Thank You for choosing our product We hope you consider us for future purchases PLEASE CAREFULLY READ AND SAVE THESE INSTRUCTIONS This Use Care Manual provides specific operating instructions for your model Use your range only as instructed in this manual These instructions are not meant to cover every...

Page 3: ...lone Children should not be left alone or unattended in the area where appliance is in use They should never be allowed to sit or stand on any part of the appliance DONOTTOUCHSURFACEUNITS AREASNEARTHESE UNITS HEATINGELEMENTSORINTERIORSURFACES OFTHEOVEN Bothsurfaceunitsandovenheatingelements may be hot even though they are dark in color Areas near surfaceunitsmaybecomehotenoughtocauseburns During a...

Page 4: ...lders and grasp the rack with both hands to reposition Do not let potholders contact the hot heating elements in the oven Remove all utensils from the rack before moving Do not use the broiler pan without its insert The broiler pan and its insert allow dripping fat to drain and be kept away from the high heat of the broiler Do not cover the broiler insert with aluminum foil Exposed fat and grease ...

Page 5: ...g Oven interior 14 Self Clean Door Latch 15 Convection Fan Cover 16 Adjustable Interior Oven Rack s 17 Large 1 piece Oven Door Handle styles colors vary 18 Full width Oven Door with Window styles colors vary 19 Storage Drawer with Integrated Handle some models or Warming Drawer with Handle some models 20 Easy to clean upswept Cooktop 21 Ceramic Smoothtop elements styles color will vary 22 Left Fro...

Page 6: ...g 3 Correct Roasting Shelf position Fig 4 For best air circulation and baking results allow 2 4 5 10 cm around the cookware for proper air circulation and be sure pans and cookware do not touch each other the oven door sides or back of the oven cavity The hot air must be able to circulate around the pans and cookware in the oven for even heat to reach around the food Air Circulation in the Oven Ba...

Page 7: ...ins enough heat to provide a uniform and consistent heat during the off cycle For efficient cooking turn off the element several minutes before cooking is complete This will allow residual heat to complete the cooking process Your range is equipped with radiant surface burners with different wattage ratings The ability to heat food quicker and in larger volumes increases as the element wattage inc...

Page 8: ...surface element positions on the cooktop These settings work the same way as normal knob setting indicators work except the settings are displayed in digital windows Figs 1 thru 4 The available ESEC Display Settings The ESEC control provides various heat levels from Hi Fig 2 to Lo Fig 4 and OFF Fig 1 Use the chart Fig 5 to determine the correct setting for the kind of food you are preparing The Si...

Page 9: ...g has completed turn the surface control knob to OFF before removing the cookware Note The HE message will appear after turning the control knob to OFF if the cooktop is still hot and will remain on until the heating surface area has cooled sufficiently Note See page 8 Fig 5 for recommended control settings To Operate the Single Elements some models ESEC Lockout Feature The Self Clean feature will...

Page 10: ... will heat The symbol shown in Fig 4 indicates that both inner and outer coils will heat You may switch from either coil setting at any time during cooking The Bridge Radiant Element some models Some ceramic cooktops are equipped with a BRIDGE surface element located at the left front and middle See Fig 10 positions The Bridge can be used when cooking with rectangular like a griddle or oval shaped...

Page 11: ...indicates the cookware is too small Please note that not all cookware will fit the Bridge element correctly 4 When cooking has completed turn the surface control knob to OFF before removing the cookware The HE message will appear in the display after turning the control knob to OFF if the cooktop is still hot and will remain on until the radiant heating surface area has cooled sufficiently Note Se...

Page 12: ...sh in and turn the knob The On indicator light will come on See Figs 1 and 2 The temperatures are approximate and are designated by HI MED and LO However the control can be set at any position between HI and LO for different levels ofheating Fig 1 2 When done turn the control to OFF The Warming Zone Hot surface indicator light will remain on until the Warming Zone cools to a moderate level See Fig...

Page 13: ...onductor however will retain heat very well Cooks evenly once cooking temperature is reached Not recommended for use on ceramic cooktops PORCELAIN ENAMEL on METAL Heating characteristics will vary depending on base material Porcelain enamel coating must be smooth to avoid scratching ceramic cooktops GLASS Slow heat conductor Not recommended for ceramic cooktop surfaces because it may scratch the g...

Page 14: ...ing Drawer control 1 Turn the knob to select the desired temperature setting 2 For best results preheat the drawer before adding food An empty drawer will preheat in approximately 15 minutes 3 When done turn the control to OFF Warming Drawer Temperature Selection Recommended Warming Drawer food settings are shown in Fig 3 If a particular food is not listed start with the MED setting If more crispn...

Page 15: ... the length of the baking time Minimum Maximum Control Pad Settings All of the features listed have minimum and maximum time or temperature settings that may be entered into the control An ENTRY acceptance beep will sound each time a control pad is touched the Oven Lockout pad is delayed by 3 seconds An ENTRY ERROR tone 3 short beeps will sound if the entry of the temperature or time is below the ...

Page 16: ...Changing between 12 or 24 hour time of day display 1 Press and hold for 6 seconds Fig 3 While holding the pad down the current time of day will remain and CLO will disappear from the display CONTINUE holding the pad until a beep is heard 2 The display will show either 12Hr Fig 5 or 24Hr Fig 6 3 Press to switch between the 12 and 24 hour time of day display The display will show either 12Hr Fig 5 o...

Page 17: ...he Kitchen Timer before the set time has run out Press The display will return to the time of day for 6 seconds or Setting Continuous Bake or 12 Hour Energy Saving The TIMER ON OFF and CLEAN pads control the Continuous Bake or 12 Hour Energy Saving features The oven control has a factory preset built in 12 Hour Energy Saving feature that will shut off the oven if the oven control is left on for mo...

Page 18: ...2 2 The oven is again fully operational Setting Temperature Display Fahrenheit or Celsius The BROIL and CLEAN pads control the Fahrenheit or Celsius temperature display modes The oven control can be programmed to display temperatures in Fahrenheit or Celsius The oven has been preset at the factory to display in Fahrenheit To change display from Fahrenheit to Celsius or Celsius to Fahrenheit 1 To t...

Page 19: ... from normal sound operation to silent control operation 1 To tell if your range is set for normal or silent operation press and hold for 7 seconds 0 00 will appear and DELAY will flash in the display Fig 1 2 Press to switch between normal sound operation and silent operation mode The display will show either SP Fig 2 or Fig 3 If SP appears Fig 2 the control will operate with normal sounds and bee...

Page 20: ... the Bake feature at any time To change the Bake Temperature example changing from 350 to 425 F 1 After the oven has already been set to bake at 350 F and the oven temperature needs to be changed to 425 F press Fig 4 and will show in the display 2 Press Fig 5 BAKE flashes and 425 will appear in the display 3 Press BAKE and 425 will appear in the display See Fig 6 INSTRUCTIONS PRESS DISPLAY Setting...

Page 21: ...main on in the display Fig 6 Once the Timed Bake feature has started the current time of day will appear in the display Note After the Timed Bake feature has activated press to display the bake time remaining in the Timed Bake mode Once Timed Bake has started baking a long beep will sound when the oven temperature reaches the set temperature Press when baking has finished or at any time to cancel ...

Page 22: ...Press When Delay Start starts the set oven temperature will disappear TIMED DELAY BAKE and the current time of time of day will appear in the display Fig 8 Note Once Delay Start has started press to display the bake time remaining Once the Delayed Timed Bake has started baking a long beep will sound when the oven temperature reaches the set temperature Press when baking has finished or at any time...

Page 23: ...r 1 thick 6th 550 F 9 00 7 00 Well 5th 550 F 10 00 8 00 Well INSTRUCTIONS PRESS DISPLAY Should an oven fire occur leave the oven door closed and turn the oven OFF If the fire continues throw baking soda on the fire or use a fire extinguisher DO NOT put water or flour on the fire Flour may be explosive and water can cause a grease fire to spread and cause personal injury Use the following table for...

Page 24: ...n using Convection Bake with a single rack place oven rack in position 3 or 4 If cooking on multiple racks place the oven racks in positions 2 and 5 for 2 racks Place in positions 1 3 and 6 for 3 racks Refer to Fig 1 3 Cakes have better results when baked using the BAKE pad Setting Convection Bake The CONV BAKE pad controls the Convection Bake feature Use the Convection Bake feature when cooking s...

Page 25: ... NOT use the roasting rack when broiling 1 Place oven rack on bottom or next to the bottom rack position See Arranging Oven Racks in the Before Setting Oven Controls section 2 Place the insert in the broiler pan The roasting rack fits on the insert allowing the heated air to circulate under the food for even cooking and helps to increase browning on the underside Make sure the roasting rack is sec...

Page 26: ...e at any time Fig 1 Fig 2 Fig 3 Fig 4 Fig 5 To set the Convection Convert Feature The CONV CONVERT pad is used to automatically convert a standard baking recipe for convection baking When set properly this feature is designed to display the actual converted reduced temperature in display Convection Convert may ONLY be used with a Bake Timed Bake or a Delayed Timed Bake setting When used with a Tim...

Page 27: ...east 3 seconds or until a beep sounds The beep indicates that the recipe setting has been recorded for future recall The display will show 350 and BAKE See Fig 4 NOTE The oven will continue to bake unless is pressed To Begin Baking recalled setting example below recalling from the number 1 pad 1 Place the food in the oven 2 Press BAKE flashes and appears in the display See Fig 5 3 Within 25 second...

Page 28: ...t the clock is set with the correct time of day 2 Arrange the oven racks and place the food in the oven 3 Press will appear in the display Fig 1 4 Press Fig 2 BAKE will flash and 350 will appear in the display 5 Press The display will show 350 and BAKE The oven will turn ON and begin heating See Fig 3 6 If a Timed Bake or Delayed Timed Bake is needed then enter the time in this step If not skip th...

Page 29: ...n will shut off When power is returned the oven will not turn back on automatically The oven will remember that it is set for the Sabbath and the food may be safely removed from the oven while still in the Sabbath feature however the oven cannot be turned back on until after the Sabbath Holidays After the Sabbath observance turn OFF the Sabbath feature At the same time press and hold both the and ...

Page 30: ...cate glide lever on each side of drawer pull up on the left glide lever and push down on the right glide lever 5 Pull the Warming Drawer away from the range To Replace the Warming Drawer 1 Replace shield on the right glide of the drawer body 2 Pull the bearing glides to the front of the chassis glide See Fig 2 3 Align the glide on each side of the drawer with the glide slots on the range 4 Push th...

Page 31: ...ratures Remove oven racks See Removing Replacing Oven Racks under Before Setting Oven Controls If they are not removed during the Self Clean cycle their color will turn slightly blue the finish will be dull After the cycle is complete the oven has cooled rub the sides of the oven racks with wax paper or a cloth containing a small amount of salad oil this will make the racks glide easier into the r...

Page 32: ...ked icon will show in the display See Fig 1 Note 2 hours of Self Cleaning time may be choosen by pressing or 4 hours by pressing the at this time 3 Press The DOOR LOCKED icon will flash CLEAN Cooktop Lockout icon and the letters CLn will remain on in the display Fig 2 4 As soon as the control is set the motor driven oven door lock will begin to close automatically Once the door has been locked the...

Page 33: ...n feature will not operate whenever a radiant surface remains ON 2 A Self Clean cycle cannot be started if Oven Lockout feature is active 3 If a Self Cleaning Cycle has started but not finished and a power failure occurs the appliance may not have thoroughly cleaned Once power is restored the Cooktop will remain locked To unlock the cooktop press and hold the pad for 3 seconds The red cooktop lock...

Page 34: ...conds Fig 4 2 To decrease the temperature use the number pads to enter the desired change Example 30 F and then press Fig 5 The temperature may be decreased as much as 35 F 19 C 3 Press to accept the temperature change and the display will return to the time of day Fig 6 Press to reject the change if necessary INSTRUCTIONS PRESS DISPLAY Adjusting Your Oven Temperature The oven light bulb is locate...

Page 35: ...n Cooktop Surface Porcelain Enamel Broiler Pan Insert some models Door Liner Body Parts Oven Bottom Warming Drawer Liner some models How to Clean Surfaces Oven Racks Oven Door Remove Oven Racks See Removing Replacing Oven Racks under Before Setting Oven Controls Use a mild abrasive cleaner following the cleaner s recommendations Rinse with clean water let dry After cleaning the racks rub the sides...

Page 36: ...can chemically damage the ceramic glass surface Before cleaning the cooktop be sure the controls are turned to OFF and the cooktop is COOL If soils remain carefully scrape soils with a metal razor blade scraper holding scraper at a 30 degree angle to the surface Remove loosened soils with cooktop cleaning cream and buff surface clean IMPORTANT NOTE Damage to the ceramic glass cooktop may occur if ...

Page 37: ...inge locks on both left and right door hinges down from the oven frame completely towards the oven door See Fig 2 A tool such as a small flat blade screwdriver may be required 3 Firmly grasp both sides of oven door along the door sides Do not use the oven door handle See Fig 3 4 Close the door to the broil stop position the oven door will stop into this position just before fully closing 5 With th...

Page 38: ... Lightweight or warped pans used Use only flat evenly balanced medium or heavyweight cookware Flat pans heat better than warped pans Cookware materials and weight of the material affect heating Heavy and medium weight pans heat evenly Because lightweight pans heat unevenly foods may burn easily No power to the appliance Check steps under Entire Appliance Does Not Operate in this Before You Call ch...

Page 39: ... nylon brush and water or a nylon scrubber Be careful not to damage the oven gasket Excessive spillovers in oven Set Self Clean cycle for a longer cleaning time Excessive spillovers in oven This is normal especially for high oven temperatures pie spillovers or large amounts of grease on bottom of oven Wipe up excessive spillovers before starting cycle If flames or excessive smoke are present stop ...

Page 40: ...rvice companies or external causes such as abuse misuse inadequate power supply accidents fires or acts of God DISCLAIMER OF IMPLIED WARRANTIES LIMITATION OF REMEDIES CUSTOMER S SOLE AND EXCLUSIVE REMEDY UNDER THIS LIMITED WARRANTY SHALL BE PRODUCT REPAIR OR REPLACEMENT AS PROVIDED HEREIN CLAIMS BASED ON IMPLIED WARRANTIES INCLUDING WARRANTIES OF MERCHANTABILITY OR FITNESS FOR A PARTICULAR PURPOSE...

Reviews: