27
To clean burner caps
• Remove caps from burner heads after they have cooled.
• Clean heavy soils with a plastic scrubbing pad and
absorbent cloth.
• Thoroughly dry burner caps immediately following
cleaning including the bottom and inside of cap.
• Do not use abrasive cleaners. They can scratch
porcelain.
• Do not clean burner caps in the dishwasher.
To clean recessed and contoured areas of cooktop
Routinely clean the cooktop. Wipe with a clean, damp cloth
and wipe dry to avoid scratches. If a spill occurs on or in the
recessed or contoured areas, blot up spill with an absorbent
cloth. Rinse with a clean, damp cloth and wipe dry.
Cleaning the cooktop and surface burners
CAUTION
To avoid possible burns
DO NOT
attempt the cleaning
instructions provided below before turning OFF the
surface burners and provide sufficient time for the
cooktop and all cooktop parts to cool.
To prevent flare-ups and avoid creation of harmful
by-products,
do not
use the cooktop without all burner
caps properly installed to insure proper ignition and gas
flame size.
WARNING
To clean burner grates
• Clean when the grates are cool.
• Use nonabrasive plastic scrubbing pad and mild abrasive
cleanser.
• Food soils containing acids may affect the finish. Clean
immediately after the grates are cool.
• Thoroughly dry grates immediately following cleaning.
Always check for proper burner cap placement
before
operating any surface burner
. Also be sure and check
for correct burner cap placement after having removed
and replaced the burner caps for cleaning.
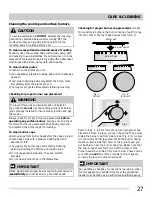
Checking for proper burner cap placement
IMPORTANT
When placing burner caps, be sure that all burner caps are
seated firmly
and rest level on top of burner heads.
On round style burners, the burner cap lip should fit snug
into the center of burner head and rest level (Fig. 1).
Fig. 1
Burner cap lip
Burner cap
Fig. 2
Correct
Burner head
Refer to Figs. 2 & 3 for correct and incorrect burner cap
placement. Once in place, you may check the fit by gently
sliding the burner cap from side to side (Fig. 4) to be sure
it is centered and firmly seated. When the burner cap lip
makes contact inside the center of the burner head you
will be able to hear the burner cap click. Please note that
the burner cap should NOT move off the center of the
burner head when sliding from side to side. Check and be
sure that all
oval
style (some models) burner caps are
correctly in place on oval burner heads.
Fig. 3
Incorrect
Fig.4
Checking for proper burner cap placement
(cont’d)
IMPORTANT
Any additions, changes or conversions required in order
for this appliance to satisfactorily meet the application
needs must be made by an authorized qualified Agency.
CARE & CLEANING

