background image

12

SETTING OVEN CONTROLS

To set Broil

1. Arrange the oven rack while oven is still cool. 

Position

the oven rack as needed.

2. Press 

broil

. " 

— — 

" will appear in display.

3. Press and hold the

or

 until the desired broil

setting level appears in the display. Press the

for 

HI

broil or the

for 

LO

 broil. Most foods may be broiled

at the 

HI

 broil setting. Select the 

LO

 broil setting to

avoid excess browning or drying of foods that should be

cooked to the well-done stage.

4.

For optimum results, preheat oven for 5 minutes

before adding food.

5. Place the insert on the broil pan (if equipped), then

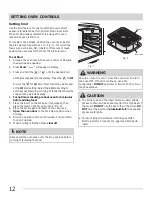
place the food on the broil pan insert (Fig. 2).

6. Place the broiler pan and insert on the oven rack.

7.

Open the oven door

 to the broil stop position when

broiling.

8. Broil on one side until food is browned. Turn and broil

food on 2nd side.

9. When broiling is finished press 

clear off

.

Use the broil feature to cook meats that require direct

exposure to radiant heat for optimum browning results.

When broiling always remember to arrange the oven

racks while oven is still cool.

Setting broil

Fig. 1

Fig. 2

Should an oven fire occur, close the oven door and turn

the oven OFF. If the fire continues, use a fire

extinguisher. 

DO NOT

 put water or flour on the fire. Flour

may be explosive.

The broiler pan and the insert (some models) allows

grease to drain and be kept away from the high heat of

the broiler. 

DO NOT

 use the pan without the insert. 

DO

NOT 

cover the insert with 

aluminum foil

; the exposed

grease could ignite.

To insure proper results when broiling use ONLY

Electrolux Home Products, Inc. approved broil pan &

insert.

NOTE

Always pull the oven rack out to the stop position before

turning or removing the food.

For medium done steaks, position the oven rack closer to

the broil element (positions 4 or 5; Fig. 1). For well-done

foods such as chicken, fish, lobster or thick cuts of meat,

position the oven rack further from the broil element.

Insert

Broil pan

CAUTION

WARNING

Summary of Contents for FFEF3011L W

Page 1: ...800 265 8352 Electric Range 316902210 Dec 2009 Important Safety Instructions 3 5 Before Setting Oven Controls 6 Before Setting Surface Controls 7 8 Setting Surface Controls Coil cooktop 9 Oven Control Functions 100 10 Setting Oven Controls 10 13 Care Cleaning 14 17 Before You Call 18 19 Major Appliance Warranty 20 ...

Page 2: ...nstructions to help you use and maintain your range properly If you received a damaged range immediately contact the dealer or builder that sold you the range Save time and money Check the section titled Before you call This section helps step you through some common problems that might occur If you do need service help is only a phone call away Call Frigidaire Customer Services at 1 800 944 9044 ...

Page 3: ...afety messages that follow this symbol to avoid possible injury or death IMPORTANT CAUTION indicates a potentially hazardous situation which if not avoided may result in minor or moderate injury CAUTION IMPORTANT indicates installation operation maintenance or valuable information that is not hazard related Definitions Important Safety Instructions WARNING All ranges can tip Injury to persons coul...

Page 4: ... oven vent is located under the left rear surface element if your model is equipped with coil elements The oven vent is located below the backguard for models equipped with ceramic glass cook tops Touching the surfaces in this area when the oven is operating may cause severe burns Also do not place plastic or heat sensitive items on or near the oven vent These items could melt or ignite Placement ...

Page 5: ...nsils are suitable for cook top service without breaking due to the sudden change in temperature Check the manufacturer s recommendations for cook top use When flaming foods under a ventilating hood turn the fan on IMPORTANTINSTRUCTIONSFORCLEANING YOUR RANGE Clean the range regularly to keep all parts free of grease that could catch fire Pay particular attention to the area around each surface ele...

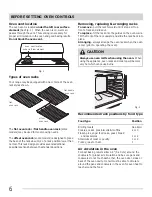
Page 6: ...est baking results allow 2 4 5 10 cm around the cookware for proper air circulation and be sure pans and cookware do not touch each other the oven door sides or back of the oven cavity Hot air must be able to circulate around the pans and cookware in the oven for even heat to reach around the food Fig 2 Removing replacing arranging racks To remove pull the rack forward until it stops Lift up front...

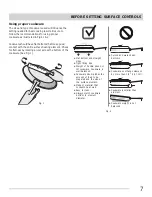
Page 7: ...across the bottom of the cookware See Fig 1 Fig 2 Fig 1 BEFORE SETTING SURFACE CONTROLS Flat bottom and straight sides Tight fitting lids Weight of handle does not tilt cookware Cookware is well balanced Cookware size matches the amount of food to be prepared and the size of the surface element Made of material that conducts heat well Easy to clean Always match cookware bottom to element diameter ...

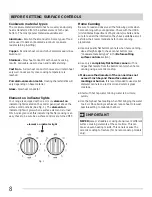
Page 8: ...e turned OFF Home Canning Be sure to read and observe all the following points when home canning with your appliance Check with the USDA United States Department of Agriculture website and be sure to read all the information they have available as well as follow their recommendations for home canning procedures Use only quality flat bottom canners when home canning Use a straight edge to check can...

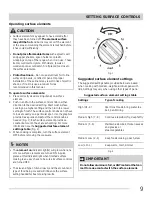
Page 9: ...t and burns may occur if the element or the area surrounding the element is touched before it has cooled sufficiently Do not place flammable items such as plastic salt and pepper shakers spoon holders or plastic wrappings on top of the range when it is in use These items could melt or ignite Potholders towels or wooden spoons could catch fire if placed too close to the surface elements Protective ...

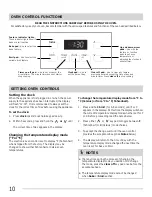
Page 10: ...plugged in or when the power supply to the appliance has been interrupted the display will flash 12 00 It is recommended to always set the clock for the correct time of day before using the appliance To set the clock 1 Press clock once do not hold key pad down 2 Within 5 seconds press and hold the or until the correct time of day appears in the display SETTING OVEN CONTROLS To change the temperatu...

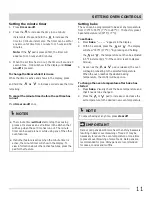
Page 11: ... in the display To view information about other active features press the pad for that feature Setting bake The oven can be programmed to bake at any temperature from 170 F to 550 F 77 C to 287 C The factory preset bake temperature is 350 F 177 C To set bake 1 Press bake appears in the display 2 Within 5 seconds press the or The display will show 350 F 177 C By pressing and holding the or the temp...

Page 12: ...roil feature to cook meats that require direct exposure to radiant heat for optimum browning results When broiling always remember to arrange the oven racks while oven is still cool Setting broil Fig 1 Fig 2 Should an oven fire occur close the oven door and turn the oven OFF If the fire continues use a fire extinguisher DO NOT put water or flour on the fire Flour may be explosive The broiler pan a...

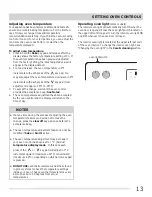
Page 13: ...oven These oven thermometers may vary as much as 20 to 40 degrees from actual temperatures NOTES To adjust oven temperature 1 Press hold the bake key pad and release after the display shows the factory temperature setting of 00 If the oven temperature has been previously adjusted from the factory setting the latest adjusted value will appear in the display instead 2 You may increase the oven tempe...

Page 14: ...raut fruit juices or pie filling to remain on the surface they may cause a dull spot even after cleaning The oven interior is porcelain coated and is safe to clean using oven cleaners following manufacturer s instructions After cleaning remove any oven cleaner or the porcelain may become damaged during future heating Do not spray oven cleaner on any electrical controls or switches Do not spray or ...

Page 15: ...soaking the drip bowls for about 20 minutes in a lightly diluted liquid cleanser or a solution of ammonia and water 1 2 cup ammonia to 1 gallon of water A nylon scrubber may be used after soaking DO NOT use abrasive cleaners or steel wool they will scratch the surface Always rinse with clean water and polish dry with a soft cloth To raise the cooktop for cleaning 1 Grasp the sides and lift from th...

Page 16: ... at the upper left rear of the oven cavity To replace the oven light bulb 1 Turn electrical power off at the main source or unplug the range 2 Replace bulb with a new 40 watt appliance bulb 3 Turn power back on again at the main source or plug the appliance back in 4 The clock will then need to be reset To reset see Setting the clock in this Use Care Guide For models that have a visible lower bake...

Page 17: ...s fall out of the hinge holes the hinge s may snap back against the oven frame and could pinch fingers or chip the porcelain finish on the oven front frame 2 Hold door at the sides near the top while resting the lower front of door on your knee Insert the door channels at the bottom of door over the door hinges See Fig 3 3 Allow the door to slide down into the door hinges evenly at the same 45 deg...

Page 18: ...o tightly Contact builder or installer to make appliance accessible Carpet interferes with appliance Provide sufficient space so appliance can be lifted over carpet Surface element too hot or not hot enough Incorrect control setting Be sure the correct control is ON for the element that you are attempting to use Problem Solution Appliance is not level Be sure floor is level strong stable enough to...

Page 19: ...the Setting Oven Controls section Oven control panel beeps displays any F code error for example F30 Oven control has detected a fault or error condition Press clear off to clear the display stop beeping Try the bake or broil feature again If the F code error repeats remove power from appliance wait 5 minutes and then repower appliance and set clock for the time of day Try the bake or broil featur...

Page 20: ...ed from persons other than authorized service companies or external causes such as abuse misuse inadequate power supply accidents fires or acts of God CUSTOMER S SOLE AND EXCLUSIVE REMEDY UNDER THIS LIMITED WARRANTY SHALL BE PRODUCT REPAIR OR REPLACEMENT AS PROVIDED HEREIN CLAIMS BASED ON IMPLIED WARRANTIES INCLUDING WARRANTIES OF MERCHANTABILITY OR FITNESS FOR A PARTICULAR PURPOSE ARE LIMITED TO ...

Reviews: