background image

9

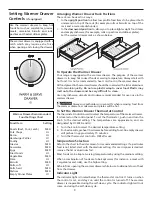
Before Setting Oven

Controls

REMOVING & REPLACING OVEN

RACKS

To remove

, pull the rack forward until

it stops. Lift up front of rack and slide

out. 

To replace

, fit the rack onto the

guides on the oven walls. Tilt the front

of the rack upward and slide the rack

back into place.

ARRANGING OVEN RACKS WITH 5

RACK POSITIONS

To bake on 1 rack

, place the rack on

position 3 or 4. 

To bake on 2 racks,

place the racks on positions 2 and 4.

Arranging Oven Racks

ALWAYS  ARRANGE  OVEN  RACKS  WHEN  THE  OVEN  IS  COOL  (PRIOR  TO

OPERATING THE OVEN). 

Always use oven mitts when using the oven.

Oven Vent Location

The  oven  vent  is  located 

below  the

backguard

. When the oven is on, warm

air is released through the vents. This

venting  is  necessary  for  proper  air

circulation in the oven and good baking

results.

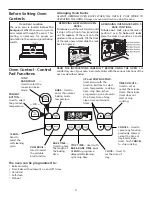
Oven Control - Control

Pad Functions

STOP TIME

— Used with

BAKE, BAKE TIME, and

CLEAN

 to program a

delayedself-cleaning

cycle stop time.

READ  THE  INSTRUCTIONS  CAREFULLY  BEFORE  USING  THE  OVEN. 

For

satisfactory use of your oven, become familiar with the various functions of the

oven as described below.

UP and DOWN ARROW

—

Used along with the

function buttons to select

oven temperature, cooking

time, stop time (when

programming an automatic

stop time), time of day,

clean time and minute

timer.

TIMER ON/OFF

—

Used to set or

cancel the minute

timer. The minute

timer does not

start or stop

cooking.

VARI BROIL

—

Used to select

the variable

broil function.

PREHEAT

BUTTON

—

Used to select

the preheat

temperature.

BAKE

—Used to

enter the normal

baking mode

temperature.

The oven can be programmed to:

• Bake normally

• Time bake with automatic on and off times

• Vari Broil

• Self-clean

• Preheat

BAKE TIME

—

Used to enter

the length of

the baking

time.

CLEAN

—

Used to

select the

self-cleaning

cycle.

CANCEL

— Used to

cancel any function

previously entered

except the time of

day and minute

timer. Push 

CANCEL

to stop cooking.

CLOCK

— Used to

set the time of

day.

CONV.

BAKE/ROAST

—

Used to select the

convection bake

mode.

— OR —

Summary of Contents for FEF389WJCC

Page 1: ...equipped 12 Timed Baking 13 14 Broil 15 Self Cleaning Oven 16 17 General Cleaning 18 20 Customizing Your Oven Performance 21 Changing Cooktop and or Oven Lights 21 Avoid Service Checklist 22 23 Warranty 24 OWNER S GUIDE Ceramic Glass Cooktop Radiant Surface Elements Electronic Oven Control ES IV Self Cleaning Oven Feature READ AND SAVE THESE INSTRUCTIONS ELECTRIC RANGE This Owner s Guide contains ...

Page 2: ...structions for your range and feature information for several models Your range may not have all the described features The graphics shown are representational The graphics on your range may not look exactly like those shown Note The instructions appearing in this Owner s Guide are not meant to cover every possible condition and situation that may occur Common sense and caution must be practiced w...

Page 3: ...dren to climb or play around the range The weight of a child on an open door may cause the range to tip resulting in serious burns or other injury Do not use the oven or warmer drawer if equipped for storage Do not store items of interest to children in the cabinets above a range or on the backguard of a range Children climbing on the range to reach items could be seriously injured Never Use Your ...

Page 4: ... The oven vent is located under the left rear surface element if your model is equipped with coil elements The oven vent is located below the backguard for models equipped with ceramic glass cook tops Touching the surfaces in this area when the oven is operating may cause severe burns Also do not place plastic or heat sensitive items on or near the oven vent These items could melt or ignite Placem...

Page 5: ... residual heat to complete the cooking process The amount of residual heat depends on the type and quality of cooking utensil the quantity of food being cooked and the selected heat setting Dual Radiant Surface Units If equipped The dual radiant surface unit is made up of an inner and outer coil within the same surface unit A control knob and rocker switch is used for operating the different coils...

Page 6: ...to high settings The left side of the control knob is used to operate the Simmer Select feature This feature allows the element to heat at a much lower temperature than when used as a normal surface unit This allows you to precisely simmer delicate foods You may switch between normal cooking and Simmer Select at any time during the cooking process Be sure to set the knob indicator between MAX and ...

Page 7: ...fferent levels of heating 2 When done turn the control to OFF The warm zone will remain warm until the hot surface indicator light goes off Temperature Selection Refer to the chart in the side column for recommended heating levels If a particular food is not listed start with the medium level and adjust as needed Most foods can be kept at serving temperatures by using the medium level Indicator Li...

Page 8: ...e and are designated by HI MED and LO 1 Turn the knob to select the desired temperature setting 2 For best results preheat the drawer before adding food An empty drawer will preheat in approximately 15 minutes 3 Turn the thermostat control to OFF after use Temperature Selection Refer to the chart in the side column for recommended settings If a particular food is not listed start with the medium s...

Page 9: ...yedself cleaning cycle stop time READ THE INSTRUCTIONS CAREFULLY BEFORE USING THE OVEN For satisfactory use of your oven become familiar with the various functions of the oven as described below UP and DOWN ARROW Used along with the function buttons to select oven temperature cooking time stop time when programming an automatic stop time time of day clean time and minute timer TIMER ON OFF Used to...

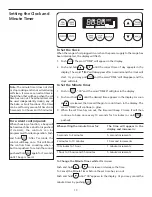
Page 10: ...to 2 minutes 5 second increments 2 minutes to 10 minutes 10 second increments 10 minutes to 1 hour 1 minute increments 1 hour to 9 hours and 55 minutes 5 minute increments To Change the Minute Timer while it is in use Push and hold or to increase or decrease the time To Cancel the Minute Timer before the set time has run out Push and hold until 00 appears in the display Or you may cancel the minut...

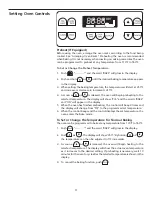
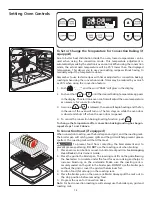
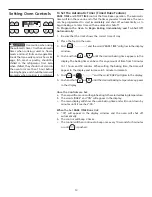
Page 11: ...y will show PrE and the words BAKE and ON will appear in the display 5 When the oven has finished preheating the control will beep 3 times and the display will change from PrE to the programmed set temperature 6 When the control beeps and the control displays the set temperature the oven enters the bake mode To Set or Change the Temperature for Normal Baking The oven can be programmed to bake at a...

Page 12: ...he oven door is opened 4 To cancel the convection baking roasting function push To change the temperature after convection baking roasting has begun repeat steps 1 and 2 above To Convection Roast if equipped When convection roasting use the broiler pan and grid and the roasting rack The broiler pan will catch grease spills and the grid will help prevent grease spatters The roasting rack will hold ...

Page 13: ...or and the word BAKE will glow in the display 6 Push and hold or until the desired baking temperature appears in the display Once the Controls are Set a Theovenwillcomeonandbeginheatingtotheselectedbakingtemperature b The words BAKE and ON will appear in the display c The main display will show the oven baking time and will count down by minutes until it reaches 00 When the Set BAKE TIME Runs Out ...

Page 14: ...ay 10 If the baking temperature is not set the control will beep will flash and the word BAKE will appear in the display Once the Controls are Set a Theovenwillcomeonandbeginheatingtotheselectedbakingtemperature b The words BAKE and ON will appear in the display c The main display will show the oven baking time and will count down by minutes until it reaches 00 When the Set BAKE TIME Runs Out a 00...

Page 15: ...ks hamburgers chops 3 Well done foods such as chicken and lobster 2 Push and the word BROIL will appear in the display 3 Push and hold the or until the desired broil setting level appears in the display Variable Setting Doneness LO LOW Well done 2 Medium Low Medium well 3 Medium Medium 4 5 Medium HI Medium rare HI High Rare 4 Place the grid on the broiler pan then place the food on the grid DO NOT...

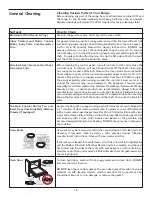
Page 16: ...se hot soapy water and a cloth Large spillovers can cause heavy smoke or fire when subjected to high temperatures DO NOT allow food spills with a high sugar or acid content such as milk tomatoes sauerkraut fruit juices or pie filling to remain on the surface as they may cause a dull spot even after cleaning 5 Clean any soil from the oven frame the door liner outside the oven door gasket and the th...

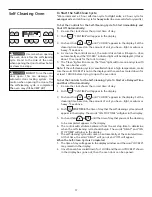
Page 17: ...time of day 2 Push CLN TIME will appear in the display 3 Push and hold or until 3 HR 00 appears in the display Set the cleaning time based on the amount of soil you have light medium or heavy See above 4 Push STOP TIME The time of day that the self cleaning cycle ends will appear in the display The words CLN STOP TIME will glow in the display 5 Push and hold or until the time of day that you want ...

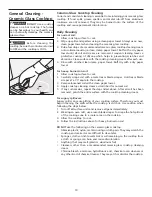
Page 18: ...tains may occur during heating and cannot be removed To replace knobs after cleaning line up the flat sides of both the knob and the shaft then push the knob into place Gentle scouring with a soapy scouring pad will remove most spots Rinse with a 1 1 solution of clear water and ammonia If necessary cover difficult spots with an ammonia soaked paper towel for 30 to 40 minutes Rinse with clean water...

Page 19: ...zor blade scraper at a 30 angle to the cooktop 3 Remove loosened soil with a clean paper towel 4 Apply cooktop cleaning cream as described for normal soil 5 If any soil remains repeat the steps listed above After all soil has been removed polish the entire surface with the cooktop cleaning cream For sugary spillovers Sugary spills can cause pitting of your cooktop surface Therefore you must begin ...

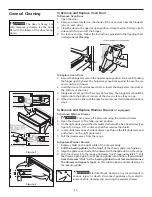
Page 20: ... the door facing down To Remove and Replace Warmer Drawer if equipped To Remove Warmer Drawer 1 Turn power off before removing the warmer drawer 2 Open the drawer to the fully opened position 3 On the right glide you will find a shield attached with a hex head screw see figure 1 Using a 1 4 socket and ratchet remove the shield 4 Locate glide lever on each side of drawer pull up on the left glide l...

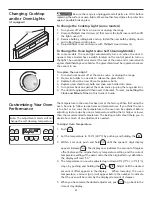
Page 21: ...e the desired adjustment push to go back to the time of day display Changing Cooktop and or Oven Lights if equipped Be sure the range is unplugged and all parts are COOL before replacing the surface or oven lights Wear a leather faced glove for protection against possible broken glass To Change the Cooktop Light some models 1 Turn power off at the main source or unplug the range 2 Remove Phillips ...

Page 22: ...oping contact a carpenter to correct the situation Kitchen cabinet alignment may make range appear unlevel Be sure cabinets are square and have sufficient room for range clearance Cabinets not square or are built in too tightly Contact builder or installer to make appliance accessible Carpet interferes with range Provide sufficient space so range can be lifted over carpet Electronic control has de...

Page 23: ... oven seal These areas are not in the self cleaning area but get hot enough to burn on residue Clean these areas before the self cleaning cycle is started Burned on residue can be cleaned with a stiff nylon brush and water or a nylon scrubber Be careful not to damage the oven gasket Excessive spillovers in oven Set self clean cycle for a longer cleaning time Excessive spillovers in oven This is no...

Page 24: ...r limitation of incidental or consequential damages so this limitation or exclusion may not apply to you 2 Service calls which do not involve malfunction or defects in workmanship or material or for appliances not in ordinary household use The consumer shall pay for such service calls 3 Damages caused by services performed by servicers other than Electrolux Home Products North America or its autho...

Reviews: