background image

TG


EN 

14 / 24 

4.3 

Grilling time 

Grilling time depends on a number of factors: 

  The ambient temperature and draft in the direct vicinity of the unit. 

  Grilling temperature. 

  The initial product temperature. 

  The sort of meat (fat or lean) and with or without additives. 

  The mass and shape of the product. 

  The total amount of meat to be grilled in one grilling cycle. 

  The end result. 


4.4 

Operation of the unit 

The unit has a mechanical timer with which the grilling time can be set.  The grilling process stops 
at a time pre-set by you: 

1. 

Load the grill as described in section 4.2. 

2. 

Close the door. 

3. 

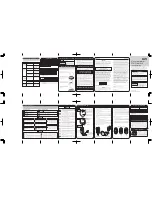
Set the required temperature (A1). 

4. 

Set the required grilling time (A2). 

5. 

Set the main switch (A3) to 

 
The  oven  will  begin  cooking  immediately.  After  the  pre-set  temperature  has  been  reached,  the 
heating  elements  and  the  lamp  on  the  operator  side  will  cycle  on  and  off  to  maintain  the  set 
temperature. 
The quartz lamps, fan and heating elements will turn off when the timer reaches "0". The bell will 
give a signal. 
 

4.5 

Taking out the products 


WARNING


After  the  grilling,  the  interior  of  the  unit  and  the  glass  panes  are  very  hot.  
Always use oven gloves when taking out the meat forks or other accessories. 


Summary of Contents for TG 4M

Page 1: ...TG EN Original Instruction 9124177 2106 USER MANUAL TG 4M WARNING Read the instructions before using the machine...

Page 2: ...result of constant commitment to improvement it may happen that your unit deviates in detail from what is described in this manual For this reason the given instructions are only a guideline for the...

Page 3: ...anel 11 4 2 Loading the unit 12 4 2 1 Loading the rotisserie using meat forks 12 4 2 2 Loading the rotisserie using V shape spits accessory 13 4 2 3 Loading the rotisserie using meat baskets accessory...

Page 4: ...4 Monthly Cleaning 19 5 5 Cleaning guidelines for non stick coated surfaces 20 6 MALFUNCTIONS AND SERVICE 21 6 1 Replace the mains cord 21 6 2 Adjust the door 21 6 3 Replace a lamp 22 7 TECHNICAL SPEC...

Page 5: ...tion plate can be found on the outside of the machine and contains the following data Name of the supplier or the manufacturer Model Serial number Year of construction Voltage Frequency Power consumpt...

Page 6: ...emoved and have to be clearly visible during the entire lifetime of the unit Immediately repair or replace damaged or illegible pictograms warnings and instructions To avoid short circuiting never cle...

Page 7: ...be cleaned thoroughly 1 6 Service and technical support The electrical schematics of your unit is included In case of malfunctions you can contact your dealer service agent Make sure you have the fol...

Page 8: ...s manually controlled The grease drawer has a drain plug for elimination of excess fat and can be completely removed for cleaning 2 2 Intended use The TG has been designed for grilling warming up cook...

Page 9: ...tage in accordance with the information indicated on the data plate of the appliance It is the consumer s responsibility to make sure the electrical installation conforms with current national and loc...

Page 10: ...maximum temperature 250 C 482 F for at least half an hour 1 Clean the interior thoroughly with soap suds Refer to section 5 2 Rinse thoroughly and wipe dry with a soft clean cloth 3 Put the plug in th...

Page 11: ...tat is graduated from 65 to 250 C 149 to 482 F and the temperature can be set by turning the thermostat dial a clockwise direction A2 Timer Oven time can be set between 1 and 120 minutes by turning th...

Page 12: ...main switch to rotate rotor 2 Turn the main switch to 0 to stop rotation 3 Load accessory with product into the oven 4 Repeat this procedure until the grill is full 5 Close oven door 4 2 1 Loading th...

Page 13: ...ll outside hole on the rotor end plate on your left as you face the oven The back of the V shape spit should be pointing towards you 2 Fit the other end on the spit into the small corresponding holes...

Page 14: ...stops at a time pre set by you 1 Load the grill as described in section 4 2 2 Close the door 3 Set the required temperature A1 4 Set the required grilling time A2 5 Set the main switch A3 to The oven...

Page 15: ...e same principle as described in section 4 5 1 4 5 3 Taking out the chicken racks accessory When taking out the chicken racks from the TG it is best to act as follows 1 Slightly lift both ends of the...

Page 16: ...r cooking Allow grease to cool or use extreme caution and wear insulated gloves or safety mitts 1 Open the door and slide the grease drawer out about 130 mm 5 inch 2 Provide a suitably large bucket or...

Page 17: ...enance schedule Item Action Frequency Interior Clean see section 5 2 Daily Fat collection drawer Empty see section 5 2 Daily Rotor and bottom plates Clean see section 5 2 Daily Glass panes Clean see s...

Page 18: ...mbined with an appropriate cleaning agent Dry the interior thoroughly by using a dry cloth Make sure no water or detergent stays behind in the unit Glass doors Open the glass doors Clean the panes wit...

Page 19: ...is the fan blade Clean the fan grille with a cloth and grill cleaning agent Dry the fan grille thoroughly by using a dry cloth Fan blade Remove the fan blade by turning the nut on the fan clockwise l...

Page 20: ...leaning Cleaning of Non stick Coated Surfaces Routine Cleaning 1 Clean at the end of each cook cycle 2 Allow surfaces to cool before cleaning 3 Mix a mild dish washing soap in warm water and use a sof...

Page 21: ...differential switch Oven The oven does not heat up Open and close door Check fuses and or the differential switch Door Door hangs at an angle Adjust door see section 6 2 Mains cord Damaged Replace see...

Page 22: ...ch off the unit 2 Remove the power plug from the wall socket 3 Remove the porcelain lamp covers 4 Remove the bolts fastening the lamp and remove the lamp 5 Trim the metal connecting strips of the new...

Page 23: ...pressure 70 dB A 70 dB A Electrical installation Voltage 3N 400 230V 1N 230V Frequency 50 60 Hz 50 60 Hz Required power 5200 W 3100 W Max nom current 9 A 13 A Plug2 CEE form 16 A 2 pole PE Length of p...

Page 24: ...TG EN 24 24 Fri Jado B V Blauwhekken 2 4751 XD Oud Gastel The Netherlands Tel 31 0 76 50 85 400 Fri Jado Inc 1401 Davey Road Suite 100 Woodridge IL 60517 USA Tel 1 630 633 7950 www frijado com...

Reviews: