


2
Create UDP 5060 Signaling ACL
1.
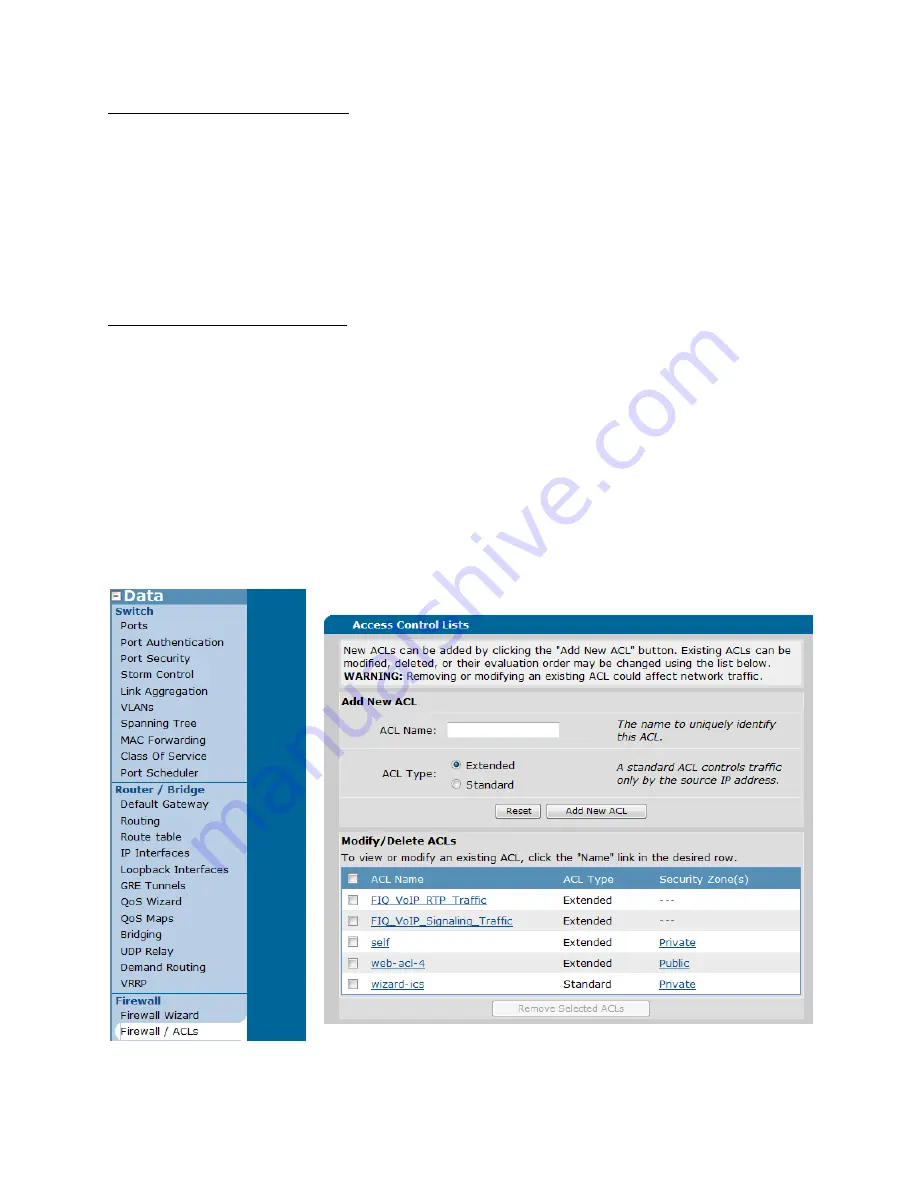
From “Data” in the left column, select “Firewall / ACLs”.
2.
Scroll to the bottom of the page and click “Configure ACLs”.
3.
Enter an ACL name, select “Extended” and then click “Add New ACL”.
(Screenshot)
4.
Click on the new “ACL” name and click “Add New Traffic Selector”.
5.
Select “UDP” from the Protocol drop down.
(Screenshot)
6.
Under Destination Data/Destination ports check “Specified”.
7.
Select “Equal To” from the drop down.
8. In the next box, enter 5060.
9.
At the bottom of the screen click the “Apply” button.
10. At the top of the screen click t
he “Save” button.
Add TCP 5061 to Signaling ACL
1.
From “Data” in the left column, select “Firewall / ACLs”.
2.
Scroll to the bottom of the page and click “Configure ACLs”.
3.
Click on the “ACL” name you created in the previous step.
(Screenshot)
4. C
lick “Add New Traffic Selector”.
5.
Select “TCP” from the Protocol drop down.
(Screenshot)
6.
Under Destination Data/Destination ports check “Specified”.
7.
Select “Equal To” from the drop down.
8. In the next box, enter 5061.
9.
At the bottom of the screen click the “Apply” button.
10.
At the top of the screen click the “Save” button.
ACL Screen 1 of 2
Data
Firewall / ACLs
Configure ACLs