


18
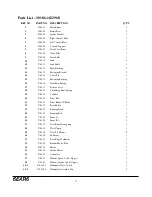
KEY NO.
PART NO. DESCRIPTION
Q'TY
39~4
2
7
6839-4
Handpulse Assembly Bottom
2
39~5
2
7
6839-5
Handpulse End Cap
2
40
2
7
6840
Sensor W/Cable
1
41
2
7
6841
Breaker
1
42
2
7
6842
Power Socket
1
43
2
7
6843
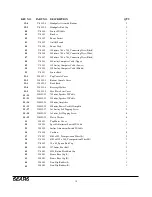
On/Off Switch
1
44
2
7
6844
Power Cord
1
45
2
7
6845
100m/m x 764 x 764_Connecting Wire (Black)
1
46
2
7
6846
300m/m x 764 x 764_Connecting Wire(White)
1
47
2
7
6847
300m/m x 764 x 764_Connecting Wire (Black)
1
48
2
7
6848
800 m/m_Computer Cable (Upper)
1
49
2
7
6849
1150 m/m_Computer Cable (Lower)
1
50
2
7
6850
1300 m/m_Computer Cable (Middle)
1
51
2
7
6851
Sensor Rack
1
52~1
296852-1
Top Console Cover
1
52~2
296852-2
Bottom Console Cover
1
52~3
296852-3
Book Rack
2
52~4
296852-4
Beverage Holder
1
52~5
296852-5
Face Plate Lens Cover
1
52~22
296852-22
700m/m_Speaker W/Cable
1
52~23
296852-23
250m/m_Speaker W/Cable
1
52~24
296852-24
200m/m_Amplifier
1
52~25
296852-25
400m/m_Power Cord Of Amplifie
1
52~27
296852-27
3x10 m/m_Self Tapping Screw
2
52~28
296852-28
3x8m/m_Self Tapping Screw
6
52~29
296852-29
Plastic Washer
6
53
296853
Top Motor Cover
1
54
296854
Speed Adjustment Switch W/Cable
1
55
296855
Incline Adjustment Switch W/Cable
1
56
2
7
6856
Cushion
6
57
2
7
6857
Ø60 ×35L_Transportation Wheel(A)
2
58
2
7
6858
Ø62 x Ø32 x 30L_Transportation Wheel(B)
2
59
2
7
6859
30 x 60_Square End Cap
2
60
296860
1275m/m_Foot Rail
2
61
2
7
6861
Ø38_Button Head End Cap
2
62
296862
Frame Base Cap (L)
1
63
296863
Frame Base Cap (R)
1
64
296864
Non-Slip Rubber (L)
1
65
296865
Non-Slip Rubber (R)
1
Summary of Contents for C 249 30186 0
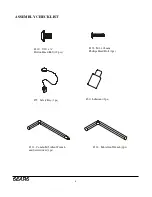
Page 8: ...7 ASSEMBLY...
Page 33: ...32...


