


7
The success information appears
Step 2:
On
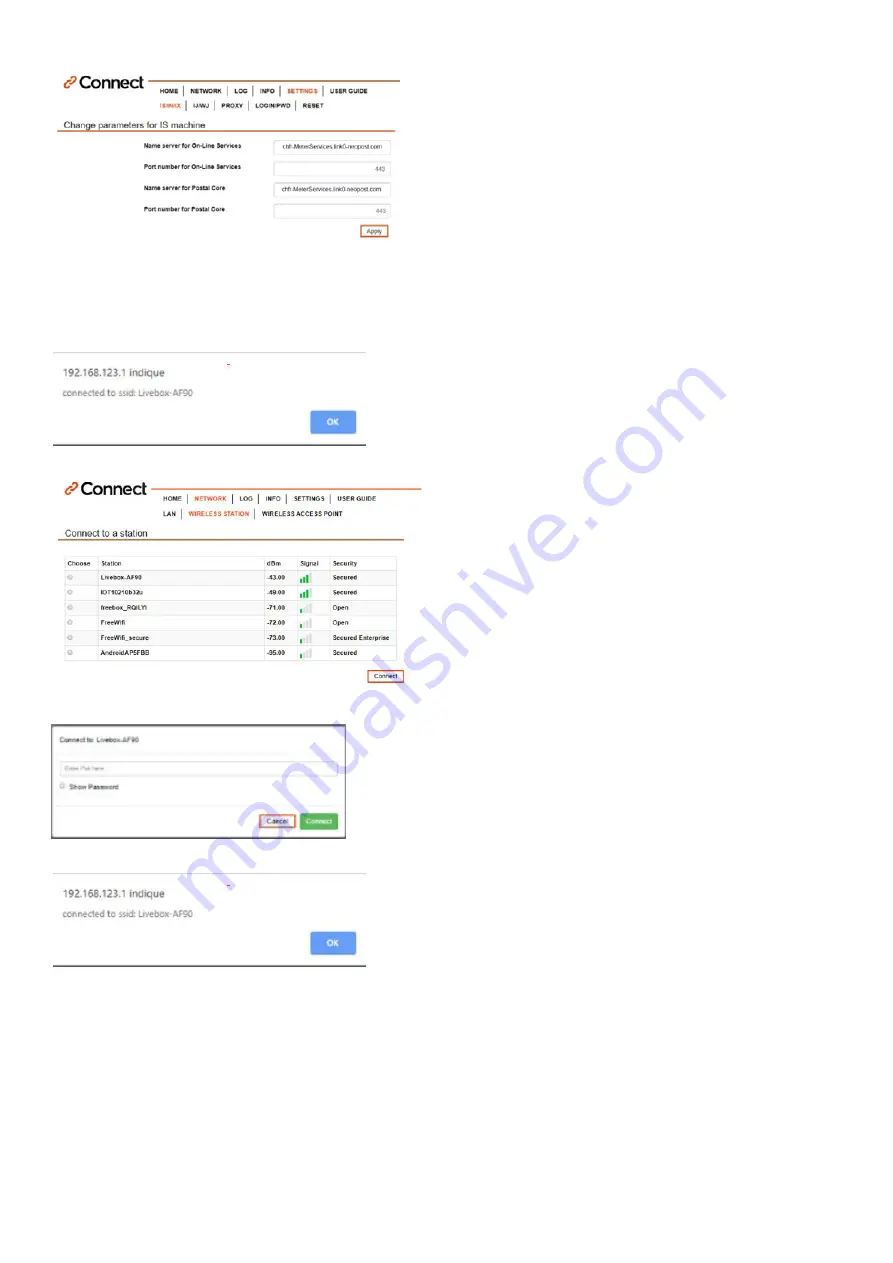
Settings / IS/IN/IX
enter
URL Settings
of F-Link 2
Step 3:
In the navigation, select
Wireless Station
. You will see a list of
Wireless networks with their SSIDs displayed
Select the corresponding Wireless network and click
Connect
The security description is to be understood as follows:
•
Open: no password required
•
Secured: password required
•
Secured Enterprise: administrator required
Next, enter the
password
of your WLAN and click
„Connect“
After that, you should receive a success information
Press
OK
The F-Link 2 is now connected to WI-FI. Now, the configuration of the franking machine will take place.
Note:
The WI-FI is activated if the green LED is lightnig
Then, click the
Apply
button
Note:
From configuration LAN to WI-FI, check in
Menu,
advanced Network Settings:
URI = OFF
Port = 443
CH
On- Line Services:
chfr-MeterServices.link0-neopost.com
Server Postal Core:
chfr-MeterServices.link0-neopost.com
Port number:
443
UK
On- Line Services:
ukfr-MeterServices.link0-neopost.com
Server Postal Core:
ukfr-MeterServices.link0-neopost.com
Port number:
443