


3
Success Information
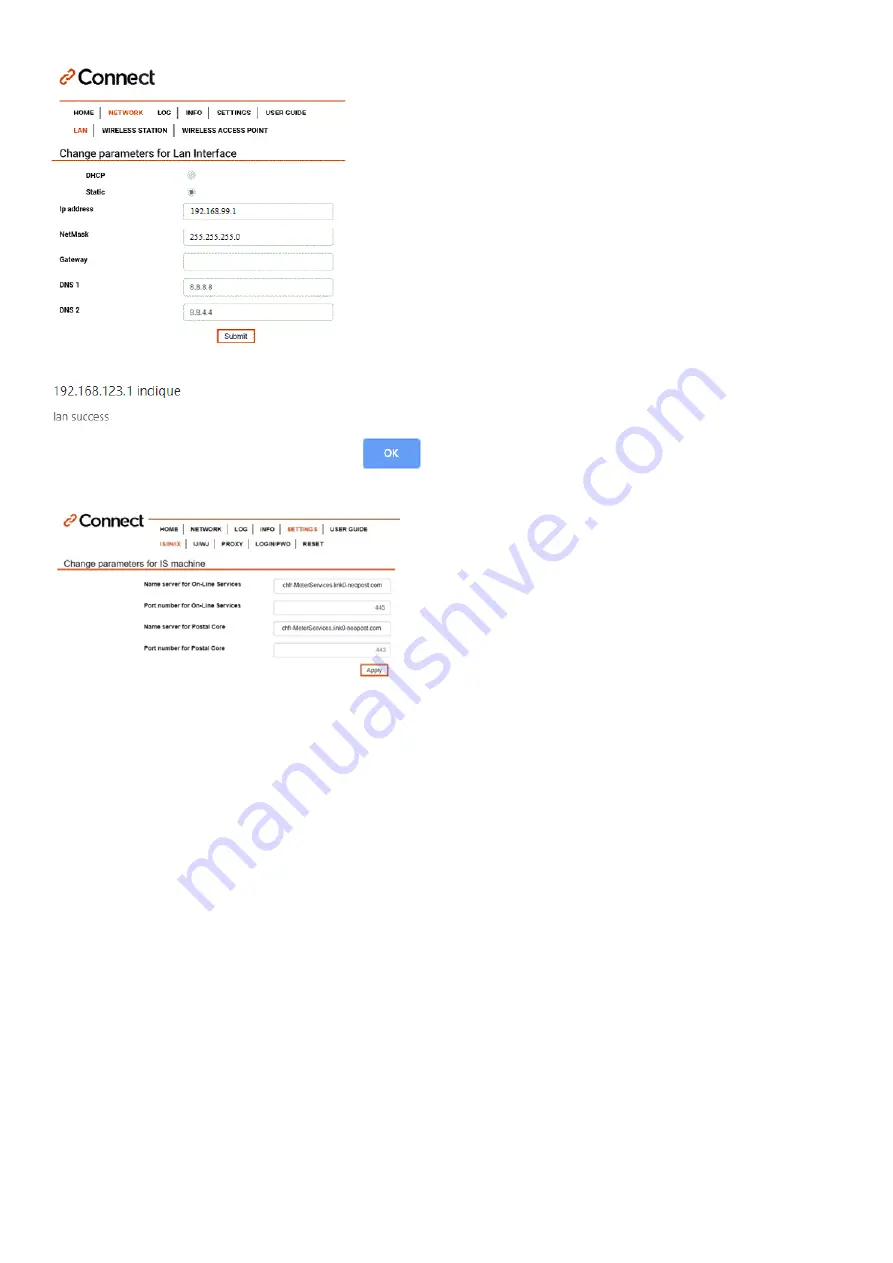
Step 3:
On
Settings / IS/IN/IX
enter
URL Settings
of F-Link 2
Then, click the
Apply
button
Therewith the configuration of the F-Link 2 has been completed.
Step 2:
Go to
NETWORK/LAN
page
Next, set the following parameters:
Select
Static
(not DHCP)
Sample settings. Ask the Network administrator for correct IP
credentials:
IP address:
192.168.99.1
NetMask:
255.255.255.0
Gateway:
192.168.0.1
DNS 1:
8.8.8.8
DNS 2:
8.8.4.4
Then, click the
Submit
button
CH
On- Line Services:
chfr-MeterServices.link0-neopost.com
Server Postal Core:
chfr-MeterServices.link0-neopost.com
Port number:
443
UK
On- Line Services:
ukfr-MeterServices.link0-neopost.com
Server Postal Core:
ukfr-MeterServices.link0-neopost.com
Port number:
443