background image

E-6

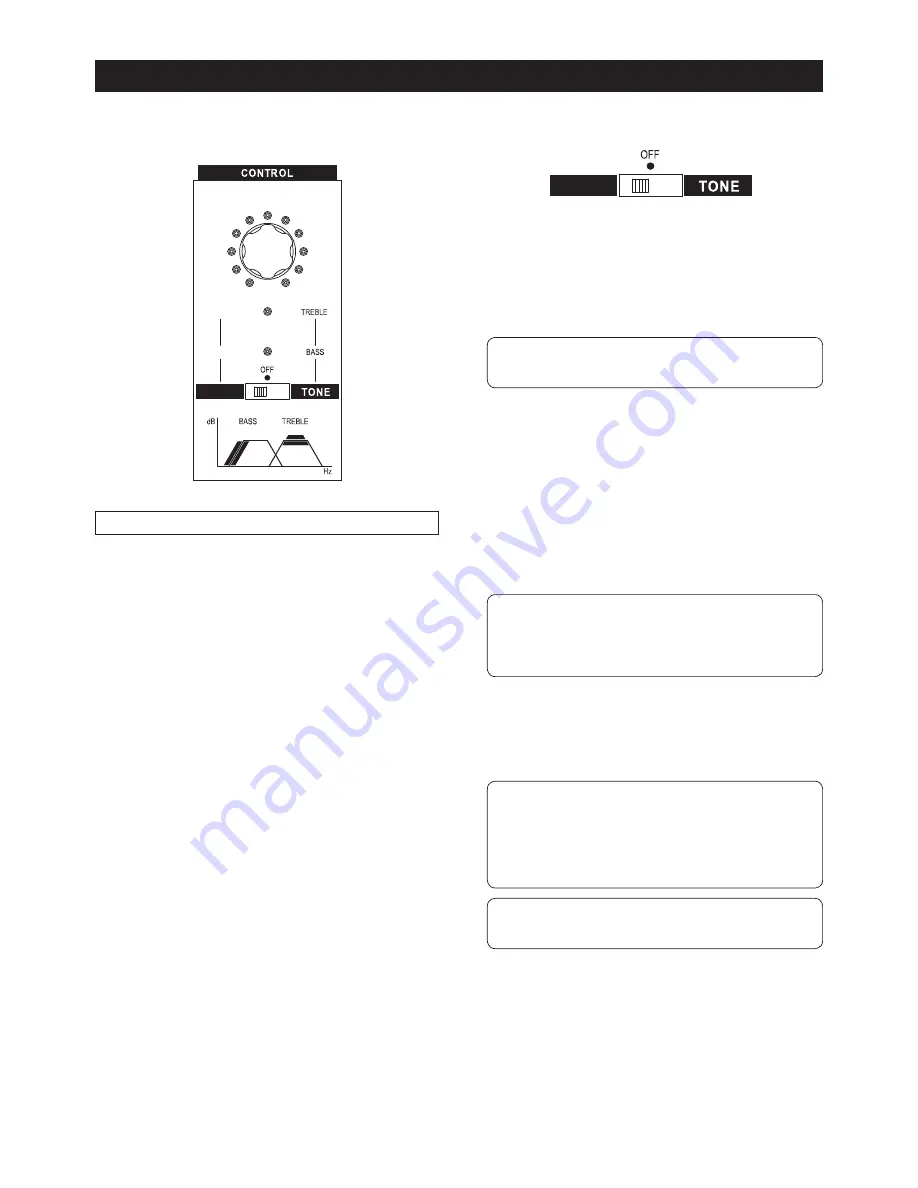
Adjusting volume level

In the LEVEL mode, you can adjust the volume 

level using the [CONTROL] knob.

The VOLUME and TRIM items are available in the 

LEVEL mode. The VOLUME item coarsely adjusts 

the level, while the TRIM item fine-tune the level. 

By using a combination of these items, you can 

adjust the volume level precisely in 440 steps. 

Volume level and tone controls

VOLUME

TRIM

LEVEL

You can adjust volume level as well as tone using 

the [CONTROL] knob.

1) Set the mode select switch to the LEVEL posi-

tion.

LEVEL

The upper status indicator (beside VOLUME)  

lights steadily. 

In this condition, you can coarsely adjust the vol-

ume level.
2) Adjust the volume level coarsely by rotating the 

[CONTROL] knob.

<Note>: If you change the stored value by rotating 

the [CONTROL] knob, the status indicator changes 

from lighting to flashing .

If necessary, fine-tune the volume level by follow-

ing steps 3) and 4) below.
3) Press the [CONTROL] knob.
The lower status indicator (beside TRIM)  lights 

steadily or flashes. 

In this condition, you can fine-tune the volume 

level.
4) Fine-tune the volume level by rotating the 

[CONTROL] knob.

<Note>: 

TRIM reset function

When you change the stored VOLUME value in step 

2) above, the TRIM value is automatically reset to the 

center position. This function allows you to make pre-

cise volume level adjustment effectively. 

5) After fine-tuning the volume level, long-press 

the [CONTROL] knob until the flashing upper 

status indicator turns on.

The adjusted value is saved to the unit.

<Note>: Even if you perform step 5) above to save 

the value after you fine-tune the level (i.e. when the 

lower status indicator flashes), the upper status indi-

cator lights steadily. Therefore, whenever you attempt 

to readjust LEVEL after you saved the LEVEL value, 

you can start with the VOLUME adjustment (coarse 

adjustment).

<Note>: By long-pressing the [CONTROL] knob, 

values of all items (both the volume and tone controls) 

are saved. 

Summary of Contents for PX-5

Page 1: ...he Fostex PX 6 professional monitor system This manual provides the operating instructions for the PX 6 Read this before you use the unit for the first time After reading keep this manual in a convenient place so that you can consult it at any time Professional monitor system ...

Page 2: ...UALIFIED SERVICE PERSONNEL AVERTISSEMENT POUR RÉDUIRE LE RISQUE DE CHOC ÉLECTRIQUE NE PAS ENLEVER LE COUVERCLE NI LE DOS AUCUNE PIÈCE À L INTÉRIEUR EN TRETIEN DE PERSONNEL QUALIFIE The lightning flash with arrowhead symbol within an equilateral trian gle is intended to alert the user to the presence of uninsulated dan gerous voltage within the product s enclosure that may be of sufficient magnitud...

Page 3: ... phase of the high pass filter E 9 Subwoofer settings after adjusting the phase of the high pass filter E 11 Disabling the high pass filter E 11 Specifications E 11 Speaker section E 11 Amplifier section E 11 General E 11 Declaration of EC Directive E 12 Fostex distributors list in Europe E 12 1 IMPORTANT NOTICE This product when installed as indicated in the instructions contained in this manual ...

Page 4: ...A jack the phone jack is disabled When an RCA plug and an XLR connector are simul taneously inserted to the RCA and XLR jacks respec tively both the input signals are mixed CONTROL knob Used for controlling the volume level and the tone bass and treble By pressing this knob you can change the con trolling item in the current mode LEVEL or TONE mode selected by the mode select switch By rotating th...

Page 5: ...dicator acts when the unit is used with a subwoofer and the high pass filter is active see Using the unit with a subwoofer on page 9 11 Mode select switch You can select the control mode LEVEL or TONE When the switch is set to LEVEL you can control the volume level using the CONTROL knob When the switch is set to TONE you can control the bass and treble using the CONTROL knob When the switch is se...

Page 6: ...lume level by follow ing steps 3 and 4 below 3 Press the CONTROL knob The lower status indicator beside TRIM lights steadily or flashes In this condition you can fine tune the volume level 4 Fine tune the volume level by rotating the CONTROL knob Note TRIM reset function When you change the stored VOLUME value in step 2 above the TRIM value is automatically reset to the center position This functi...

Page 7: ...the treble by rotating the CONTROL knob Note You can adjust the treble by changing the tweeter level within the range of 3 dB to 3 dB Note If you change the stored value by rotating the CONTROL knob the status indicator changes from lighting to flashing 3 Press the CONTROL knob The lower status indicator beside BASS lights steadily In this condition you can adjust the bass setting 4 Adjust the bas...

Page 8: ...witch is set to OFF the auto standby function is disabled Entering the standby mode manually By long pressing the CONTROL knob when the mode select switch is set to OFF you can turn the unit to the standby mode This feature would be useful when you go outside the studio for a while Releasing the standby mode When the unit is in the standby mode pressing the CONTROL knob releases the standby mode a...

Page 9: ...ly 2 Press the CONTROL knob The lower status indicator lights steadily 3 Press the CONTROL knob for more than three seconds The lower status indicator turns off In this condition the high pass filter is enabled Note When both of the status indicators is unlit the high pass filter is enabled When either of the sta tus indicators is lit the high pass filter is disabled Adjusting the phase of the hig...

Page 10: ...he front speakers L C and R the distance difference from the subwoofer is one meter so the phase adjustment is 90 degrees and the level indicator scale position is 10 Note If you change the stored value by rotating the CONTROL knob the status indicator changes from lighting to flashing 2 After adjusting the phase long press the CONTROL knob until the flashing status indica tor turns off The adjust...

Page 11: ...woofer settings after adjusting the phase of the high pass filter Input an 85 Hz sine wave to both the unit and the subwoofer If you find the phase is re versed flip the phase of the subwoofer 180 degrees While monitoring music adjust the level of the subwoofer appropriately so that you can get a flat sound pressure level at the low frequency range around 85 Hz Note For the subwoofer settings see ...

Page 12: ... ADD P O Box 145 Vinderen 0319 Oslo Norway TEL 47 2213 9900 FAX 47 2214 8259 POLAND NAME Mega Music Spolka z o o ADD Ul Lesna 15 81 876 Sopot Poland TEL 48 58 551 18 82 FAX 48 58 551 18 72 SPAIN NAME Letusa S A ADD C Laguna 10 28923 Alcorcon Madrid Spain TEL 34 91 4862800 91 4470898 FAX 34 91 6414597 SWEDEN NAME Benum Nordic A S ADD Aldermansvagen 17 171 48 Solna Sweden TEL 46 8 207710 SWITZERLAND...

Reviews: