16
&
Service Manual
4. SERVICE MENU
In addition to various MENU modes, SERVICE menus are available to check and maintain the MR16 condition.
Please utilize them when servicing MR16.
4-1. Entering Service Menu
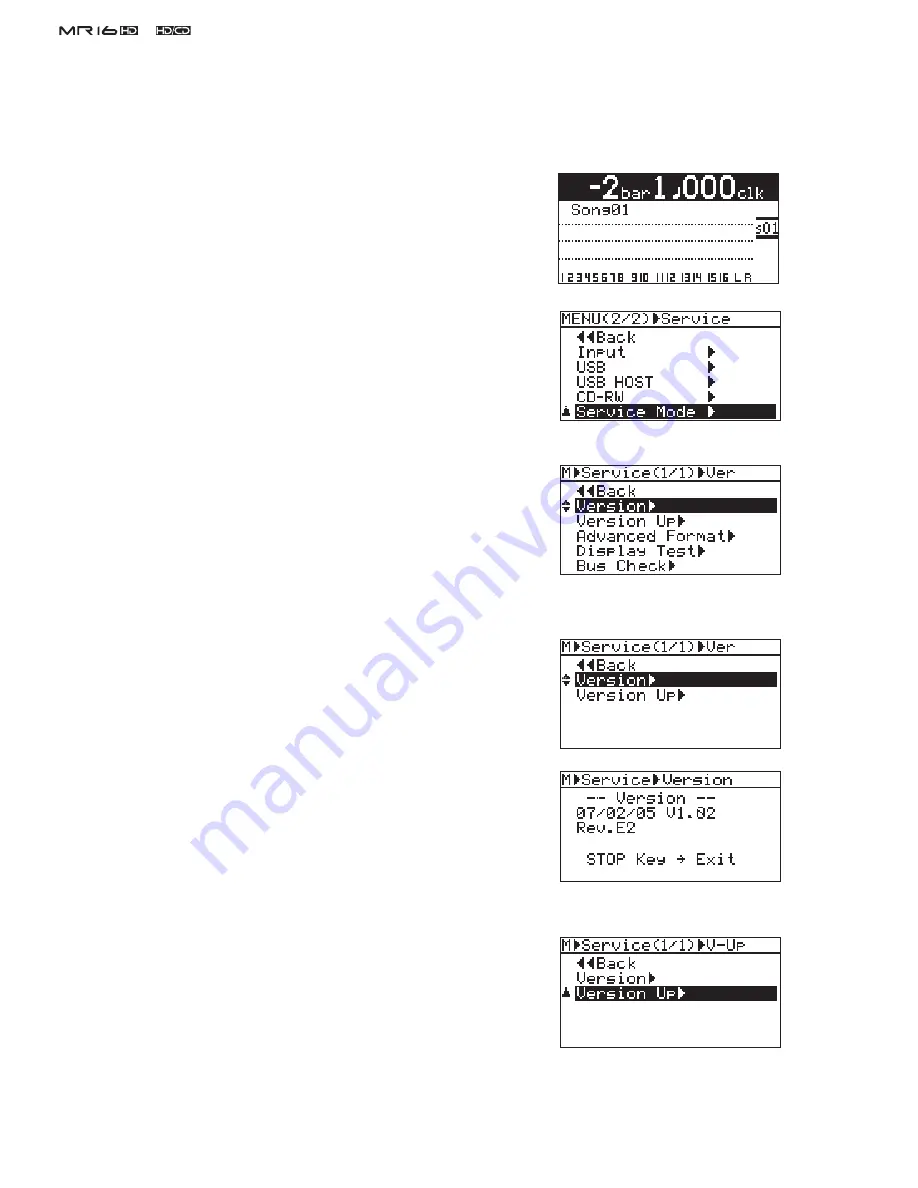
1) Connect the AC cable and power on MR16. After the bootup proce-
dure is completed, the display on the right will appear on the MR16
LCD.
2) Press the [MENU/ENTER] dial while holding down the [STOP]
and [POWER] keys. If you do so, "Service Mode" is displayed on
the MR16 LCD.
3) Rotate the [MENU/ENTER] dial and select “Service Mode”. Then,
press the [MENU/ENTER] dial. You can see that the following ser-
vice menus will appear on the MR16 LCD.
Select one of the service menus you would like to execute and press
the [MENU/ENTER] dial.
4-2. Version
In the “Version” service menu, the current MR16 software version as well
as the corresponding software programming date can be checked.
1) After selecting the “Version” menu, press the [MENU/ENTER] dial
to check the current software version and the programming date.
The example on the right indicates that the software version is
“V1.02” the programming date is February 5th, 2007 and the CPU
revision number is E2.
By pressing the STOP key, MR16 returns to the service menu select
condition.
4-3. Version Up
The “Version Up” service menu allows you to update the MR16 software
by placing the software update
fi
le in the root directory tree of the MR16
3.5” internal hard disk. For the update procedures, refer to the previous
section “3. SOFTWARE UPDATE” on page 10 in detail.
CAUTION:
If the [POWER] key is held down for more than three
seconds, MR16 turns off. Please be careful to expedite
the above manipulation 2).
Summary of Contents for MR-16HD
Page 1: ...Service Manual DIGITAL MULTITRACKER ...
Page 67: ...67 Service Manual NOTE ...


