


10
&
Service Manual
3. SOFTWARE UPDATE
1) Connect the AC power cable to the AC IN connector.
2) Press the MR16 power switch.
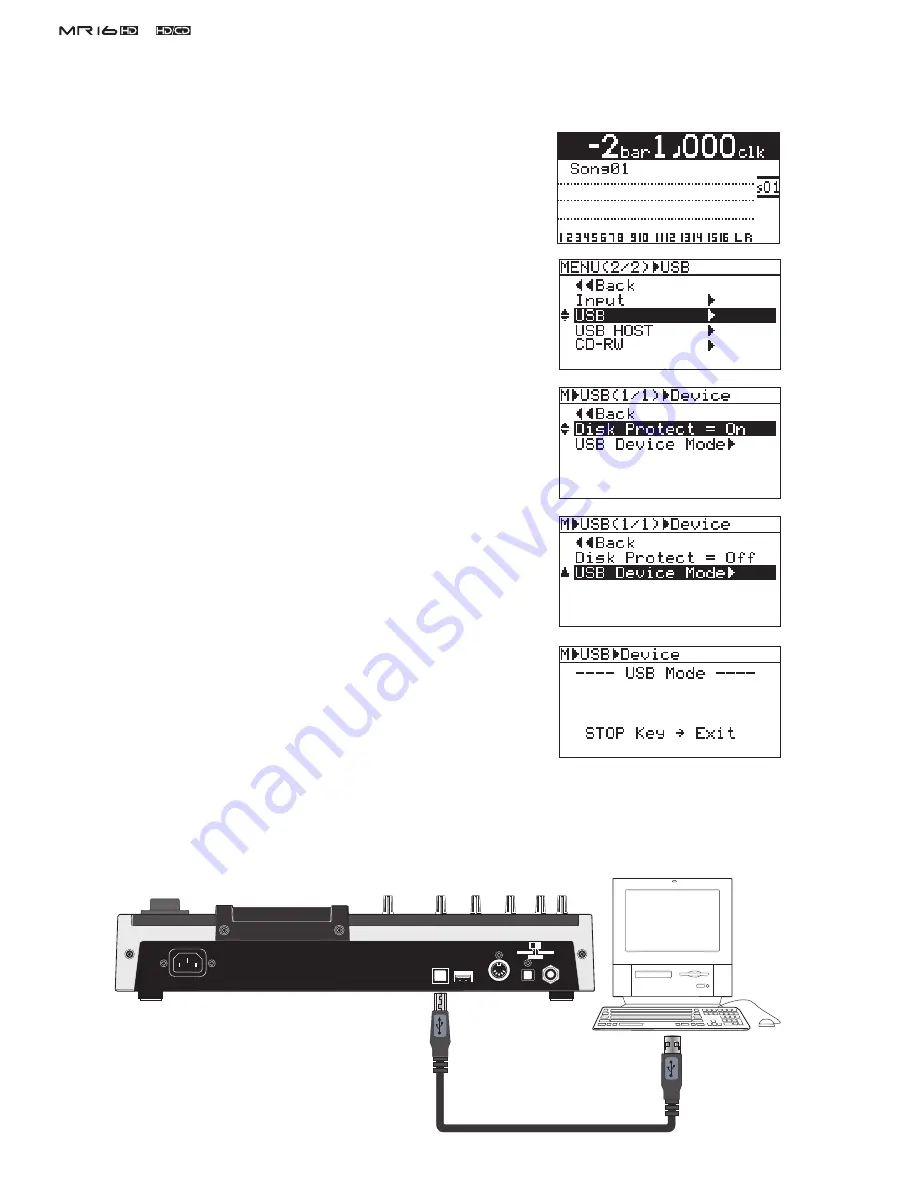
3) Press the [MENU/ENTER] dial to enter the MENU mode.
4) Rotate the [MENU/ENTER] dial and select the “USB” menu.
5) Press the [MENU/ENTER] dial.
6) Rotate the [MENU/ENTER] dial and select the “Disk Protect”
menu.
7) Press the [MENU/ENTER] dial and set “Disk Protect” to “Off” by
rotating the [MENU/ENTER] dial. Then, press the [MENU/EN-
TER] dial. With this setting, the Disk Protect mode is turned off
indicating the condition that the software update
fi
le can be copied
to the MR16 internal HDD.
8) Rotate the [MENU/ENTER] dial to select the “< < Back” menu and
press the [MENU/ENTER] dial.
9) Rotate the [MENU/ENTER] dial and select the “USB Device
Mode” menu.
10) Press the [MENU/ENTER] dial. If MR16 is correctly put into the
USB mode, the display on the right will appear on the LCD. Now
MR16 is ready to connect to PC or Macintosh.
11) Connect the USB cable from the MR16 USB port to PC on which
Windows XP/2000 is running or Macintosh on which OS X is run-
ning.
CAUTION:
MR16
can be connected to PC on which Windows XP/2000 is running or Macintosh on which
OS X is running for software update as well as audio data transfer. Of course PC/Macintosh
has to be equipped with a USB port.
USB
USB HOST
MIDI OUT
DIGITAL OUT
FOOT SW
INPUT A SEL
GTR CLEAN
MIC/LINE
GTR DIST
USB port
USB port
Summary of Contents for MR-16HD
Page 1: ...Service Manual DIGITAL MULTITRACKER ...
Page 67: ...67 Service Manual NOTE ...


