D-108 Owner’s Manual (Editing Tracks)
73
Real Tracks 1-8
Additional Tracks 9-16
Additional Tracks 17-24
Track Exchange
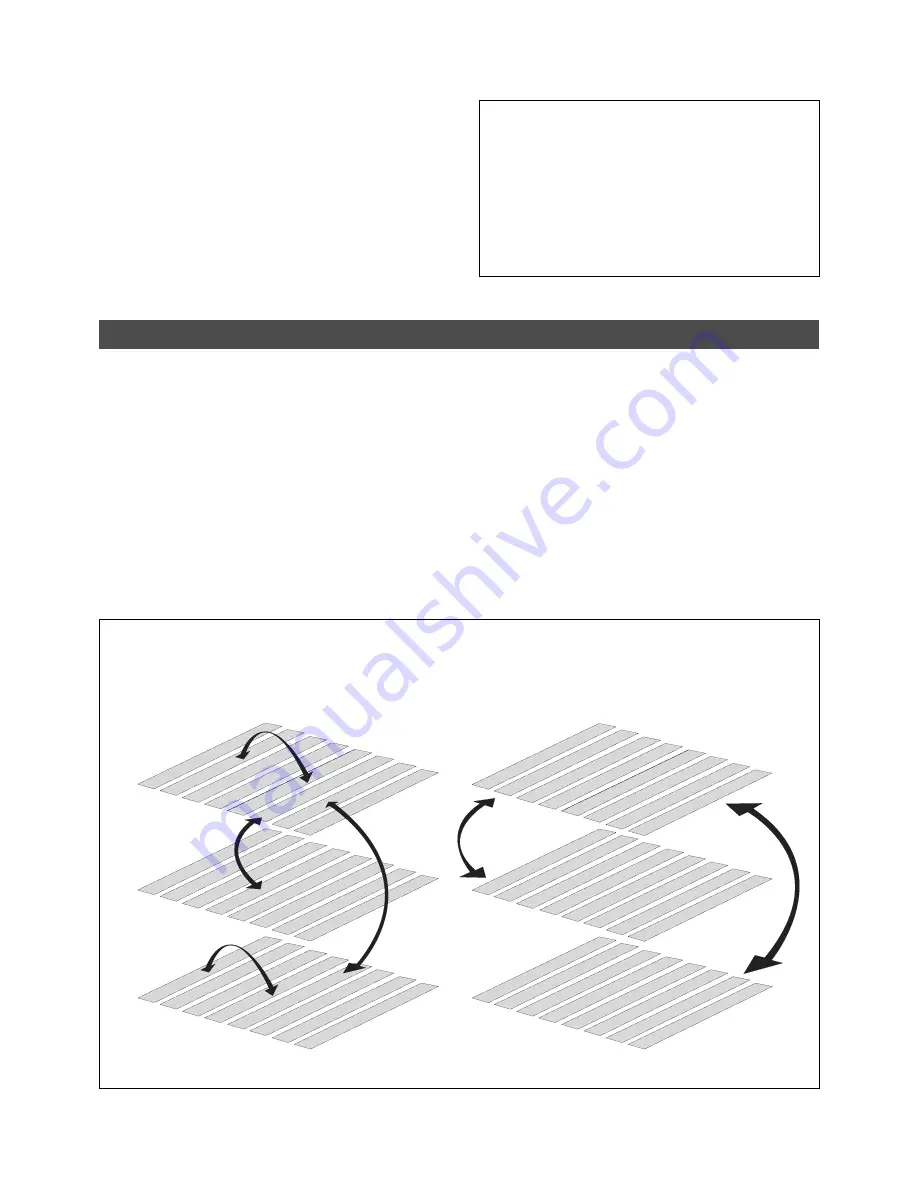
The Track Exchange function enables you to swap mono track data or multiple track data of the current Program
between Real tracks and Additional tracks in units of single or multiple tracks.
You can swap mono track data between Real tracks, Additional tracks, or between a Real track and an Additional
track. You can swap multiple track data between eight Real tracks (1–8) and Additional tracks (9–16 or 17–24).
Refer to the diagrams below for information on how data on the tracks can be moved using this function.
The Track Exchange function also enables you to move Real track data to an empty Additional track (to empty
the original Real track) so that you can use the Real track for a new recording. This capability lets you use tracks
more flexibly.
You need to move data on an Additional track back to a Real track to audition the data, since data on an
Additional track cannot be played in real-time.
You can also use this function when you wish to check the REC END point of an Additional track, as described in
the “Erase” section. Execute [Track Exchange] with the [Track Exchange?] menu in the SETUP mode of the D-108.
Swapping mono track data between Real tracks, Addi-
tional tracks, or between a Real track and an Additional
track.
Swapping multiple track data between eight Real tracks
and eight Additional tracks (9–16 or 17–24)
Real Tracks 1-8
Additional Tracks 9-16
Additional Tracks 17-24
Track 1
Track 2
Track 3
Track 4
Track 5
Track 6
Track 7
Track 8
Track 9
Track 10
Track 1
1
Track 12
Track 13
Track 14
Track 15
Track 16
Track 17
Track 18
Track 19
Track 20
Track 21
Track 22
Track 23
Track 24
Track 1
Track 2
Track 3
Track 4
Track 5
Track 6
Track 7
Track 8
Track 9
Track 10
Track 1
1
Track 12
Track 13
Track 14
Track 15
Track 16
Track 17
Track 18
Track 19
Track 20
Track 21
Track 22
Track 23
Track 24
5-1. Press the EXIT/NO key to exit without inputting a
title.
A [Temporary Title] is automatically assigned. The top
indication (ABS 0) of the program erased appears.
5-2. Press the EXECUTE/YES key to input the title.
The title input menu will appear to allow input of a specific
title. For more details on editing a title, refer to the
“Editing a program title” section of the “Program
Operation” chapter on page 38.
To erase all data on the track you can use the “Program
Delete” function to erase all programs in a manner other
than with the above mentioned erase procedures. Either
measure will make space on the disk to allow for more
recordings. If an [Over !] warning appears, indicating that
there is not enough disk space, during Auto Punch In/Out,
Copy & Paste or Move & Paste, there is need to erase some
unneccesary data to make more space. For more details
on deleting a program, refer to the “Deleting a Program”
section of the “Program Operation” chapter on page 37.


