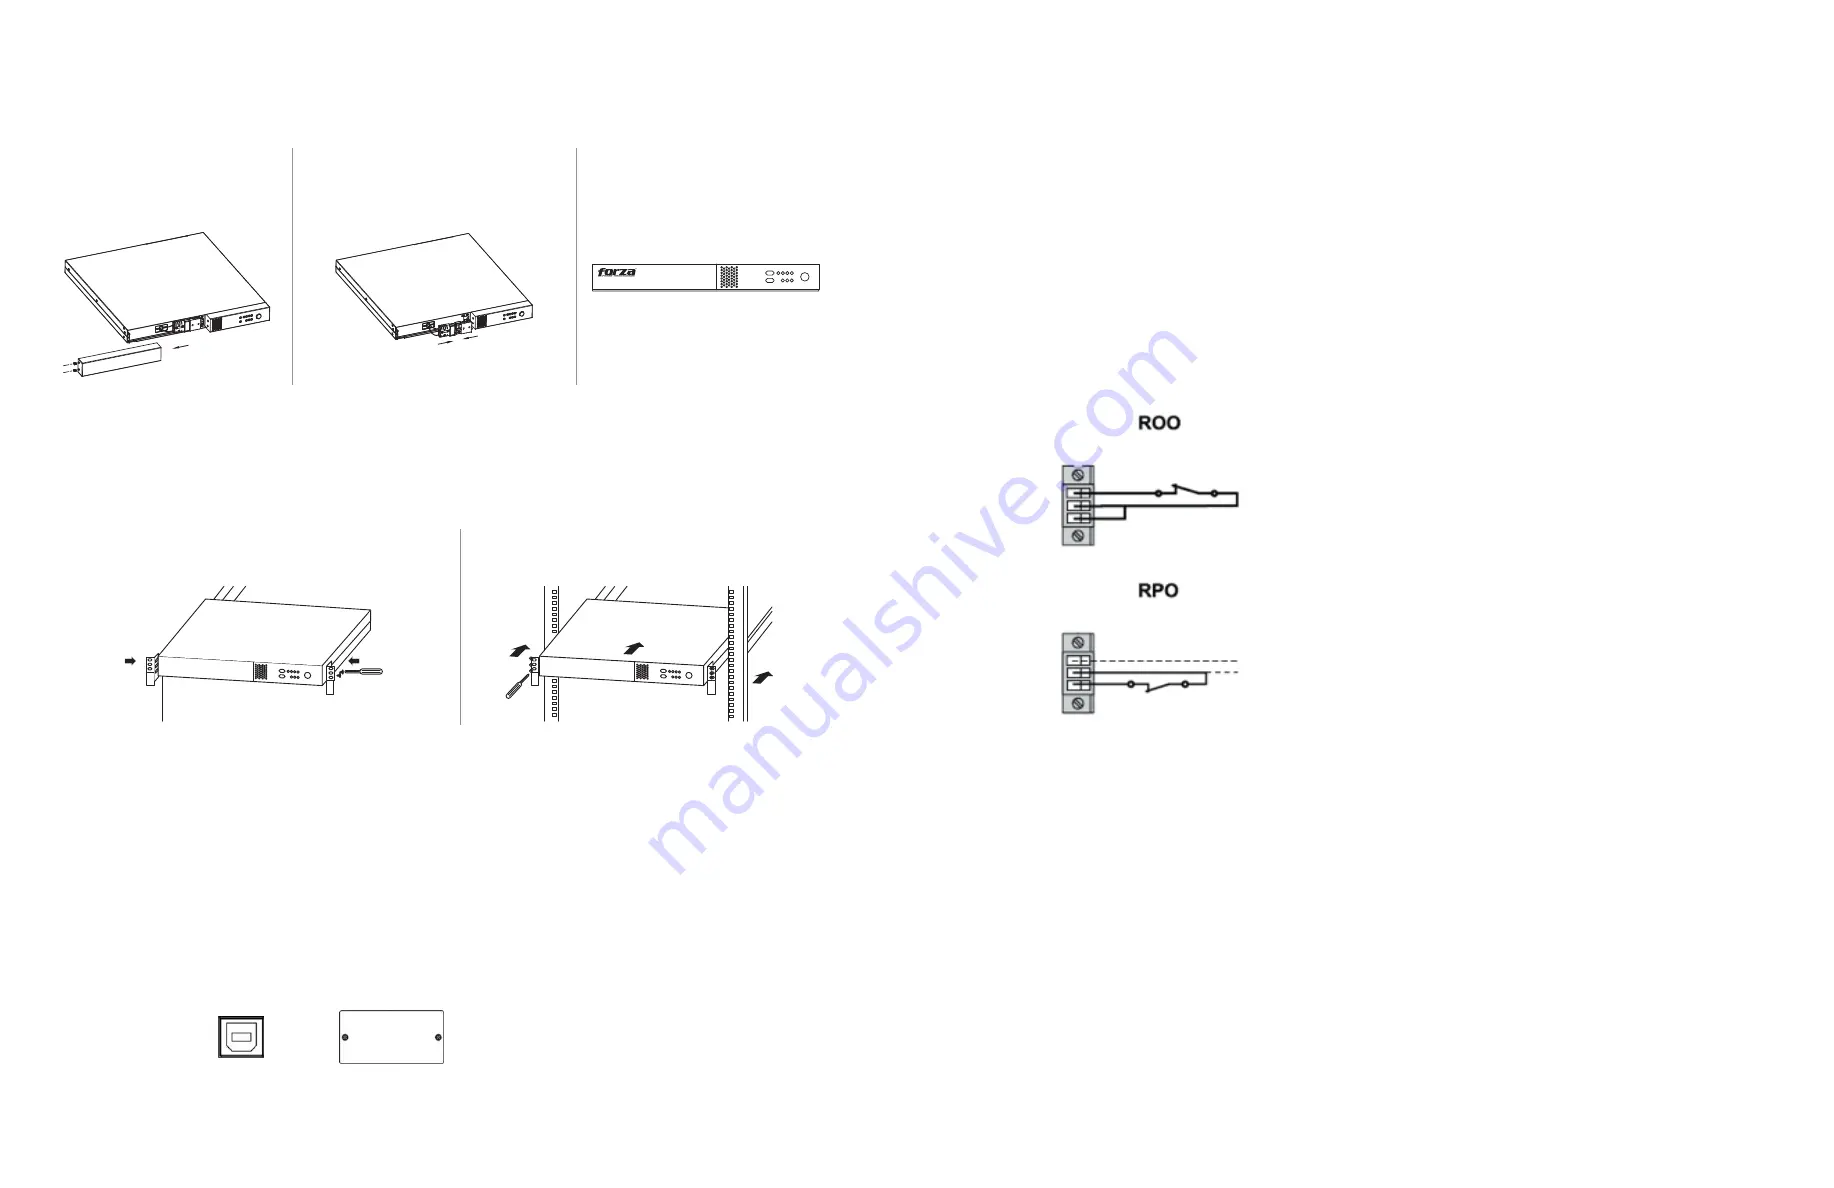
2.3.1 Initial setup
• For safety considerations, the UPS is shipped out from the factory with battery connectors unattached.
• Before installing the UPS, the user must first reconnect the wires. To do so, follow the steps illustrated below.
Rack-mount installation
The unit comes with mounting brackets for the standard 19-inch (46.5cm) rack.
2-4. UPS connections
For socket-type outputs, there are two kinds of outputs: programmable outlets and general outlets for mission critical loads. During
power failure, you may extend the backup time to critical devices by setting shorter backup times for non-critical devices.
2.5 Disabling and enabling the ROO/RPO function
2.6 Turning on/off the UPS
Press the
ON/OFF
button on the front panel for two seconds to power on the UPS.
Note:
The battery charges fully during the first five hours of normal operation. Do not expect full battery run capability during this initial
charge period.
To allow for unattended UPS shutdown/start-up and status monitoring, connect one end of the communication cable to the USB
port, and the other end to the communication port of your PC. With the monitoring software installed, you can schedule UPS
shutdown/start-up and monitor its status through a PC.
The UPS is equipped with an intelligent slot perfect for either SNMP or AS400 card. When installing either SNMP or AS400 card
in the UPS, it will provide advanced communication and monitoring options.
Step 1
Remove the two screws and
slide the front panel.
Step 1
Step 2
Step 2
Connect the AC input and then
reconnect battery connectors.
Step 3
Replace the front panel.
Communication ports
USB port
Intelligent slot
Contact open:
UPS shuts down.
Contact closed:
UPS start-up (UPS is connected to AC power
and AC power is available).
Note:
The local ON/OFF control by pressing On/Off button
overrides the remote-control function.
Contact open:
UPS shuts down and Fault LED (3) will be ON.
To return to normal operation, de-activate external remote
contact (Fault LED (3) will be OFF) and restart the UPS by
pressing the power button.
Remote on/off
Remote power off
Summary of Contents for FDC-1001RUL
Page 1: ...2 y e a r w a r r a n t y...
Page 8: ...NOTES NOTAS NOTES NOTAS...


