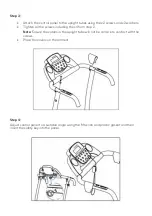
background image

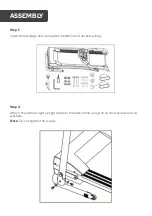
Step 5: 


Attach the M16 knob to left upright tube 


Attach the running frame to base tube by using the M12 knob. 


Step 6: 

Assembly is complete. 


Summary of Contents for FSEFBTM360A

Page 1: ...360MM BELT ADJUSTABLE INCLINE ELECTRIC TREADMILL FSEFBTM360A...

Page 2: ......

Page 3: ...the machine on flat ground Do not use the machine in the following locations 1 Outdoors The machine is specially designed for indoor use only 2 Any ground that is uneven 3 Any areas in high sunlight...

Page 4: ...t come in contact with the machine especially the motor power cable and plug Never wear long dresses or other unsuitable garments during use Do not use the machine in enclosed spaces locations with un...

Page 5: ...Open the package and remove the treadmill and accessory bag Step 2 Attach the left and right upright tubes to the base frame using the x4 short screws and x4 washers Note Do not tighten the screws AS...

Page 6: ...all the screws including the x4 from step 2 Note Ensure the cables in the upright tube will not be come into contact with the screws Place the covers on the armrest Step 4 Adjust control panel to a su...

Page 7: ...Step 5 Attach the M16 knob to left upright tube Attach the running frame to base tube by using the M12 knob Step 6 Assembly is complete...

Page 8: ...e screen will automatically move between Distance Time and Calories every 5 seconds 4 The treadmill has 12 inbuilt programs To select a program ensure that the treadmill is in standby with the belt st...

Page 9: ...e platform then release the knob to fix the treadmill in place The treadmill can be moved and stored safely Unfold Pull out the tension knob then carefully lower the running board Secure the treadmill...

Page 10: ...n the screws and spines at fixing point Do not hang clothes or other objects on the machine Lubrication Pull up the running belt carefully Apply silicone oil to running board Start the machine and let...

Page 11: ...cess until the belt is centred 2 If the belt is deviating to the right Start the machine and adjust to 2 3km h without loading use a hex key to tighten 1 4 of a rotation Let the unit run without loadi...

Page 12: ...ion We hope that this user guide has given you the assistance needed for a simple set up For the most up to date guide for your product as well as any additional assistance you may require head online...

Reviews: