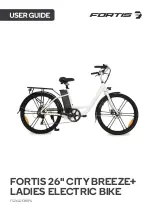
Fortis CITY BREEZE+ User Manual Download Page 15


Error 

Code 

Meaning 

Troubleshooting 

E02 

Brake failure 

The brake is in a power-off state. Check whether the left 

and right brake levers are reset. Check if the fault 
disappears after opening the junction box and 

unplugging the power-off switch. Contact Kogan.com for 

support if problem persists. 

E06 

Battery under-

voltage 

The battery is Low and the fault code disappears after 

the battery is fully charged. 

E07 

Motor failure 

The motor is faulty. Check whether the connector of the 

motor's waterproof cable is loose. Contact Kogan.com 

for support if problem persists. 

E09 

Controller failure 

The controller is damaged and the controller needs to be 
replaced. After opening the junction box to replace the 

controller, the fault is eliminated and the fault code 

disappears. 

E10 

Communication 

receiving failure 

The communication receiving line between the LCD 

display and the controller is blocked. Open the junction 
box; check whether the connectors of the LCD display 

and the controller are firm. Reconnect the plug and 
restart. Contact Kogan.com for support if problem 

persists. 

E11 

Communication 

sending failure 

The communication sending line between the LCD 
display and the controller is blocked. Open the junction 

box, check whether the connectors of the LCD display 
and the controller are firm. Reconnect the plug and 

restart. Contact Kogan.com for support if problem 

persists. 

E12 

BMS 

communication 

failure 

The communication sending and receiving Line between 
the LCD display and the controller are blocked. Open the 
junction box, check whether the connectors of the LCD 

display and the controller are firm. Reconnect the plug 
and restart. Contact Kogan.com for support if problem 

persists. 

E13 

Headlight failure 

The front light of the instrument is damaged or the plug-
in is in poor contact. Open the junction box, unplug and 

reinsert it. Contact Kogan.com for support if problem 

persists. 


        TROUBLESHOOTING 

Summary of Contents for CITY BREEZE+

Page 1: ...FORTIS 26 CITY BREEZE LADIES ELECTRIC BIKE FS26LDEBKPA...

Page 2: ......

Page 3: ...ow visibility be careful and adjust your speed 6 At night ensure the bicycle headlights are activated while operating 7 Trying to repair anything that implies removing technical or electrical componen...

Page 4: ...cation which might make you drowsy Do not ride while you feel unwell nor after consuming alcohol or drugs This product has the potential to endanger yourself and others if not operated responsibly Ped...

Page 5: ...l Headlight Front wheel Pedals Crankset Chain Rack Seat Seatpost clamp Bike frame Handlebar stem Fork Rear wheel Front brakes Handlebars Battery Rear derailleur Control pad Handle grips Brake lever Re...

Page 6: ...ngled and track smoothly on either side of the stem The stem should be pointing towards the front of the bike aligned with the front tire Tighten the stem bolt with an Allen wrench see Figure 2 Figure...

Page 7: ...nment you will need to true the wheel when spinning the wheel and notice the gaps between the brake pads are not consistently the same the wheel needs truing See a qualified bike technician to true wh...

Page 8: ...eat stem using rotary movements You can use grease to help assembly 4 Tighten the quick release clamp and then fold the lever to closed position Minimal torque specifications are 19 5Nm Figure 4a Figu...

Page 9: ...k that the wheels are correctly fitted to the bicycle either by a quick release system or nuts Steering Check that the handlebar and stem are correctly tightened and that they are in line with the whe...

Page 10: ...be adjusted If you must dismantle the handlebar or turn it to transport the bicycle please make sure that you correctly reassemble and centre the handlebars check the position by placing your hands o...

Page 11: ...Off Mode Starting System Hold Up button for 3 seconds to turn on the light hold for another 3 seconds to turn off the light Press the Mode button for 5 seconds to start the system Press the Mode butt...

Page 12: ...H The meter will calculate the true speed based on the wheel diameter and signal data the hall of the motor also needs to set the number of magnetic steel 1 5 Power Status Display Area Assistant gear...

Page 13: ...button on the battery to check the battery volume Battery Charging With the supplied charger you can charge the battery directly whilst it is on the bike or use the key to take out the battery the con...

Page 14: ...sudden braking 7 Be careful when riding in pools of water 8 Thoroughly check the bicycle before each ride 9 Avoid leaving your bicycle in heavy rain or snow If you do so wipe dry It is highly recomme...

Page 15: ...CD display and the controller is blocked Open the junction box check whether the connectors of the LCD display and the controller are firm Reconnect the plug and restart Contact Kogan com for support...

Page 16: ...ion We hope that this user guide has given you the assistance needed for a simple set up For the most up to date guide for your product as well as any additional assistance you may require head online...

Reviews: