


4
5
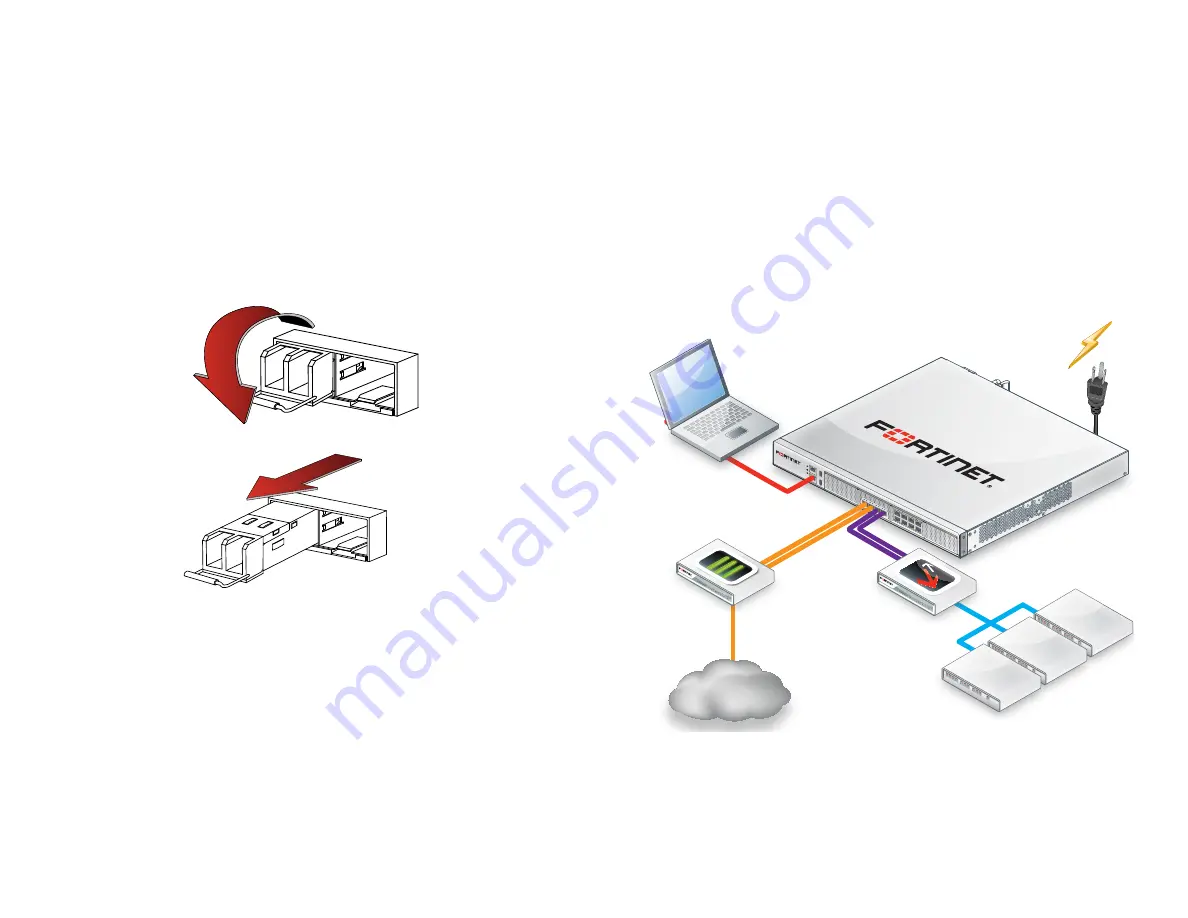
Connecting to FortiADC
If the appliance has a redundant power supply, connect each power cable
to a different power source .
You can configure FortiADC for your network through a connection to
either its web UI or command line interface (CLI) .
Connect FortiADC only to your computer until you finish setup . (If you
place FortiADC in your network before FortiADC is set up, traffic could
be interrupted until setup is complete .) Deployment instructions are in the
.
One typical, basic network topology is shown below .
FortiADC-1500D
POW
ER
STATU
S
HDD
RES
ET
MGM
T
CON
SOLE
USB
1
2
3
4
5/6
7/8
9/10
11/12
Link
to
ISP1
Link
to
ISP2
Internet
Firewall
Switch
Administrator
Servers
FortiADC
4.
Press the transceiver firmly into the cage socket with your thumb until it
clicks, indicating that it is latched .
5.
To verify that the transceiver is latched, grasp its sides and try to pull it out
without
lowering the extraction lever .
If you can remove the transceiver, it was
not
latched correctly, and could
become accidentally dislodged . Try again .
To remove the SFP transceivers
1.
Disconnect the fiber optic cable from the transceiver connector .
2.
To prevent dust from entering the optical bores, insert clean plugs .
3.
To eject the transceiver, pull the extraction lever out and down .
Tip:
Instead of using your finger, try a small flat-head screwdriver .
4.
Hold the sides of the transceiver and carefully pull it from the cage socket .
5.
Replace the cap on the SFP cage socket .
6.
Put the removed SFP transceiver into an anti-static bag .


