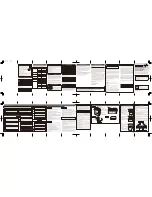
5. Loosen the screw on the small box (the screw is connected to the inside
of the liner and can be screwed out from the inside of the liner)
6. On the right side of the box, you can see two screws, screw out the two
screws and open the small cover of the box.
7. Remove the old tube, put the new tube back inside the small box, close
the lid, and tighten the two screws on the lid.
23A, 46A towel cabinet replacement lamp steps:
1. Remove all the screws on the back panel and open the back panel.
2. You can see the white cotton after opening the back panel.
3. Take out the white cotton back, you can see the position of the lamp, as
shown
4. Unplug both lines
Premium Hot Towel Warmer
Item #391442 • New Hudson, MI 48165
www.tngworldwide.com • 800.520.6000
Made in China • ©2020 TNG
Troubleshooting
1. There is excessive moisture when the towel warmer is ON or the towels are heating up very
slowly.
• Check to see that the towels are only slightly damp. Excess moisture and/or slow heating
time may be a result of soaked towels.
2. The door is not closing properly and/or steam is escaping
• Check that the silicone door seal is in place. Push into door groove to assure proper fit.
Safety Precautions
Caution and proper procedures must be practiced at all times when using electrical appliances.
Basic safety precautions should always be followed, including the following:
• Do not use appliance for other than intended use.
• Do not place poisonous, flammable, explosive and evaporative chemicals into the towel
warmer.
• Do not touch hot surfaces. Use handle or knobs.
• To protect against electrical shock, do not immerse cord, plugs or appliance in water or
other liquid.
• Unplug from outlet when not in use and before cleaning. Cool the machine before
maintenance.
• Do not operate any appliance with a damaged cord or plug or after the appliance
malfunctions or has been damaged in any manner. If the product is defective, stop using it at
once and contact supplier for service.
• Do not use outdoors. This appliance is intended for indoor use only.
• Do not let cord hang over edge of table or counter, or touch hot surfaces.
• Close supervision is necessary when any appliance is used by or near children.
• Do not leave the appliance unattended when switched on.
• Extreme caution must be used when moving an appliance containing hot liquids.
• The temperature of accessible surfaces may be high when the appliance is operating.
• If using an extension cord, the marked electrical rating of the extension cord should be at
least as great as the electrical rating of the appliance.
Internal surfaces, wire baskets, towels and steam may be hot. Use with extreme caution
when removing hot towels or baskets. Always use protective heat-resistant gloves or
mitts to avoid steam or other burns. Ignoring the warnings may result in harm or serious
injury.
Premium
Hot Towel Warmer
Replacing the UV Bulb
continued
8. On the right side of the box, you can see two screws, screw out the two screws and open
the small cover of the box. See Fig. 5a & 5b.
9. Remove the faulty UV bulb. Insert a new UV bulb (Replacement bulb Item #391445) back
inside the small box, close the lid, and tighten the two screws on the lid. See Fig. 6a & 6b.
10. Reattach both lines and tighten the screws of the UV box. See Fig. 7a & 7b.
11. Replace environmentally friendly cotton and reattach back panel.
5. Loosen the screw on the small box (the screw is connected to the inside
of the liner and can be screwed out from the inside of the liner)
6. On the right side of the box, you can see two screws, screw out the two
screws and open the small cover of the box.
7. Remove the old tube, put the new tube back inside the small box, close
the lid, and tighten the two screws on the lid.
8. Tighten the screws of the UV box
9. Install environmentally friendly cotton and backboard
8. Tighten the screws of the UV box
9. Install environmentally friendly cotton and backboard
5. Loosen the screw on the small box (the screw is connected to the inside
of the liner and can be screwed out from the inside of the liner)
6. On the right side of the box, you can see two screws, screw out the two
screws and open the small cover of the box.
7. Remove the old tube, put the new tube back inside the small box, close
the lid, and tighten the two screws on the lid.
Fig. 5a
Fig. 6a
Fig. 5b
Fig. 6b
Fig. 7a
Fig. 7b


