background image

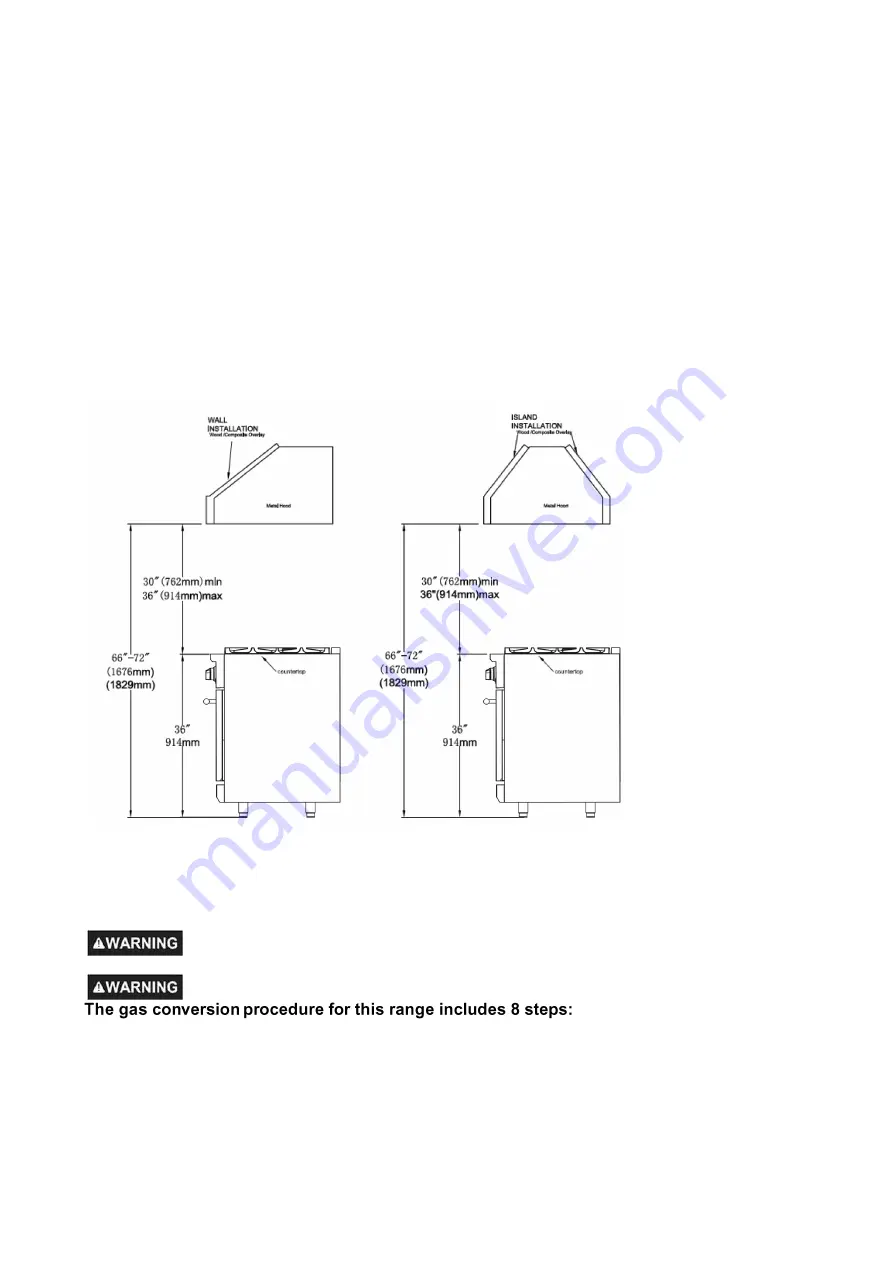
The bottom of the hood should be 30" min. to 36" above the countertop. This would typically result 
in the bottom of the hood being 66" to 72" above the floor. These dimensions provide safe and 
efficient operation of the hood. 
After Installation: 
1. Check ignition of cooktop burners.
2. Check the air shutter adjustment – sharp blue flame, with no yellow tipping or lifting flames.
3. Check ignition of oven burner.
4. Visually check tubular burner (oven burner) re-ignition to be sure both rows of
burner ports are relighting each time. 
5. Check for gas leaks at all gas connections (using a gas detector, never a flame).
6. Check oven bake and convection bake function.

Gas Conversion Operation

This cooking range can be used with LP gas and NG gas. It is shipped from the factory adjusted 
for use with NG(Nature Gas). Conversion nozzles are included. Follow the instruction shown 
below for gas conversion. 

Gas conversion shall be conducted by a factory- trained professional.Call the 

customer service hotline to identify a factory-trained professional near your home. 

Before carrying out this operation, disconnect the range from gas and electricity. 

1. Pressure regulator

5. Gas valves

2. Cooktop burners

6. Reconnect Gas and Electrical Supply

3. Oven burner

7. Air shutter oven burner

4. Broil burner

8. Installation of new rating label

Exhaust Hood Installation

20

Summary of Contents for FFSGS6239-30

Page 1: ...FREESTANDING GAS RANGE INSTALLATION GUIDE SPECIFICATIONS INSTALLATION AND MORE MODEL NUMBERS FFSGS6239 30 FFSGS6239 36 FFSGS6239 48 FFSGS6239 60 ...

Page 2: ...ly Connection 26 Ignition 27 Simmer and Boil 27 Burner Grates 28 Griddle Operation Cooktop Cleaning Tips Preheating Convection Bake Convection Roast Setting Broil Oven Cleaning Tips 28 28 28 28 29 29 29 30 30 31 31 32 Door Handle Installation 12 12 34 Please Read Before Using Your Oven Oven Racks Installation 13 2 11 26 Important Safety Information Oven Operation Broiler Operation s 35 Wire Diagra...

Page 3: ... concerning your product If you received a damaged product immediately contact FORNO Save time and money Before you call for service check the Troubleshooting Guide It lists the causes of minor operating problems that you can correct yourself SERVICE IN CANADA UNITED STATES Keep the instruction manual handy to answer your questions You can also find all the information you need online at www forno...

Page 4: ...appliance Always read and obey all safety messages This is a safety alert symbol It will alert you to potential personal or property safety hazards Obey all safety messages to avoid any property damage personal injury or death WARNING indicates a potentially hazardous situation which if not avoided could result in serious injury or death CAUTION indicates a moderate hazardous situation which if no...

Page 5: ...se you to chemicals including carbon monoxide which is known to the State of California to cause developmental harm For more information go to www P65Warnings ca gov WARNING Never operate the top surface cooking section of the appliance unattended Failure to follow this warning statement may result in fire explosion or burn hazard that could cause property damage personal injury or death If a fire...

Page 6: ...ty and obligation to have an ungrounded outlet in accordance with the National Electrical Code Do not use an extension code with this range 7 Before performing any service unplug the range or disconnect the power supply at the household distribution panel by removing the fuse or switching off the circuit breaker 8 Be sure all packing materials are removed from the range before operating to prevent...

Page 7: ... be hot enough to burn even though they are dark in color During and after use do not touch or let clothing or other flammable materials contact any interior area of the oven allow sufficient time for cooling first Other surfaces of the appliance may become hot enough to cause burns Potentially hot surfaces include the burners grates oven vent opening surfaces near the opening crevices around the ...

Page 8: ... the pan completely with a well fitting lid cookie sheet or flat tray Use a multi purpose dry chemical or foam type fire extinguisher If there is a fire in the oven during baking smother the fire by closing the oven door and turning the oven off or by using a multi purpose dry chemical or foam type fire extinguisher If there is a fire in the oven during self clean turn the oven off and wait for th...

Page 9: ...that could spread to surrounding cabinets Never leave oil unattended while frying If allowed to heat beyond its smoking point oil may ignite resulting in fire that may spread to surrounding cabinets Use a deep fat thermometer whenever possible to monitor oil temperature To avoid oil spillover and fire use the minimum amount of oil when frying in a shallow pan and avoid cooking frozen foods with ex...

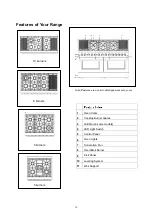
Page 10: ...dels 4 LED Light Switch 5 Control Panel 6 7 Convention Fan 8 Oven Lights 9 Oven Broil Burner 10 Kick Panel 11 Leveling System Wok Support 8 burners 6 burners 5 burners Not all features are on all models Appearance may vary Features of Your Range 10 10 burners ...

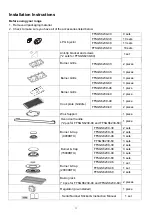
Page 11: ...installed 1 piece Serial Number Sticker Instruction Manual 1 set Oven door handle 2 pcs for FFSGS6239 48 and FFSGS6239 60 FFSGS6239 60 5 sets FFSGS6239 36 FFSGS6239 48 FFSGS6239 60 Burner Cap 20000BTU FFSGS6239 60 3 sets 1 set 2 sets FFSGS6239 30 9 sets FFSGS6239 36 10 sets FFSGS6239 48 13 sets Anti tip bracket and screws 2 sets for FFSGS6239 60 Burner Grills 3 pieces Cook plate Griddle 1 piece FF...

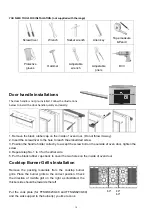
Page 12: ...e hole to reach the embedded screw 3 Position the handle holder correctly to accept the screw bolt on the outside of oven door tighten the screw 4 Repeat step No 1 to 3 for the other side 5 Put the black rubber caps back to cover the two holes on the inside of oven door Cooktop Burner Grills Installation Remove the packing materials from the cooktop burner grills Place the burner grills to the cor...

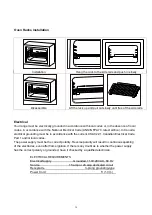
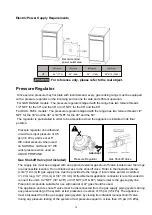
Page 13: ...ust be the correct polarity Reverse polarity will result in continuous sparking of the electrodes even after flame ignition If there is any doubt as to whether the power supply has the correct polarity or grounded have it checked by a qualified electrician ELECTRICAL REQUIREMENTS Electrical Supply Service Grounded 110 120 VAC 60 Hz 15 amp or 20 amp dedicated circuit Receptacle 3 prong grounding ty...

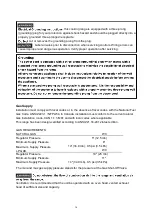
Page 14: ... Code ANSI Z223 1 NFPA 54 In Canada installation must conform to the current natural Gas Installation code CAN 1 1 1 M81 and with local codes where applicable This range has been design certified according to ANSI Z21 1b 2012 latest edition Ventilation it is recommended that the unit be operated with an oven head vented exhaust hood of sufficient size and capacity 14 GAS REQUIREMENTS NATURAL GAS W...

Page 15: ... with natural or LP gas should be used The appliance and its shut off valve must be disconnected from the gas supply piping system during any pressure testing of the system at test pressures in excess of 0 5 psi 3 5 kPa The appliance must be isolated from the gas supply piping system by closing its individual manual shutoff valve during any pressure testing of the system at test pressures equal to...

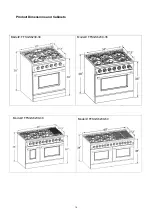
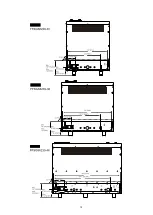
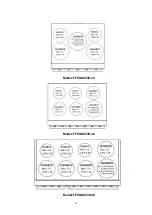
Page 16: ...Product Dimensions and Cabinets 16 Model FFSGS6239 30 Model FFSGS6239 36 Model FFSGS6239 48 Model FFSGS6239 60 ...

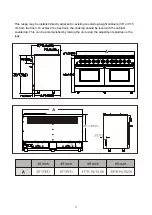
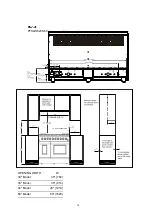
Page 17: ...cent to existing countertop height cabinets 36 or 91 5 cm from the floor To achieve the best look the cooktop should be level with the cabinet countertop This can be accomplished by raising the unit using the adjustment spindles on the legs 17 ...

Page 18: ......

Page 19: ...W OPENING WIDTH W OPENING WIDTH 30 Model 30 762 36 Model 36 914 48 Model 48 1219 To wall on either side 19 FFSGS6239 60 60 Model 60 1520 ...

Page 20: ...using a gas detector never a flame 6 Check oven bake and convection bake function Gas Conversion Operation This cooking range can be used with LP gas and NG gas It is shipped from the factory adjusted for use with NG Nature Gas Conversion nozzles are included Follow the instruction shown below for gas conversion Gas conversion shall be conducted by a factory trained professional Call the customer ...

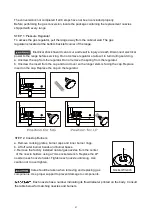
Page 21: ...e the spring from the regulator b Unscrew the insert from the cap and turn it over so the longer stem is facing the cap Replace insert on the cap Replace the cap on the regulator STEP 2 Cooktop Burners a Remove cooking grates burner caps and inner burner rings b Lift off outer burner heads and burner bases c Remove the factory installed natural gas nozzles from the center of the nozzle holders usi...

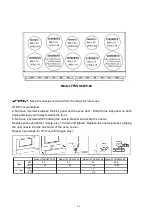
Page 22: ...22 Model FFSGS6239 30 Model FFSGS6239 36 Model FFSGS6239 48 ...

Page 23: ...ews which holding the nozzle bracket and locate the nozzle Replace with oven burner nozzle size 1 32mm and tighten Replace the nozzle bracket aligning the new nozzle into the air shutter of the oven burner Repeat upon steps for 18 oven 48 ranges only 18 Oven 1 7 1 12 Oven NG LPG 2 2 1 39 Model FFSGS6239 30 2 2 1 39 Model FFSGS6239 36 2 2 1 39 Model FFSGS6239 48 NG LPG 2 2 2 1 39 2 Model FFSGS6239 ...

Page 24: ...e gas conversion always check for leaks with a soapy water solution or other acceptable method in at gas connections installed between the gas inlet pipe of the range gas regulator and the manual shut off valve 24 Broil NG LPG 1 38 0 94 Model FFSGS6239 30 Model FFSGS6239 36 Model FFSGS6239 48 Model FFSGS6239 60 1 38 0 94 1 38 0 94 1 38 2 0 94 2 b Using a flat screwdriver adjust main burner bypass ...

Page 25: ...rial number on the LP Propane Rating serial plate provided in this kit The information can be obtained from the existing Rating Serial plate Place the new plate as close as possible to the existing Rating Serial plate on the range Before moving the range protect any finished flooring and secure oven door s closed to prevent damage The oven door s can be removed to lighten the load or to fit the un...

Page 26: ...to the manufacture s instructions Use some soap water 50 water and 50 soap or a leak detector at all joints and connections to check for leaks in the system Do not use a flame to check for gas leaks The appliance must be isolated from the building s gas supply piping system by closing its individual manual shut off valve during any pressure testing of the gas supply piping system at test pressure ...

Page 27: ...avy cooking jobs such as boiling water and cooking pasts When you select the flame size watch the flame when you turn the knob Any flame larger than the bottom of the cookware is wasted The flame should be steady and blue in color Foreign material in the gas line may cause an orange flame during initial operation If the gas does not ignite within four seconds turn off the valve and allow at least ...

Page 28: ...rewing it from the socket Replace with a 40 watt halogen bulb Burner Grates Cooktop Cleaning Tips Oven Light 28 LED Light Switch Use the LED light switch to turn on the LED lights when the room becomes dark Your FORNO range may have come with a standard reversible grill griddle For best use and results please read below Pre heat gently Because the FORNO grill griddle is so large it can take time f...

Page 29: ... end of the preheating cycle Oven Function Natural Airflow Bake occurs when heat is transferred into the oven from the bake burners in the bottom of the oven cavity Heat is then circulated by natural airflow This is a traditional bake setting Convection Bake Heat is transferred from the bake burners in the bottom of the oven cavity to the oven cavity itself The convection fan at the rear of the ov...

Page 30: ...broiler for even coverage The Broil feature temperature is 500 F 260 C Used together the broil pan not included and insert allow dripping grease to drain and be kept away from the high heat of the oven broiler DO NOT use the broil pan without the insert DO NOT cover the broil pan insert with foil The exposed grease could catch fire To set the oven to Broil 1 Place the broiler pan insert on the bro...

Page 31: ...ven interior Use mild abrasive cleaners spray degreasers Use a razor blade to gently lift baked on foods from oven cavity and window For stubborn stains spray with a mild abrasive cleaner or spray degreaser Wash the entire oven cavity with soap and water to remove all cleaning chemicals To clean the upper rack use mild detergent and a scouring pad Rinse and dry To clean the bottom pan discard grea...

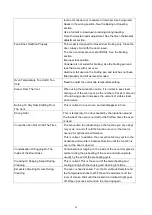
Page 32: ...lames Normal for natural gas If burner flames look like A call for service Normal burner flames should look like B or C depending on the type of gas Burner Flames Very Large Or Yellow The range may be connected to the wrong fuel type Contact the person who installed your range or made the conversion Burner Flames Contain Orange Flickers Airborne dust cool mist humidifier debris on or inside burner...

Page 33: ...ear in time Strong Odor This is temporary An odour caused by the insulation around the inside of the oven is normal for the first few times the oven is used Convection Fan Not On All The Time The convection fan depending on the function you are using may cycle on and off until the function is over or the door is opened for optimized performance This is normal In addition the convection fan may cyc...

Page 34: ... withcare For better Broil efficiency pre heat to 500F for 8 Minutes and turn the knob to broil until you see the flame and wait 3 to 4 seconds beforereleasing Cooking tips 1 Pizza Place rack on bottom level at 375F for 16 minutes then broil 2 to 3 minutes on top level 2 Vegetables Place rack second from bottom at 350F for 14 to 17 minutes 3 Place rack on middle level at 350F for Fish 4 to 6 minut...

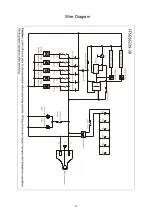
Page 35: ...Wire Diagram 35 ...

Page 36: ...36 ...

Page 37: ...37 ...

Page 38: ...38 ...

Reviews: