background image

Installing child safety seats in combination lap and shoulder belt
seating positions

Air bags can kill or injure a child in a child seat.

NEVER

place a

rear-facing child seat in front of an active air bag. If you must

use a forward-facing child seat in the front seat, move the seat all the
way back.

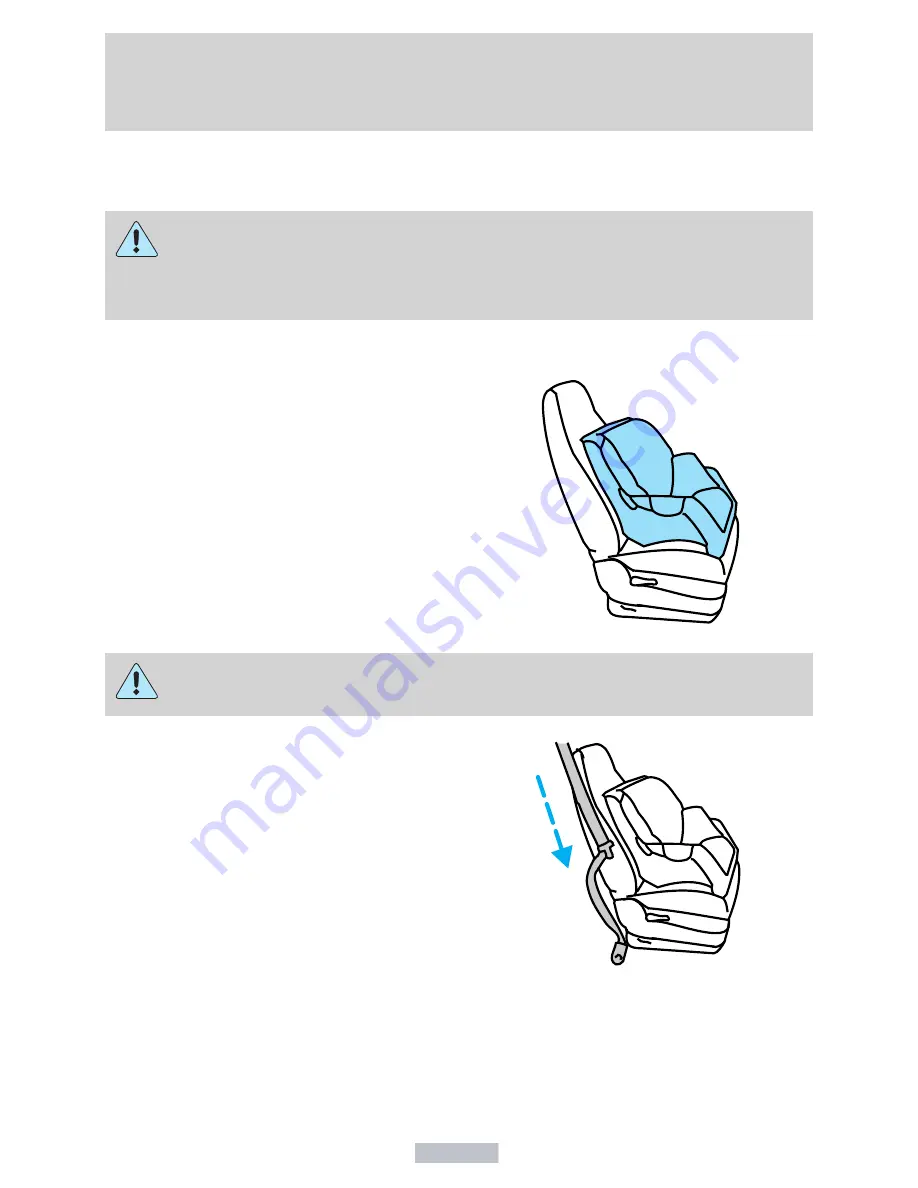
1. Position the child safety seat in a
seat with a combination lap and
shoulder belt.

Children 12 and under should be properly restrained in the rear
seat whenever possible.

2. Pull down on the shoulder belt
and then grasp the shoulder belt
and lap belt together.

Seating and safety restraints

140

Summary of Contents for F-150 2001 Climate Control System

Page 1: ...ce 274 Reporting safety defects 287 Index 288 All rights reserved Reproduction by any means electronic or mechanical including photocopying recording or by any information storage and retrieval system...

Page 2: ...her reproductive harm ICONS Indicates a safety alert Read the following section on Warnings Indicates vehicle information related to recycling and other environmental concerns will follow Correct vehi...

Page 3: ...ation found in this guide was in effect at the time of printing Ford may change the contents without notice and without incurring obligation EMISSION WARRANTY The New Vehicle Limited Warranty includes...

Page 4: ...all a snowplow and plow with your vehicle until it has been driven at least 800 km 500 miles F150 SuperCrew F150 5 4L Supercharged Lightning and Harley Davidson F 150 Owners Snowplowing Your vehicle i...

Page 5: ...tly may result in loss of control or an accident Be sure to read Driving off road in the Driving chapter as well as the Four Wheeling supplement included with 4WD and utility type vehicles Notice to o...

Page 6: ...n Warning Child Seat Tether Anchorage Brake System Anti Lock Brake System Brake Fluid Non Petroleum Based Traction Control Master Lighting Switch Hazard Warning Flasher Fog Lamps Front Fuse Compartmen...

Page 7: ...olant Engine Coolant Temperature Do Not Open When Hot Battery Avoid Smoking Flames or Sparks Battery Acid Explosive Gas Fan Warning Power Steering Fluid Maintain Correct Fluid Level MAX MIN Emission S...

Page 8: ...A P PEDALS Headlamp control pg 20 Instrument panel dimmer control pg 21 Turn signal lever pg 63 Windshield wiper washer control pg 68 Instrument cluster pg 10 Speed control pg 63 Driver air bag pg 127...

Page 9: ...EJ REW FF 1 2 TAPE AMS VOL PUSH ON SEEK TUNE AM FM CLK 1 2 3 4 5 6 FM1 ST Passenger air bag deactivate switch pg 132 Climate control systems pg 56 Gearshift includes overdrive button pg 159 Auxiliary...

Page 10: ...st be in the ON position for this lamp to illuminate The lamp will also illuminate for several seconds after the ignition is turned to the ON position regardless of the fuel level to ensure your bulb...

Page 11: ...light illuminates Light turns on solid This means that the OBD II system has detected a malfunction Temporary malfunctions may cause your Service Engine Soon light to illuminate Examples are 1 The veh...

Page 12: ...lluminate continues to flash or remains on have the system serviced immediately Safety belt Momentarily illuminates when the ignition is turned to the ON position to remind you to fasten your safety b...

Page 13: ...t turn signal or the hazard lights are turned on If one or both of the indicators stay on continuously or flash faster check for a burned out turn signal bulb Refer to Bulbs in the Maintenance and car...

Page 14: ...he gear shift light is on the transmission does not operate in the overdrive mode refer to the Driving chapter for transmission function and operation The light may also flash steadily if a transmissi...

Page 15: ...efer to the Seating and safety restraints chapter Belt minder chime Sounds intermittently to remind you to fasten your safety belts For information on the safety belt minder chime refer to the Seating...

Page 16: ...OOR AJAR SELECT RESET 4X4 LOW RANGE THEFT FUEL DOOR SERVICE ENGINE SOON LOW FUEL 20 40 60 80 00 20 40 60 D L H L H E F C H BRAKE P RN D 2 CRUISE DOOR AJAR SELECT RESET 4X4 LOW RANGE THEFT FUEL DOOR SE...

Page 17: ...tank When refueling the vehicle from empty indication the amount of fuel that can be added will be less than the advertised capacity due to the reserve fuel A minimum of 22 2 L six gallons must be ad...

Page 18: ...erature of the engine coolant not the coolant level If the coolant is not at its proper level the gauge indication will not be accurate If the gauge enters the red section the oil pressure engine cool...

Page 19: ...s soon as possible Engine oil pressure gauge This shows the engine oil pressure in the system Sufficient pressure exists as long as the needle remains in the normal range the area between the L and H...

Page 20: ...the parking lamps Rotate to the second position to also turn on the headlamps High beams Push forward to activate Pull toward you to deactivate Flash to pass Pull toward you to activate and release to...

Page 21: ...ions may result in a collision Foglamp control if equipped The headlamp control also operates the foglamps The foglamps can be turned on only when the headlamp control is in the position and the high...

Page 22: ...the position and pull toward you for foglamps POWER REAR SLIDER WINDOW IF EQUIPPED Press the open arrow side of control to open window Press the closed arrow side of control to close window POWER ADJ...

Page 23: ...ly Do not hang any type of accessory or accessory bracket from the plug Improper use of the power outlet can cause damage not covered by your warranty The auxiliary power point is located on the instr...

Page 24: ...e power outlet can cause damage not covered by your warranty An additional auxiliary power point is located on the right side rear trim panel next to the rear seat USING YOUR AUDIO SYSTEM AM FM stereo...

Page 25: ...is turned back on AM FM select The AM FM select control works in radio and tape modes AM FM select in radio mode This control allows you to select AM or FM frequency bands Press the AM control to sele...

Page 26: ...ess to find the next listenable station down the frequency band Press to find the next listenable station up the frequency band Scan function The scan function works in radio mode Scan function in rad...

Page 27: ...a memory preset control until the sound returns indicating the station is held in memory on the control you selected Bass adjust The bass adjust control allows you to increase or decrease the audio s...

Page 28: ...e right and left speakers Speaker fade adjust Speaker sound can be adjusted between the front and rear speakers Tape select To enter tape mode while in radio mode press the TAPE AMS control BAL FADE T...

Page 29: ...nsure proper operation of the AMS feature the tape MUST have a blank section of at least four seconds duration between programs Rewind The rewind control works in tape mode To rewind in tape mode pres...

Page 30: ...poration Dolbyt and the double D symbol are registered trademarks of Dolby Laboratories Licensing Corporation Setting the clock Press CLK to toggle between listening frequencies and clock mode while i...

Page 31: ...will always be displayed Premium AM FM Stereo Single CD Radio Your audio system is equipped with selective lighting a unique lighting strategy This lighting feature is operable when the headlamps are...

Page 32: ...back on Speed sensitive volume if equipped With this feature radio volume changes automatically and slightly with vehicle speed to compensate for road and wind noise The recommended level for speed se...

Page 33: ...uipped AM FM select in radio mode This control allows you to select AM or FM frequency bands Press the control to switch between AM FM1 or FM2 memory preset stations AM FM select in CD or CD changer m...

Page 34: ...t listenable station up the frequency band Seek function for CD or CD changer if equipped Press to seek to the previous track of the current disc If a selection has been playing for three seconds or m...

Page 35: ...nd returns indicating the station is held in memory on the control you selected Autoset memory preset Autoset allows you to set strong radio stations without losing your original manually set preset s...

Page 36: ...crease or decrease the audio system s treble output Speaker balance adjust Speaker sound distribution can be adjusted between the right and left speakers Speaker fade adjust Speaker sound can be adjus...

Page 37: ...ontrol to stop and eject a CD Compression feature if equipped Compression adjust brings soft and loud CD passages together for a more consistent listening level Press the COMP control to activate and...

Page 38: ...ogy to transmit station ID and program type as desired Press the RDS control until RDS ON or RDS OFF appear in the display Use the SEL control to enable ON or disable OFF the feature Once activated yo...

Page 39: ...c Country Info Jazz Oldies R B Religious Rock Soft Top 40 Show With RDS activated press the RDS control until SHOW is displayed Use the SEL control to select TYPE NAME or NONE Mute mode Press the cont...

Page 40: ...g feature is operable when the headlamps are illuminated During the operation of any selected mode lighting for the individual function controls will either illuminate or turn off Those controls which...

Page 41: ...e if equipped With this feature radio volume changes automatically and slightly with vehicle speed to compensate for road and wind noise The recommended level for speed sensitive volume is from level...

Page 42: ...top tape play and begin radio play AM FM select in CD mode Press this control to stop CD play and begin radio play Tune adjust The tune control works in radio or CD mode if equipped Tune adjust in rad...

Page 43: ...own the frequency band Press to find the next listenable station up the frequency band Seek function in tape mode Press to listen to the previous selection on the tape or return to the beginning of th...

Page 44: ...mpling of all selections on the CD The CD scans in a forward direction wrapping back to the first track at the end of the CD To stop on a particular selection press the control again Radio station mem...

Page 45: ...on the frequency band the remaining memory preset controls will all store the last strong station available To deactivate autoset and return to your audio system s manually set memory stations press t...

Page 46: ...a tape loaded into the audio system while in the radio or CD mode press the TAPE control Press the button during rewind or fast forward to stop the rewind or fast forward function To begin CD play if...

Page 47: ...he fast forward control works in tape and CD modes if equipped In the tape mode tape direction will automatically reverse when the end of the tape is reached In CD mode pressing the control for less t...

Page 48: ...mpression adjust brings soft and loud CD passages together for a more consistent listening level Press the COMP control to activate and deactivate compression adjust The effect of the feature varies w...

Page 49: ...desired Press the RDS control until RDS ON or RDS OFF appears in the display Use the SEL control to enable ON or disable OFF the feature With the RDS activated press the SEL control to scroll through...

Page 50: ...ock Soft Top 40 Show With RDS activated press the RDS control until SHOW is displayed Use the SEL control to select TYPE the display shows the program type NAME the display shows the call letters of t...

Page 51: ...pped The CD changer is in one of the following locations behind the passenger s seat Regular Cab only in the center console SuperCab SuperCrew with Captain s chairs under the rear bench on the driver...

Page 52: ...the disc holder B out of the magazine If you pull too hard on the disc holder the disc holder may come completely out of the magazine If this happens reinsert the disc holder back into the magazine w...

Page 53: ...following instructions apply for loading discs 1 The holders DO NOT pull out Load the discs into the magazine slots numbered 1 through 6 on the window one at a time with labeled surfaces upward 2 Sta...

Page 54: ...yes Do not attempt to disassemble the case If sound skips You may be traveling on a rough road playing badly scratched discs or the disc may be dirty Skipping will not scratch the discs or damage the...

Page 55: ...nutes long or less Do not expose tapes to direct sunlight high humidity extreme heat or extreme cold Allow tapes that may have been exposed to extreme temperatures to reach a moderate temperature befo...

Page 56: ...tructure out of its shadow returns your reception to normal Station overload Weak signals are sometimes captured by stronger signals when you pass a broadcast tower A stronger signal may temporarily o...

Page 57: ...r through the floor ducts FLOOR DEF Distributes outside air through the floor ducts and the windshield defroster ducts DEF Distributes outside air through the windshield defroster ducts It can be used...

Page 58: ...nder the front seat that will interfere with the airflow to the rear seats if equipped Remove any snow ice or leaves from the air intake area at the base of the windshield Do not place objects over th...

Page 59: ...ditioner removes considerable moisture from the air during operation it is normal if clear water drips on the ground under the air conditioner drain while the system is working and even after you have...

Page 60: ...d below the outside temperature because the air conditioning does not operate in this mode FLOOR DEFROST Distributes outside air through the windshield defroster ducts and the floor ducts Heating and...

Page 61: ...ions the air conditioner will perform more efficiently in cooling the vehicle if driven for two or three minutes with the windows open This will force most of the hot stale air out of the vehicle Once...

Page 62: ...ition Refer to Passenger air bag ON OFF switchin the Seating and safety restraints chapter POSITIONS OF THE IGNITION 1 ACCESSORY allows the electrical accessories such as the radio to operate while th...

Page 63: ...at or above 48 km h 30 mph Do not use the speed control in heavy traffic or on roads that are winding slippery or unpaved Do not shift the gearshift lever into N Neutral with the speed control on To...

Page 64: ...our vehicle speed If your vehicle slows down more than 16 km h 10 mph below your set speed on an uphill your speed control will disengage This is normal Pressing RES will re engage it Do not use the s...

Page 65: ...COAST Release the control when the desired speed is reached or Press and release COAST to operate the Tap Down function Each press will decrease the set speed by 1 6 km h 1 mph or Depress the brake p...

Page 66: ...sly programmed set speed Pressing OFF will erase the previously programmed set speed To return to a previously set speed Press RES For RES to operate the vehicle speed must be faster than 48 km h 30 m...

Page 67: ...EERING WHEEL IF EQUIPPED Pull the tilt steering control toward you to move the steering wheel up or down Hold the control while adjusting the wheel to the desired position then release the control to...

Page 68: ...s if equipped When the windshield wiper control is set on the intermittent settings speed sensitive front wipers automatically adjust as the vehicle s speed changes OVERDRIVE CONTROL Activating overdr...

Page 69: ...lever and the transmission control switch operation refer to the Automatic Transmission Operation section of the Driving chapter OVERHEAD CONSOLE IF EQUIPPED The appearance of your vehicle s overhead...

Page 70: ...clip from the door Place Velcroy hook onto side of aftermarket transmitter opposite of actuator control Place the transmitter into storage compartment control down Place the provided height adaptors...

Page 71: ...falls below 3 C 38 F the display will alternate from ICE to the outside temperature at a two second rate for one minute Compass The compass display is contained in the overhead console The vehicle he...

Page 72: ...ECT control until VAR appears in the display then release The display should show the current zone number 4 Press the SELECT control until the desired zone number appears The display will flash and th...

Page 73: ...appears in the display approximately eight seconds and release Drive the vehicle slowly less than 5 km h 3 mph in circles until CAL indicator turns off in about 2 3 complete circles The compass is now...

Page 74: ...he remote entry controls are pressed and the ignition is OFF With the ignition key in the ACC or ON position the rear dome lamp can be turned ON or OFF by sliding the control Courtesy reading lamps Th...

Page 75: ...ate when bright lights glare reach the inside rear view mirror When the inside rear view mirror detects bright light from behind the vehicle the inside rear view mirror will automatically adjust darke...

Page 76: ...ederal safety standards this includes any garage door opener model manufactured before April 1 1982 A garage door which cannot detect an object signaling the door to stop and reverse does not meet cur...

Page 77: ...Link jci com Operating the HomeLinkT Universal Transceiver Once programmed the HomeLinkt Universal Transceiver can be used in place of hand held transmitters To operate simply press and release the ap...

Page 78: ...press from step 3 will activate the door The HomeLinkt Universal Transceiver has now been trained to the receiver The remaining two buttons may now be programmed if this has not previously been done...

Page 79: ...o program the HomeLinkt Universal Transceiver To program your hand held transmitters continue to hold the button on the HomeLinkt Universal Transceiver press and re press the hand held transmitter but...

Page 80: ...nd The indicator light will flash amber and an error tone will sound if the REC button is pressed when memory is full To play a message 1 Press and release the PLAY button to play the message 2 Press...

Page 81: ...roof control To close press and hold as desired the front portion of the moon roof control To halt motion at any point during one touch opening press the control a second time To tilt into the vent p...

Page 82: ...changer if equipped Use only soft cups in the cupholder Hard objects can injure you in a collision POWER WINDOWS IF EQUIPPED Press and hold the rocker switches to open and close windows Press the top...

Page 83: ...down on the top part of the driver power window control Accessory delay if equipped With accessory delay the window switches may be used for up to ten minutes after the ignition switch is turned to t...

Page 84: ...for each door Setting the lock for one door will not automatically set the lock for both doors Move lock control up to engage the childproof lock Move control down to disengage childproof locks POWER...

Page 85: ...uipped When the turn signal is activated the outer portion of the appropriate mirror housing will blink red This provides an additional warning to other drivers that your vehicle is about to turn Fold...

Page 86: ...re with the operation of the accelerator or the brake pedal To remove the floor mat reverse the installation procedure TAILGATE LOCK IF EQUIPPED Your vehicle may be equipped with a tailgate lock desig...

Page 87: ...ft right side off of its hinge 6 Lift left side off of its hinge To install follow the removal procedures in reverse order BED EXTENDER IF EQUIPPED Your vehicle may be equipped with a bed extender des...

Page 88: ...6 kg 100 lbs on the tailgate The bed extender should always be kept in the stowed position with the tailgate closed when not in use To remove the bed extender 1 Extend the bed extender 2 Pull the roun...

Page 89: ...er The removal and stowage for styleside and flareside vehicles are basically the same except where noted To remove or stow the cover 1 Styleside only In cold weather lower tailgate and release the le...

Page 90: ...way from the side rail and roll the cover from rear to front 5 Secure the cover behind the cab with two straps The cover may be removed from the vehicle by sliding it sideways out of the front rail Co...

Page 91: ...rs from pickup box by pushing towards either side to release tension Lower tailgate depress the levers on each side of the rear rail and remove rear rail from pickup box Controls and features 91 I n f...

Page 92: ...vers on each side of the rear rail and push rear rail towards the front of the pickup box securing it behind the cross bars and cover For installation of the cover follow the removal procedure in reve...

Page 93: ...erior tonneau cover release handle that provides a means of escape for children and adults in the event they become locked inside the pickup box Adults are advised to familiarize themselves with the o...

Page 94: ...ss a coded key programmed to your vehicle is used The SecuriLocky passive anti theft system is not compatible with non Ford aftermarket remote start systems Use of these systems may result in vehicle...

Page 95: ...nd key on the same key ring as the coded key may cause vehicle starting issues If present you need to keep these objects from touching the coded key while starting the engine These objects and devices...

Page 96: ...to a NO START condition If an unprogrammed key is used in the ignition it will cause a NO START condition Programming spare keys A maximum of eight keys can be coded to your vehicle Only SecuriLocky k...

Page 97: ...ded key 6 To program additional new unprogrammed key s repeat this procedure from step 1 If successful the new coded key s will start the vehicle s engine and the theft indicator will illuminate for t...

Page 98: ...to aid in troubleshooting Unlocking the doors Press this control to unlock the driver s door The interior lamps will illuminate Press the control a second time within three seconds to unlock all door...

Page 99: ...radio towers structures around the vehicle other vehicles parked next to the vehicle To replace the battery 1 Twist a thin coin between the two halves of the transmitter near the key ring DO NOT TAKE...

Page 100: ...cession within 10 seconds with the eighth turn ending in the 4 ON position The doors will lock unlock to confirm that programming mode has been entered Within 20 seconds program a remote transmitter b...

Page 101: ...e power door unlock control three times 3 Turn the ignition key from ON to OFF 4 Press the power door unlock control three times 5 Turn the ignition back to ON The horn will chirp 6 Press the unlock c...

Page 102: ...e of the same number or presents them in sequential order Thieves can easily figure out these types of codes Your personal code does not replace the permanent code that the dealership gave you You can...

Page 103: ...doors To lock the doors Press the 7 8 control and the 9 0 control at the same time Activating deactivating autolock with the keyless entry system Before following the activation or deactivation proced...

Page 104: ...se to that position as possible Refer to the following to raise and lower the head restraints The head restraints can be moved up and down Push control to lower head restraint Adjusting the front manu...

Page 105: ...60 40 split bench seat if equipped Lift the release bar to move the seat forward or backward Ensure the seat is relatched into place Pull the seatback handle up to move the seat back forward or backwa...

Page 106: ...rd Captain s chair if equipped Lift the track release bar to move the seat forward or rearward Make sure that the seat is relatched into place Pull the release lever handle located on the side of the...

Page 107: ...back upright and the lap belt snug and low across the hips Reclining the seatback can reduce the effectiveness of the seat s safety belt in the event of a collision The control is located on the outbo...

Page 108: ...se or lower the rear portion of the seat cushion Type A Type B Press the control to move the seat forward backward up or down Type A Type B Seating and safety restraints 108 I n f o r ma t i o nP r o...

Page 109: ...support control toward the front of vehicle to move the lumbar support forward for more direct support Turn the lumbar support control toward the rear of vehicle to move the lumbar support back for l...

Page 110: ...empty If not latched the seat may cause injury during a sudden stop 1 Pull control on the side of the seat to release seat cushion from storage position 2 Push seat cushion down until it locks into h...

Page 111: ...1 Pull control to release seat 2 Pull seatback toward front seat and down into load floor position Seating and safety restraints 111 I n f o r ma t i o nP r o v i d e db y...

Page 112: ...be sure that the seat is in a latched position whether the seat is occupied or empty If not latched the seat may cause injury during a sudden stop 1 Pull control on the side of the seat to release se...

Page 113: ...armrest up or down SAFETY RESTRAINTS Safety restraints precautions Always drive and ride with your seatback upright and the lap belt snug and low across the hips To reduce the risk of injury make sure...

Page 114: ...significantly more likely to die than a person wearing a safety belt Each seating position in your vehicle has a specific safety belt assembly which is made up of one buckle and one tongue that are d...

Page 115: ...Front seats Rear seats if equipped 2 To unfasten push the release button and remove the tongue from the buckle Front seats Seating and safety restraints 115 I n f o r ma t i o nP r o v i d e db y...

Page 116: ...em can also be made to lock manually by quickly pulling on the shoulder belt Rear seat belts if equipped cannot be made to lock up by pulling quickly on the belt Automatic locking mode In this mode th...

Page 117: ...1 Buckle the combination lap and shoulder belt Front seats Rear seats if equipped 2 Grasp the shoulder portion and pull downward until the entire belt is extracted Seating and safety restraints 117 I...

Page 118: ...ractor feature for child seats is still functioning properly In addition all seat belts should be checked for proper function BELT AND RETRACTOR ASSEMBLY MUST BE REPLACED if the seat belt assembly aut...

Page 119: ...retensioners Refer to the Safety belt maintenance section in this chapter Failure to replace the safety belt assembly under the above conditions could result in severe personal injuries in the event o...

Page 120: ...Regular Cab 4 door SuperCrew 4 door SuperCab Bench seats only Seating and safety restraints 120 I n f o r ma t i o nP r o v i d e db y...

Page 121: ...across the waist The lap belt tongues are designed to fit only in the correct buckle The tongue will not securely latch when using any of the outboard seating positions buckle To ensure that you have...

Page 122: ...the safety belt is too short when fully extended there is a 20 cm 8 inch safety belt extension assembly that can be added part number 611C22 This assembly can be obtained from your dealer at no cost U...

Page 123: ...eminders to the driver that the driver s safety belt is unbuckled by intermittently sounding a chime and illuminating the safety belt warning lamp in the instrument cluster If Then The driver s safety...

Page 124: ...us to take a few seconds to buckle up Seat belts don t work Safety belts when used properly reduce risk of death to front seat occupants by 45 in cars and by 60 in light trucks Traffic is light Nearl...

Page 125: ...e is set the gearshift is in P Park automatic transmission or the neutral position manual transmission the ignition switch is in the OFF position all vehicle doors are closed the driver s safety belt...

Page 126: ...ation procedure is complete Safety belt maintenance Inspect the safety belt systems periodically to make sure they work properly and are not damaged Inspect the safety belts to make sure there are no...

Page 127: ...ir bag system and impact severity This information will assist Ford in the servicing of your vehicle and may help Ford better understand real world collisions and further improve the safety of future...

Page 128: ...ransport children 12 years old and under in the back seat and always properly use appropriate child restraints National Highway Traffic Safety Administration NHTSA recommends a minimum distance of at...

Page 129: ...he Body Builders Layout Book for instructions about the appropriate installation of additional equipment Removing the blocker beam without installing snow plow attachment hardware may effect air bag d...

Page 130: ...the bag or sodium compounds e g baking soda that result from the combustion process that inflates the air bag Small amounts of sodium hydroxide may be present which may irritate the skin and eyes but...

Page 131: ...bag deactivation switch the impact sensors the system wiring the air bag system readiness light the air bag back up power and the air bag ignitors Determining if the system is operational The SRS uses...

Page 132: ...dealership or qualified technician Air bags MUST BE disposed of by qualified personnel Passenger air bag ON OFF switch if equipped An air bag ON OFF switch has been installed in this vehicle Before d...

Page 133: ...at the passenger air bag is deactivated If the light fails to illuminate when the passenger air bag switch is in the OFF position and the ignition switch is in ON have the passenger air bag switch ser...

Page 134: ...er is a person who meets the requirements stated either in Category 1 2 or 3 of the NHTSA Transport Canada deactivation criteria which follows The safety belts for the driver and right front passenger...

Page 135: ...ined in the vehicle especially in the front seat This provides the protection of safety belts and permits the air bags to provide the additional protection they were designed to provide If you choose...

Page 136: ...hit the dashboard or windshield in a crash Transport Canada deactivation criteria Canada Only 1 Infant An infant less than 1 year old must ride in the front seat because my vehicle has no rear seat t...

Page 137: ...them in safety seats made especially for children Check your local and state or provincial laws for specific requirements regarding the safety of children in your vehicle Never let a passenger hold a...

Page 138: ...at encourages safer seating posture and better fit of lap and shoulder belts on the child A belt positioning booster should be used if the shoulder belt rests in front of the child s face or neck or i...

Page 139: ...ht position Put the safety belt in the automatic locking mode Refer to Automatic locking mode passenger side front and outboard rear seating positions Regular Cab and SuperCab passenger side front and...

Page 140: ...t use a forward facing child seat in the front seat move the seat all the way back 1 Position the child safety seat in a seat with a combination lap and shoulder belt Children 12 and under should be p...

Page 141: ...coming from for that seating position until you hear a snap and feel the latch engage Make sure the tongue is latched securely by pulling on it 5 To put the retractor in the automatic locking mode gra...

Page 142: ...o through nine Check to make sure the child seat is properly secured before each use Installing child safety seats in the front row lap belt seating positions 1 Lengthen the lap belt To lengthen the b...

Page 143: ...sure the buckle is latched securely by pulling on the webbing 5 If you have not pulled out enough webbing to reach allow the webbing to fully retract before attempting to pull it out again and repeat...

Page 144: ...ng loops for the tether straps and anchor loops The tether strap anchors in your vehicle are in the following positions shown from top view Attach the tether strap only to the appropriate tether ancho...

Page 145: ...to pull the seatback forward to access the tether anchors Make sure the seat is locked in the upright position before installing the child seat Refer to the Folding Down The Rear Seats section in thi...

Page 146: ...ety seat is not anchored properly the risk of a child being injured in a collision greatly increases Tether strap attachment rear SuperCab only There are three loops of webbing just above the back of...

Page 147: ...h the loop directly behind the child seat 2 Attach the strap hook onto the loop behind an adjacent seating position 3 Install the child safety seat tightly using the safety belts Follow the instructio...

Page 148: ...ust system which can start a fire Do not start your vehicle in a closed garage or in other enclosed areas Exhaust fumes can be toxic Always open the garage door before you start the engine See Guardin...

Page 149: ...th an automatic transmission Make sure the parking brake is set Make sure the gearshift is in P Park If starting a vehicle with a manual transmission Make sure the parking brake is set Push the clutch...

Page 150: ...may occur when front wheels are turned front wheel is against the curb steering wheel is turned when getting in or out of the vehicle Make sure the corresponding lights illuminate or illuminate briefl...

Page 151: ...ion 4 When the engine starts release the key then release the accelerator pedal gradually as the engine speeds up 5 After idling for a few seconds apply the brake and release the parking brake Using t...

Page 152: ...f its constituents and certain vehicle components contain or emit chemicals known to the State of California to cause cancer and birth defects or other reproductive harm In addition certain fluids con...

Page 153: ...motor and pulsation in the pedal may be observed during ABS braking events Pedal pulsation coupled with noise while braking under panic conditions or on loose gravel bumps wet or snowy roads is normal...

Page 154: ...g control of your vehicle and providing there is sufficient space will enable you to avoid obstacles and bring the vehicle to a controlled stop The Anti Lock system does not decrease the time necessar...

Page 155: ...crease greatly and the handling of your vehicle will be adversely affected Pull the release lever to release the brake Driving with the parking brake on will cause the brakes to wear out quickly and r...

Page 156: ...s more effort If the steering wanders or pulls the condition could be caused by any of the following underinflated tire s on any wheel s uneven vehicle loading high crown in center of road high crossw...

Page 157: ...and placement of the load hauling people and cargo may raise the center of gravity of the vehicle Use extra caution while becoming familiar with your vehicle Know the capabilities and limitations of b...

Page 158: ...the parking brake fully and make sure the gearshift is latched in P Park Turn off the ignition whenever you leave your vehicle If the parking brake is fully released but the brake warning lamp remains...

Page 159: ...ard Always come to a complete stop before shifting into and out of R Reverse N Neutral With the gearshift lever in N Neutral the vehicle can be started and is free to roll Hold the brake pedal down wh...

Page 160: ...transmission will automatically return to normal overdrive mode Every time the vehicle is shut off and restarted you must press the transmission control switch to cancel overdrive operation if drivin...

Page 161: ...If the shift quality does not improve within a few hundred kilometers miles of operation or if the downshifts and other throttle conditions do not function normally see your dealer or a qualified ser...

Page 162: ...ch to hold your vehicle at a standstill while waiting on a hill These actions will greatly reduce clutch life Recommended shift speeds Upshift and downshift according to the following charts for your...

Page 163: ...ommended for best fuel economy Shift from Transfer case position if equipped 2H or 4H 4L 1 2 24 km h 15 mph 14 km h 9 mph 2 3 40 km h 25 mph 19 km h 12 mph 3 4 58 km h 36 mph 23 km h 14 mph 4 D Overdr...

Page 164: ...omy Shift from Transfer case position if equipped 2H or 4H 4L 1 2 16 km h 10 mph 6 km h 4 mph 2 3 26 km h 16 mph 10 km h 6 mph 3 4 43 km h 27 mph 16 km h 10 mph 4 D Overdrive 68 km h 42 mph 26 km h 16...

Page 165: ...cle 1 Disengage the clutch apply brake and shift into Neutral 2 Set parking brake 3 Shift into 1 First 4 Turn the ignition key to position 3 OFF 1 2 4 R 3 D 3 2 1 5 4 Driving 165 I n f o r ma t i o nP...

Page 166: ...t three seconds before shifting into R Reverse You can shift into R Reverse only by moving the gearshift lever from left of 3 Third and 4 Fourth gears before you shift into R Reverse This is a special...

Page 167: ...essed on manual transmissions 4WD operation is not recommended on dry pavement Doing so could result in difficult disengagement of the transfer case increased tire wear and decreased fuel economy 4WD...

Page 168: ...at a stop or any forward speed up to 88 km h 55 mph Shifting from 4H 4WD high to 4L 4WD low 1 Bring the vehicle to a complete stop 2 Depress the brake 3 Place the gearshift lever in N Neutral automati...

Page 169: ...ral position overrides the transmission and puts the vehicle in neutral regardless of transmission gearshift lever position The vehicle can move forward or backwards This position should only be used...

Page 170: ...e rear wheels slipping Shifting from 4H 4WD high to 2H 2WD high Move the 4WD control to 2H at any forward speed Shifting between 4H 4WD high and 4L 4WD low 1 Bring the vehicle to a stop 2 Depress the...

Page 171: ...If your vehicle gets stuck If the vehicle is stuck it may be rocked out by shifting from forward and reverse gears stopping between shifts in a steady pattern Press lightly on the accelerator in each...

Page 172: ...ities are not to be checked or changed unless a leak is suspected or repair is required Driving on hilly or sloping terrain When driving on a hill avoid driving crosswise or turning on steep slopes Yo...

Page 173: ...b Weight Weight of the vehicle including any standard equipment fluids lubricants etc It does not include passengers or aftermarket equipment Payload Combined maximum allowable weight of cargo passeng...

Page 174: ...abel Do not use replacement tires with lower load carrying capacities than the originals because they may lower the vehicle s GVWR and GAWR limitations Replacement tires with a higher limit than the o...

Page 175: ...perate the vehicle without cargo To obtain correct weights try taking your vehicle to a shipping company or an inspection station for trucks 3 Subtract your loaded vehicle weight from the maximum GCWR...

Page 176: ...components carefully after any towing operation Exceeding the maximum GCWR could result in extensive damage to your vehicle and personal injury Do not exceed the GVWR or the GAWR specified on the cer...

Page 177: ...ion Engine Rear axle ratio Maximum GCWR kg lbs Maximum trailer weight kg lbs 5 4L 3 73 4 500 10 000 1 825 4 000 Engine Rear axle ratio Maximum GCWR kg lbs Maximum trailer weight kg lbs Regular Cab 4x2...

Page 178: ...6 16 4 763 10 500 2 540 5 600 4 6L 3 55 40 6 16 5 216 11 500 2 994 6 600 2 857 6 300 4 6L 3 55 43 2 17 4 990 11 000 2 767 6 100 2 630 5 800 5 4L 3 31 40 6 16 5 443 12 000 3 130 6 900 5 4L 3 55 40 6 16...

Page 179: ...e on a level surface With the ignition on and all doors closed allow the vehicle to stand for several minutes so that it can level 2 Measure the height of a reference point on the front and rear bumpe...

Page 180: ...ions See your dealer or trailer rental agency for proper instructions and equipment for hooking up trailer lamps Using a step bumper if equipped The rear bumper is equipped with an integral hitch and...

Page 181: ...smissions or N Neutral manual transmissions This aids engine cooling and air conditioner efficiency Vehicles with trailers should not be parked on a grade If you must park on a grade place wheel chock...

Page 182: ...the driveshaft be removed installed only by a qualified technician See your local dealer for driveshaft removal installation Improper removal installation of the driveshaft can cause transmission flui...

Page 183: ...nt accessory reserve capacity The total weight of the snowplow and aftermarket equipment must not exceed the Total Accessory Reserve Capacity The weight of the installed snowplow and aftermarket equip...

Page 184: ...of 13 to 23 km h 8 to 14 mph or a parked car at a range of 25 to 45 km h 16 to 28 mph Careless or high speed driving while plowing snow which results in vehicle decelerations equivalent to or greater...

Page 185: ...eds below 8 km h 5 mph Shift transfer case to 4H 4WD High when plowing larger areas or light snow at higher speeds Do not exceed 24 km h 15 mph Do not shift the transmission from a forward gear to R R...

Page 186: ...idents or getting stuck in the mud or snow are covered some exclusions apply such as impound towing or repossession Using roadside assistance Complete the roadside assistance identification card and p...

Page 187: ...f vehicle breakdown approaching danger etc The hazard flashers can be operated when the ignition is off The hazard lights control is located on top of the steering column Depress hazard lights control...

Page 188: ...n to the OFF position 2 Check the fuel system for leaks 3 If no fuel leak is apparent reset the fuel pump shut off switch by pushing in on the reset button 4 Turn the ignition to the ON position Pause...

Page 189: ...rage rating can cause severe wire damage and could start a fire Standard fuse amperage rating and color COLOR Fuse Rating Mini Fuses Standard Fuses Maxi Fuses Cartridge Maxi Fuses Fuse Link Cartridge...

Page 190: ...er Compartment Fuse Panel Description 1 15A Audio 2 5A Powertrain Control Module PCM Cluster 3 20A Cigar Lighter Data Link Connector 4 5A Exterior Rear View Mirror Switch Mirror turn Signal Relays 5 1...

Page 191: ...mp Switch Lamps Turn Hazard Flasher 14 15A Battery Saver Relay Interior Lamp Relay 15 5A Stop Lamp Switch Speed Control Brake Shift Interlock GEM Module RABS Module 16 20A Headlamps Hi Beams Cluster H...

Page 192: ...rdrive Control Switch Central Security Module Belt Minder 30 30A Passive Anti Theft Transceiver Cluster Ignition Coils Powertrain Control Module Relay Coil on Plugs Radio Noise Capacitor ECC Diode 31...

Page 193: ...USE 115 MAXI FUSE 116 MAXI FUSE 117 MAXI FUSE 118 MAXI FUSE 111 MAXI FUSE 112 MAXI FUSE 113 MAXI FUSE 114 MAXI FUSE 107 MAXI FUSE 108 MAXI FUSE 109 MAXI FUSE 110 MAXI FUSE 103 MAXI FUSE 104 MAXI FUSE...

Page 194: ...Mass Air Flow Sensor 19 10A Trailer Camper Adapter Right Stop and Right Turn Lamp 20 10A Trailer Camper Adapter Left Stop and Left Turn Lamp 21 Not Used 22 Not Used 23 15A HEGO Sensor Automatic Trans...

Page 195: ...ats 201 Trailer Tow Park Lamp Relay 202 Front Wiper Run Park Relay 203 Trailer Tow Backup Lamp Relay 204 A C Clutch Relay 205 Horn Relay 206 Fog Lamp Relay 207 Front Washer Pump Relay 208 Inter Cooler...

Page 196: ...wheel tire may be used on the spare if the wheels match If your vehicle is equipped with 4WD a spare tire of a different size than the road tires should not be used Such a tire could result in damage...

Page 197: ...are tire Stowing the spare tire 1 Lay the tire on the ground with the valve stem facing up 2 Slide the wheel under the vehicle and install the retainer through the wheel center 3 Turn the jack handle...

Page 198: ...hift lever in P Park automatic transmission or in the reverse gear manual transmission and turn engine OFF 3 Block the diagonally opposite wheel 4 Obtain the spare tire and jack from their storage loc...

Page 199: ...vehicle from moving or slipping off the jack even if the transmission is in P Park or in the reverse gear manual transmission To prevent the vehicle from moving when you change the tire be sure that...

Page 200: ...ire making sure the valve stem is facing outward Reinstall the lug nuts until the wheel is snug against the hub Do not fully tighten the lug nuts until the wheel has been lowered 10 Lower the wheel by...

Page 201: ...will not effect function or durability of the transmission Over time the adaptive learning process will fully update transmission operation to its optimum shift feel 1 Use only a 12 volt supply to st...

Page 202: ...ng bolts are used to designate the assisting boosting battery While connecting the positive cable make sure the ends of the negative cable are not resting against metal parts of the vehicles 2 Connect...

Page 203: ...system Do not use fuel lines engine rocker covers or the intake manifold as grounding points Do not connect the end of the second cable to the negative terminal of the battery to be jumped A spark ma...

Page 204: ...s before disconnecting the jumper cables Removing the jumper cables Remove the jumper cables in the reverse order that they were connected 1 Remove the jumper cable from the ground metal surface Note...

Page 205: ...e engine computer can relearn its idle conditions When the battery is disconnected or a new battery is installed the transmission must relearn its adaptive strategy As a result of this the transmissio...

Page 206: ...enter It is recommended that your vehicle be towed with a wheel lift or flatbed equipment Do not tow with a slingbelt Ford Motor Company has not approved a slingbelt towing procedure If equipped with...

Page 207: ...ng a NASCAR Special Edition F 150 or a Harley Davidson F 150 using flatbed equipment you must place two 4X4 boards at the end of the ramp to allow for bumper clearance If the vehicle is towed by other...

Page 208: ...thing jewelry or long hair away from moving parts Do not work on a vehicle with the engine running in an enclosed space unless you are sure you have enough ventilation Keep all lit cigarettes open fla...

Page 209: ...icle from moving unexpectedly Do not start your engine with the air cleaner removed and do not remove it while the engine is running The cooling fan is automatic and may come on at any time Always dis...

Page 210: ...tch fluid reservoir manual transmission 5 Brake fluid reservoir 6 Power distribution box 7 Engine coolant reservoir 8 Air filter assembly 9 Power steering fluid reservoir 10 Transmission fluid dipstic...

Page 211: ...pstick 4 Brake fluid reservoir 5 Power distribution box 6 Air filter assembly 7 Engine coolant reservoir 8 Windshield washer fluid reservoir 9 Battery 10 Transmission fluid dipstick automatic transmis...

Page 212: ...s on level ground 2 Turn the engine off and wait a few minutes for the oil to drain into the oil pan 3 Set the parking brake and ensure the gearshift is securely latched in P Park automatic transmissi...

Page 213: ...il level indicator dipstick 6 Wipe the indicator clean Insert the indicator fully then remove it again If the oil level is between the MIN and MAX marks the oil level is acceptable DO NOT ADD OIL Main...

Page 214: ...rtified engine oil of the recommended viscosity Remove the engine oil filler cap and use a funnel to pour the engine oil into the opening 3 Recheck the engine oil level Make sure the oil level is not...

Page 215: ...are unnecessary and could under certain conditions lead to engine damage which is not covered by your warranty Change your engine oil and filter according to the appropriate schedule listed in the sch...

Page 216: ...ied to meet Ford specifications Refer to Lubricant specifications in the Capacities and specifications chapter Brake fluid is toxic If brake fluid contacts the eyes flush eyes with running water for 1...

Page 217: ...and specifications Brake fluid is toxic If brake fluid contacts the eyes flush eyes with running water for 15 minutes Seek medical attention if irritation persists If taken internally drink water and...

Page 218: ...sh wiper blades or washer system Do not put washer fluid in the engine coolant reservoir Washer fluid placed in the cooling system may harm engine and cooling system components ENGINE COOLANT Checking...

Page 219: ...of the engine coolant in the reservoir The engine coolant should be at the cold fill level or within the cold fill range as listed on the engine coolant reservoir depending upon application Refer to...

Page 220: ...ium Gold Engine Coolant meeting Ford Specification WSS M97B51 A1 To determine your vehicle s coolant type color check your coolant reservoir Add Motorcraft Premium Engine Coolant green colored VC 4 A...

Page 221: ...cap on the radiator of a vehicle with an overflow system follow these steps to add engine coolant To avoid personal injury make sure the engine is cool before unscrewing the coolant pressure relief ca...

Page 222: ...d Motor Company recommends the use of a recycled engine coolant produced by Ford approved processes in vehicles originally equipped with Motorcraft Premium Engine Coolant green colored However not all...

Page 223: ...low 40 will decrease the corrosion protection characteristics of the engine coolant and may cause engine damage decreased engine coolant concentrations below 40 will decrease the freeze protection cha...

Page 224: ...ncrease Once the engine temperature cools the engine can be re started Take your vehicle to a service facility as soon as possible to minimize engine damage When fail safe mode is activated You have l...

Page 225: ...schedules If adding fluid is necessary use only MERCONt ATF 1 Start the engine and let it run until it reaches normal operating temperature the engine coolant temperature gauge indicator will be near...

Page 226: ...affic during hot weather or pulling a trailer the vehicle should be turned off for about 30 minutes to allow fluid to cool before checking 1 Drive the vehicle 30 km 20 miles or until it reaches normal...

Page 227: ...can check the fluid without driving if the ambient temperature is above 10 C 50 F However if fluid is added at this time an overfill condition could result when the vehicle reaches normal operating te...

Page 228: ...k and also in the Lubricant specifications section in the Capacities and specifications chapter Use of a non approved automatic transmission fluid may cause internal transmission component damage If n...

Page 229: ...el should be at bottom of the opening 4 Add enough fluid through the filler opening so that the fluid level is at the bottom of the opening 5 Install and tighten the fill plug securely Use only fluid...

Page 230: ...meets Ford specifications Refer to the Capacities and specifications chapter DRIVELINE UNIVERSAL JOINT AND SLIP YOKE Your vehicle may be equipped with universal joints that require lubrication Refer t...

Page 231: ...er If the battery needs water often have the charging system checked If your battery has a cover shield make sure it is reinstalled after the battery has been cleaned or replaced For longer trouble fr...

Page 232: ...led by a computer some control conditions are maintained by power from the battery When the battery is disconnected or a new battery is installed the engine must relearn its idle and fuel trim strateg...

Page 233: ...TER MAINTENANCE Refer to the scheduled maintenance guide for the appropriate intervals for changing the air filter element When changing the air filter element use only the Motorcraft air filter eleme...

Page 234: ...ly seated 5 Replace the two halves of the air filter housing and secure the clamp WINDSHIELD WIPER BLADES Check the wiper blades at least twice a year or when they seem less effective Substances such...

Page 235: ...l between tread shoulder and maximum section width For example Treadwear 200 Traction AA Temperature A These Tire Quality Grades are determined by standards that the United States Department of Transp...

Page 236: ...ahead braking traction tests and does not include acceleration cornering hydroplaning or peak traction characteristics Temperature A B C The temperature grades are A the highest B and C representing t...

Page 237: ...suddenly possibly resulting in loss of vehicle control Tire rotation Because your vehicle s tires perform different jobs they often wear differently To make sure your tires wear evenly and last longer...

Page 238: ...the same size speed rating and load carrying capacity Use only the tire combinations recommended on the label If you do not follow these precautions your vehicle may not drive properly and safely Make...

Page 239: ...uidelines when using snow tires and chains Use only SAE Class S chains Install chains securely verifying that the chains do not touch any wiring brake lines or fuel lines Drive cautiously If you hear...

Page 240: ...mes before fueling your vehicle Always turn off the vehicle before fueling Automotive fuels can be harmful or fatal if swallowed Fuel such as gasoline is highly toxic and if swallowed can cause death...

Page 241: ...uel vapor is extremely hazardous under certain conditions Care should be taken to avoid inhaling excess fumes The flow of fuel through a fuel pump nozzle can produce static electricity which can cause...

Page 242: ...soline is not recommended particularly in the United States because it may cause these problems to become more pronounced If the problems persist see your dealer or a qualified service technician It s...

Page 243: ...cle 1 Turn the engine off 2 Carefully turn the filler cap counterclockwise 1 8 of a turn until it stops 3 Pull to remove the cap from the fuel filler pipe 4 To install the cap align the tabs on the ca...

Page 244: ...r best source of information about actual fuel economy is you the driver You must gather information as accurately and consistently as possible Fuel expense frequency of fillups or fuel gauge readings...

Page 245: ...irection each time you fill up Have the vehicle loading and distribution the same every time Your results will be most accurate if your filling method is consistent Calculating fuel economy 1 Fill the...

Page 246: ...traveling at 88 km h 55 mph uses 15 less fuel than traveling at 105 km h 65 mph Revving the engine before turning it off may reduce fuel economy Using the air conditioner or defroster may reduce fuel...

Page 247: ...t 12 16 km 8 10 miles of driving Driving on flat terrain offers improved fuel economy as compared to driving on hilly terrain Transmissions give their best fuel economy when operated in the top cruise...

Page 248: ...parts should be equivalent to genuine Ford Motor Company parts in performance and durability Do not park idle or drive your vehicle in dry grass or other dry ground cover The emission system heats up...

Page 249: ...ready for I M test condition To ready the on board diagnostics system for I M testing a minimum of 30 minutes of city and highway driving is necessary as described below First at least 10 minutes of d...

Page 250: ...nect the electrical connector from the bulb by pulling rearward 7 Remove bulb retainer ring by turning it counterclockwise then slide the ring off the plastic base 8 Without turning carefully pull bul...

Page 251: ...serted into the proper holes and into the guide ribs 14 Hold the headlamp assembly snugly against the vehicle and push down on the clips to lock the lamp into place Replacing front parking lamp turn s...

Page 252: ...the tail lamp assembly 4 Carefully pull the lamp assembly from the tailgate pillar to disengage two hidden snap in retainers Flare side and Super Crewtail lamps are not equipped with snap in retainers...

Page 253: ...tall the bulb into the lamp assembly and rotate clockwise 2 Install the lamp assembly on the vehicle with two screws Replacing foglamp bulbs if equipped 1 Remove the bulb socket from the foglamp by tu...

Page 254: ...authorized D O T for North America and an E for Europe to assure lamp performance light brightness and pattern and safe visibility The correct bulbs will not damage the lamp assembly or void the lamp...

Page 255: ...exposure to strong sunlight During winter months it is especially important to wash the vehicle on a regular basis Large quantities of dirt and road salt are difficult to remove and also cause damage...

Page 256: ...from the Ford Car Care Chemicals line Please note that the part numbers shown as XXXX above will vary with your vehicle s specific coloring Observe the application instructions on the products Remove...

Page 257: ...ply anything to the drive belt including belt dressing Cover the highlighted areas to prevent water damage when cleaning the engine Never wash or rinse the engine while it is running water in the runn...

Page 258: ...the windshield or rear window such as tree sap and some hot wax treatments used by commercial car washes Clean the outside of the windshield or rear window with a non abrasive cleaner such as Ford Ul...

Page 259: ...mply use a soft cloth dampened with water and a mild soap Wipe the leather again with a damp cloth to remove soap residue Dry with a soft cloth For tougher soiling concerns Ford recommends using the D...

Page 260: ...istle brushes or abrasive materials or cleaners Hot waxes applied by commercial car washes can affect the cleanability of vinyl material Using high water pressure or wand type car washes against the v...

Page 261: ...ery heavy duty BXT 65 650 BXT 65 650 BXT 65 650 Spark plugs platinum AGSF 34EE AWSF 32P AWSF 22W Refer to Vehicle Emissions Control Information VECI decal for spark plug gap information If a spark plu...

Page 262: ...L 21 6 quarts 4 6L V8 engine with 1 row radiator 19 5L 20 6 quarts 4 6L V8 engine with 2 row radiator 21 9L 23 1 quarts 5 4L V8 engine with 1 row radiator 22 6L 23 9 quarts 5 4L V8 engine with 2 row r...

Page 263: ...15 0L 15 9 quarts 4 Automatic 4R100 4x4 15 5L 16 4 quarts 4 Motorcraft MERCONtV ATF Automatic 4R70W 13 1L 13 9 quarts 4 Front axle Motorcraft SAE 75W 90 Premium 4x4 Front Axle Lubricant 4x4 vehicles...

Page 264: ...type fluids are not interchangeable DO NOT mix MERCONt and MERCONt V Use of a transmission fluid that indicates dual usage MERCONt and MERCONt V in an automatic transmission application requiring MER...

Page 265: ...Lubricant and 236 ml 8 oz of Additive Friction Modifier C8AZ 19B546 A or equivalent meeting Ford Specification EST M2C118 A LUBRICANT SPECIFICATIONS Item Ford part name or equivalent Ford part number...

Page 266: ...s latches striker plates fuel filler door hinge and seat tracks Multi Purpose Grease DOAZ 19584 AA or F5AZ 19G209 AA ESB M1C93 B or ESR M1C159 A Lock cylinders Motorcraft penetrating and lock lubrican...

Page 267: ...ts are indicated on the dipstick or on the dipstick handle Check the container to verify the fluid being added is of the correct type Refer to your scheduled maintenance guide to determine the correct...

Page 268: ...Body Style Regular Cab 4x2 Regular Cab 4x4 Super Cab 4x2 Super Cab 4x4 1 Overall length 5 256 mm 206 9 in SWB 5 729 mm 225 5 in LWB 5 264 mm 207 2 in SWB 5 736 mm 225 8 in LWB 5 728 mm 225 5 in SWB 6...

Page 269: ...mm 89 7 in Flareside Dimension Body Style Regular Cab 4x2 Regular Cab 4x4 Super Cab 4x2 Super Cab 4x4 1 Overall length 5 255 mm 206 9 in 5 263 mm 207 2 in 5 728 mm 225 5 in 5 735 mm 225 8 in 2 Overal...

Page 270: ...2 5 3 1 4 Capacities and specifications 270 I n f o r ma t i o nP r o v i d e db y...

Page 271: ...9 5 745 226 2 2 Overall width 2 009 79 1 1 2 029 79 9 1 3 Overall height 1 878 73 9 1 953 76 9 4 Wheel base 3 518 138 5 3 525 138 8 5 Track front rear 1 661 65 4 1 661 65 4 1 Vehicle width including...

Page 272: ...2 5 3 1 4 Capacities and specifications 272 I n f o r ma t i o nP r o v i d e db y...

Page 273: ...vehicle identification number is stamped on the engine block and transmission MFD BY FORD MOTOR CO IN U S A EXT PNT XXXXXX XXXXXX RC XX DSO XXXX F0000 BAR INT TR TP PS R AXLE TR SPR T0000 X XX XXX X X...

Page 274: ...han 5 000 participating Ford or Lincoln Mercury and Ford of Canada dealers If you did not take advantage of the Ford Extended Service Plan at the time of purchasing your vehicle you may still be eligi...

Page 275: ...ter following the steps described above contact the Ford Customer Relationship Center to find an authorized dealership to help you In the United States Ford Motor Company Customer Relationship Center...

Page 276: ...If you still have a complaint involving a warranty dispute you may wish to contact the Dispute Settlement Board U S or the Canadian Motor Vehicle Arbitration Plan CAMVAP available in all of Canada exc...

Page 277: ...s disputes between customer and dealer except those associated with warranty repairs or concerns with the vehicle s performance as designed a request for reimbursement of consequential expenses unless...

Page 278: ...e toll free phone number of the DSB s independent administrator Your dealership and a Ford Motor Company representative will then be asked to submit statements To properly review your case the Board n...

Page 279: ...e longer for the Board to consider some cases After a case is reviewed the Board mails you a decision letter and a form on which to accept or reject the Board s decision The decisions of the Board are...

Page 280: ...erritories and provinces except Quebec For more information without charge or obligation call your CAMVAP Provincial Administrator directly at 1 800 207 0685 GETTING ASSISTANCE OUTSIDE THE U S AND CAN...

Page 281: ...its finishes These quality products have been specifically engineered to fulfill your automotive needs they are custom designed to complement the style and appearance of your vehicle Each product is m...

Page 282: ...ceeds Ford s rigid engineering and safety specifications Ford accessories are warranted for up to 12 months or 20 000 km 12 000 miles on all cars and light trucks and 12 months with unlimited distance...

Page 283: ...e mirror with compass display Inside mirror with compass and temperature display Off road lights Outside signal mirror available only with power mirrors Pickup box rails Retractable bed hooks Running...

Page 284: ...sh guards Diamond plate tool box Door edge guards Carpet floor mats Fender flares Flat splash guards Front end covers full Grill guard brush guard HomeLinkt in sun visor Hood deflectors Leather wrappe...

Page 285: ...phones and theft alarms that are equipped with radio transmitters Any such equipment installed in your vehicle should comply with FCC or CRTC regulations and should be installed only by a qualified se...

Page 286: ...consumer has the right to choose whether to receive a refund or replacement vehicle California Civil Code Section 1793 22 b presumes that the manufacturer has had a reasonable number of attempts to co...

Page 287: ...ety defect exists in a group of vehicles it may order a recall and remedy campaign However NHTSA cannot become involved in individual problems between you your dealer or Ford Motor Company To contact...

Page 288: ...ifications 265 268 refill capacities 262 traction lok 155 B Battery 231 acid treating emergencies 231 charging system warning light 13 jumping a disabled battery 201 maintenance free 231 replacement s...

Page 289: ...cations 265 268 Cruise control see Speed control 63 Customer Assistance 186 Ford accessories for your vehicle 281 Ford Extended Service Plan 274 Getting assistance outside the U S and Canada 280 Getti...

Page 290: ...7 preparing to drive your vehicle 156 Fuel 239 calculating fuel economy 244 cap 243 capacity 262 choosing the right fuel 241 comparisons with EPA fuel economy estimates 247 detergent in fuel 243 filli...

Page 291: ...9 I Ignition 62 268 removing the key 166 Infant seats see Safety seats 138 Inspection maintenance I M testing 249 Instrument panel cleaning 258 cluster 10 259 lighting up panel and interior 21 locatio...

Page 292: ...l transmission 161 fluid capacities 262 lubricant specifications 268 reverse 166 Mirrors 75 automatic dimming rearview mirror 75 fold away 85 side view mirrors power 84 Moon roof 81 Motorcraft parts 2...

Page 293: ...specifications 261 268 Special notice 4 ambulance conversions 5 four wheel drive vehicles 185 utility type vehicles 5 Specification chart lubricants 265 268 Speed control 63 Speedometer 17 Starting y...

Page 294: ...VIN 273 Vehicle loading 173 Ventilating your vehicle 152 W Warning chimes 15 Warning lights see Lights 10 Washer fluid 218 Water Driving through 175 Windows power 82 Windshield washer fluid and wipers...

Page 295: ...es and specifications chapter Power steering fluid capacity Fill to line on reservoir Use Motorcraft MERCONt ATF Transmission fluid capacity 2 Refer to Refill capacities in the Capacities and specific...

Page 296: ...issions that require the MERCONt V type fluid MERCONt and MERCONt V type fluids are not interchangeable DO NOT mix MERCONt and MERCONt V Use of a transmission fluid that indicates dual usage MERCONt a...

Reviews: