background image

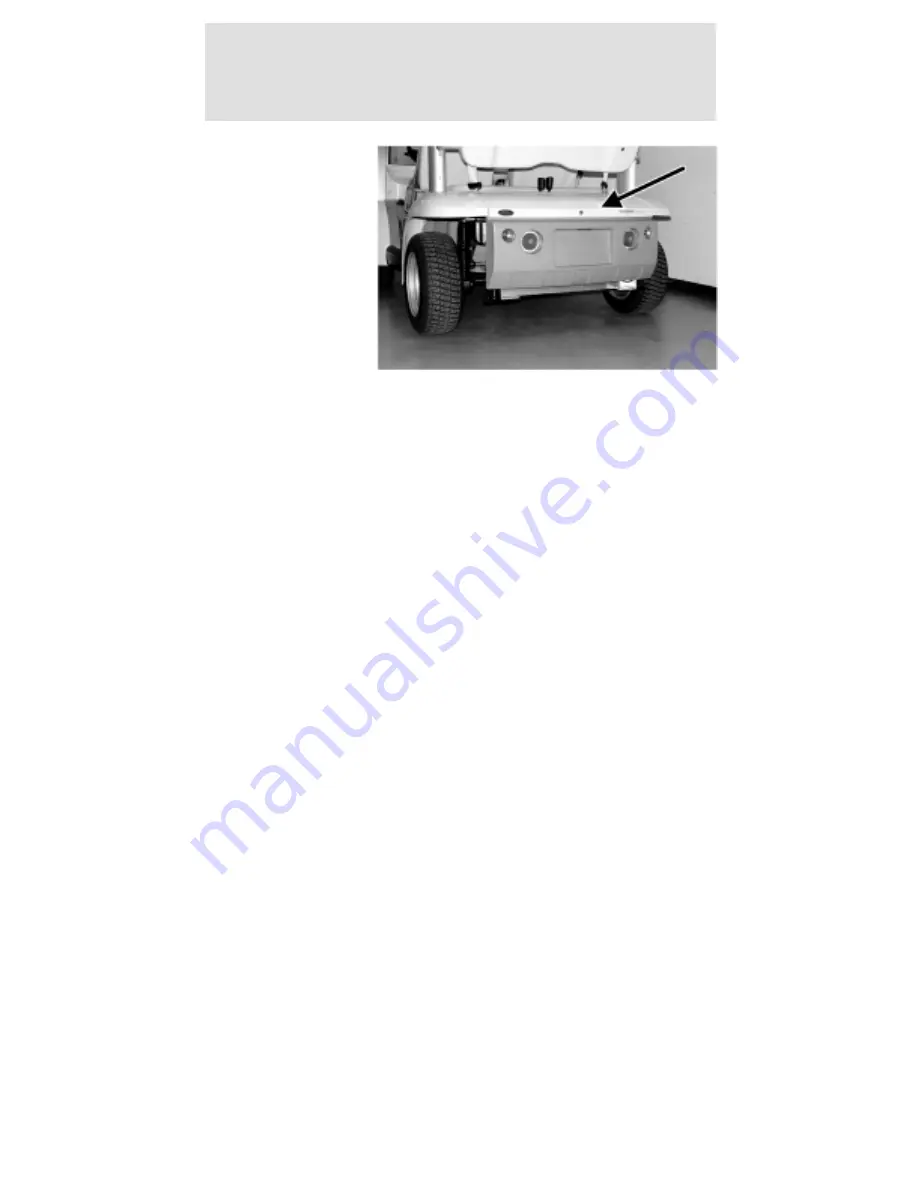
3. Store any
items in the
locking glove
box and locking
rear storage
compartment.

4. Whenever possible, recharge your vehicle
batteries to maximize your range and battery life.

Energy tips

The range the vehicle can travel is affected by:

The use of vehicle accessories

Driving habits

Type of tire (Turf tires reduce vehicle range)

Weather conditions

Age of battery pack

Climbing steep terrain

Driving off-road

To maximize the vehicle’s range, follow these steps:

Keep the tires properly inflated.

Keep payloads as light as possible.

Avoid frequent full throttle usage.

Maintain a steady speed while driving.

Cruise at moderate speeds.

Select routes that minimize the number of starts
and stops encountered.

Charge the vehicle after every use.

Driving

65

Summary of Contents for 2002 Think

Page 1: ...nty information 103 Index 115 All rights reserved Reproduction by any means electronic or mechanical including photocopying recording or by any information storage and retrieval system or translation in whole or part is not permitted without written authorization from Ford Motor Company Ford may change the contents without notice and without incurring obligation Copyright 2002 Ford Motor Company T...

Page 2: ... and birth defects or other reproductive harm ICONS Indicates a safety alert Read the following section on warnings WARNINGS Warnings provide information which may reduce the risk of personal injury to you and others BREAKING IN YOUR VEHICLE There are no particular break in schedules for the vehicle Proper charging and avoidance of over discharging of the batteries will enhance their lives and cap...

Page 3: ...afety Belt Brake System Master Lighting Switch INFORMATION ABOUT THIS GUIDE The information found in this guide was in effect at the time of printing Ford Motor Company and or TH NK Mobility LLC may change the contents without notice and without incurring obligation Introduction 3 ...

Page 4: ...icator The safety belt warning icon will illuminate for 30 seconds after the vehicle is switched into D Drive mode 2 Speedometer gauge LCD A two digit LCD gauge display shows the vehicle speed in either MPH or KPH depending on the selected mode Vehicle speed is shown while in R Reverse T Turf and D Drive modes The top speed of your vehicle in Drive mode is 25 mph 40 km h and 15 mph 24 km h in Turf...

Page 5: ...e instrument cluster The word TRIP will be displayed next to the five digit display when in Trip mode To measure a specific trip mileage with the drive mode selector switch in T Turf or D Drive reset the trip odometer by pushing and holding the Select Reset button down for three seconds 5 Drive system over temperature indicator This icon will illuminate if the drive system overheats The vehicle wi...

Page 6: ...equipped with one of two types of batteries flooded requiring water level checks and maintenance refills or the optional sealed maintenance free for which no maintenance is required This indicator will be disabled if your vehicle is equipped with sealed batteries If you change the type of battery in your vehicle the TH NK dealer will need to change the battery setting in the gauge Resetting the ba...

Page 7: ...ssing and holding the Select Reset button for over three seconds will reset the battery water reminder indicator The drive mode selector switch must be in the R Reverse mode and the instrument cluster must be in battery flooded mode for this function d The Select Reset button will allow you to display diagnostic code s To display the diagnostic code s With the key in the OFF position press and hol...

Page 8: ...nt is high on start up in the reverse direction 24 Motor field current is high on start up in the forward direction 27 12V buss is too low 41 Open thermal protector TP or transistor over temperature 42 Motor armature offset voltage is too high 43 Motor armature offset voltage is too low 44 Armature transistor did not turn off properly 45 Armature transistor did not turn on properly 46 Look Ahead t...

Page 9: ...rging Five bars are illuminated when the batteries have a full charge At one bar the battery outline will begin to flash The flashing frequency will increase as the state of charge decreases At low pack voltage you may see either five bars or zero bars with a flashing outline To maximize battery life charge the vehicle as soon as possible when the outline begins to flash When there are zero bars s...

Page 10: ...ke your vehicle to an authorized TH NK Dealer to correct the condition To avoid serious injury and or death never perform any vehicle service or maintenance while the electrical leakage warning indicator is illuminated This vehicle contains a high voltage electrical system Serious injury death and or property damage may result if this vehicle is not properly used charged or serviced as stated in t...

Page 11: ...position with the parking brake not set It stops after 10 seconds or when the parking brake is engaged During this time the vehicle is active with functional park brake reminder and the gauge will be active and backlit After 10 seconds the vehicle shuts down and park brake reminder is no longer functional To avoid serious injury death and or property damage always engage the parking brake before l...

Page 12: ... also controls the tail lights The tail lights are the larger inboard lamps integrated into the rear bumper The smaller outboard lamps are the rear turn signal lamps The headlamp switch is located on the lever on the left side of the steering column The center section of the lever rotates to turn on the rear tail lamps license plate lamps and the headlamps Lights 12 ...

Page 13: ... lights will not operate in the key OFF mode The first position above the OFF position is the rear tail lamps and license plate lamp The second position above the OFF position will illuminate the headlamps while the rear tail lamps and license plate lamps remain on Pulling the headlamp switch rearward while it is in the OFF position will cause the headlamps to turn on as long as the switch is held...

Page 14: ...HEADLAMPS The headlamps on your vehicle are properly aimed at the assembly plant If your vehicle has been in an accident the alignment of your headlamps should be checked by a qualified service technician Vertical aim adjustment 1 Park the vehicle on a level surface approximately 7 6 meters 25 feet from a vertical wall or screen directly in front of it A 2 43 meters 8 feet B Height of top of lamp ...

Page 15: ...area of high intensity light The top of the high intensity area should be 381 meters 2 ft 3 in above the ground If not the beam will need to be adjusted by a qualified TH NK technician BULB REPLACEMENT Headlamps To remove the headlamp bulb 1 Remove the scrivet and the cowl tray panel A D B C Lights 15 ...

Page 16: ... headlamp electrical connector 3 Rotate the headlamp bulb shield counterclockwise and flip down to access the bulb connectors 4 Pull the flat connector attached to the white wire from the headlamp bulb shield Lights 16 ...

Page 17: ...eep out of the children s reach Grasp the bulb only by its metal base and do not touch the glass The oil from your hand could cause the bulb to break the next time the headlamps are operated 1 Install the headlamp bulb Squeeze and push the two bulb retainer wires to engage them to the headlamp housing 2 Push the flat connector attached to the white wire into the headlamp bulb shield Lights 17 ...

Page 18: ...3 Install and rotate the headlamp bulb shield clockwise 4 Connect the headlamp electrical connector 5 Install the cowl tray panel and the scrivet Lights 18 ...

Page 19: ...similar 2 Twist counterclockwise and remove the front turn signal bulb retainer 3 Remove the bulb 4 Install the new bulb 5 Install the removed components Replacing the rear high mount stop and reverse lamp bulbs 1 Remove the two screws and pull out the lamp assembly to expose the bulb sockets on the back Lights 19 ...

Page 20: ...the lamp assembly and turn clockwise until it is locked into place 6 Position the lamp assembly into the vehicle housing and install the two screws Tighten the screws firmly but do not over tighten Over tightening can cause damage to the lamp Replacing the rear turn signals 1 Unlock and remove the decklid if equipped 2 From inside the rear wheel housings remove the six rear bumper bolts and carefu...

Page 21: ...ll the removed parts Tighten the rear bumper bolts to 8 10 N m 7 Install and lock the decklid Replacing the tail lights brake lights Note The bulb in the tail light brake light assembly is not serviceable The entire assembly must be replaced 1 Unlock and remove the decklid 2 Disconnect the electrical connector Lights 21 ...

Page 22: ... 6 Install and lock the decklid Using the right bulbs Replacement bulbs are specified in the chart below Function Number of bulbs Trade number Headlamp 2 H3 Backup lamp 2 906 License plate lamp 1 W5W High mount stop lamp 1 922 Turn signal lamp 4 7507 PY21W All replacement bulbs are clear in color except where noted To replace all instrument panel lights see your Dealer Lights 22 ...

Page 23: ...perate the windshield wiper with the drive mode selector switch in R Reverse T Turf or D Drive push the lever up Washer To operate the windshield washer turn the wiper on push the end of the lever in toward the steering column and hold it in for the desired length of spray Release the lever to stop the washer and turn the wiper off Driver controls 23 ...

Page 24: ... blade If the wiper operation results in streaky or obstructed vision clean the blade with mild soap and water to remove any foreign material grease or dirt If the wiper operation still results in poor visibility inspect the blade the insert and the arm Confirm that the arm and blade are not bent or damaged If any defect is found the part must be replaced to assure proper operation Confirm that th...

Page 25: ...1 Pull down on the sun roof roof vent handle to unlock the sun roof roof vent 2 Rotate the handle rearward and swivel up until it locks in one of the five raised positions To close the sun roof roof vent 1 Pull down on the sun roof roof vent handle to unlock the sun roof roof vent 2 Rotate the handle forward and swivel up until it locks in the closed position Driver controls 25 ...

Page 26: ...l CUPHOLDER Your vehicle is equipped with a number of convenient cupholders depending on which storage trays your vehicle has Driver side instrument panel storage tray with cupholder and storage compartments Passenger side is similar Optional cowl tray with sport package Driver controls 26 ...

Page 27: ...se the power point remove the rubber plug and insert the desired accessory plug Always keep the rubber plug inserted into the power point when not in use Note The power point should not be used during battery charging MIRRORS Interior rear view mirror The interior rear view mirror is adjustable for both day and night use To reduce the glare at night use the manual switch at the base of the mirror ...

Page 28: ...om inside corner of the mirror This will minimize any blind spot in your field of view Always confirm it is clear behind you before changing lanes or backing up to avoid a collision GOLF RACK IF EQUIPPED To mount golf bags in the golf rack 1 Unlock the decklid To remove the decklid lift and raise the decklid 2 Pull rearward on the bag belt webbing release locking lever Driver controls 28 ...

Page 29: ...k from the webbing and lock the release locking lever FLOOR MATS The floor mats are fastened to the floor with scrivets that can be loosened and removed for cleaning under the floor mats SCORECARD HOLDER IF EQUIPPED The scorecard holder is attached to the glove box door with magnets after attaching a magnetic disc to the glove box door STEREO IF EQUIPPED For operating instructions for the stereo p...

Page 30: ...SAND AND SEED BOTTLE AND HOLDER IF EQUIPPED The sand and seed bottle holder is mounted to the left hand side roof pillar Driver controls 30 ...

Page 31: ...b washer is mounted to the left hand side roof pillar To drain and fill the ball and club washer 1 Remove the front and rear rubber plugs Let the old water drain 2 Remove the five screws from the bottom of the cover Remove the cover Driver controls 31 ...

Page 32: ...rubber plugs 7 Fill with a water and soap solution 8 Install the cover and screws Tighten the screws but do not overtighten COOLER IF EQUIPPED The cooler is a removable folding soft cooler On 4 passenger neighbors the cooler is located under the rear seat On 2 passenger neighbors the cooler is located in the storage tray Driver controls 32 ...

Page 33: ...ould not be used to carry heavy objects SWEATER NET IF EQUIPPED The sweater net drapes over the front seat and is held in place by a locking clasp that routes around the lower part of the seat frame Place only soft light weight objects in the net Hard heavy objects in the net could cause injury in a collision Driver controls 33 ...

Page 34: ...ks should not be loaded with over 8 lbs 3 6 kg The trunk should not be loaded to over 200 lbs 90 7 kg WEATHER ENCLOSURES IF EQUIPPED The weather enclosures are designed to be installed on the vehicle to help shield the vehicle users and the interior of the vehicle from inclement weather To install the weather enclosure Side panels Note Opening the front access panel zipper can help install the sid...

Page 35: ... fender 3 On four passenger vehicles insert the side weather enclosure rear hanger T section into the slot on the underside of the roof rail behind the safety belt hanger bracket 4 Slide the hanger rearward until it reaches the B pillar Driver controls 35 ...

Page 36: ...illar 6 Wrap and fasten the two 1 inch attaching straps Insert the attaching straps through the D ring and fasten securely 7 Attach the three mounting hooks to the openings in the frame rail 8 Repeat steps 1 7 for the opposite side of the vehicle Driver controls 36 ...

Page 37: ...Insert the rear weather enclosure hanger into the slot near the high mount stop lamp 10 Slide the hanger toward the B pillar 11 Zip the two rear weather enclosure to side weather enclosure zippers Driver controls 37 ...

Page 38: ...ounting hooks to the rear fenders To remove the vehicle s weather enclosure 1 Unfasten the two rear mounting hooks to the rear fenders 2 Unzip the two rear weather enclosure to side weather enclosure zippers Driver controls 38 ...

Page 39: ...y from the B pillar 4 Remove the rear weather enclosure hangers from the slots behind the high mount stop lamp 5 Unfasten the three side weather enclosure mounting hooks from the openings in the frame rail Driver controls 39 ...

Page 40: ...6 Pull apart the large upper and lower attaching straps 7 Pull apart the two 1 inch attaching straps 8 Slide the hanger forward away from the B pillar Driver controls 40 ...

Page 41: ...nder 11 Remove the side weather enclosure front hanger from the slot on the underside of the roof rail in front of the safety belt hanger bracket Ventilation and access Do not drive the vehicle with the weather enclosure side panels fully unzipped They will drag on the ground damaging the panel Any stowed panels should not contact the tires or ground to prevent damage to the panels Driver controls...

Page 42: ...o open the front windows in the vehicle s weather enclosure refer to the illustration To open the rear windows on the 4 passenger vehicle s weather enclosure refer to the illustration Driver controls 42 ...

Page 43: ...To open the front access in the vehicle s weather enclosure refer to the illustration To open the front access on the 4 passenger vehicle s weather enclosure refer to the illustration Driver controls 43 ...

Page 44: ...ehicle cover drapes over the vehicle and is held in place by elastic It can be locked using a cable and lock There are hydrogen gases around the batteries that can explode if exposed to flames sparks or lit cigarettes The amount of hydrogen gas is increased during battery charging An explosion could result in personal injury or vehicle damage Do not charge the batteries with the weather enclosure ...

Page 45: ... on a track and is adjustable forward and back To move the seat forward or back slide the lever at the side of the seat to the rear and slide the seat to the desired position Release the lever to lock the seat in the new position The front passenger seat is not adjustable REAR SEATS IF EQUIPPED Always make sure that the rear seat cushion is locked down into place before operating the vehicle The r...

Page 46: ...ccupants of the vehicle including the driver should always properly wear their safety belts It is extremely dangerous to ride in a cargo area inside or outside of a vehicle In a collision people riding in these areas are more likely to be seriously injured or killed Do not allow people to ride in any area of your vehicle that is not equipped with seats and safety belts Be sure everyone in your veh...

Page 47: ...he safety belt around your neck over the inside shoulder 3 Never use a single belt for more than one person Combination lap and shoulder belts 1 Insert the belt tongue into the proper buckle the buckle closest to the direction the tongue is coming from until you hear a snap and feel it latch Make sure the tongue is securely fastened in the buckle 2 To unfasten push the release button on the buckle...

Page 48: ...assenger and rear seat if equipped have cinch tongues to help install a child safety seat tightly The cinch tongue will slide up and down the belt webbing when the belt is in the stowed position or while putting safety belts on When the cinch tongue of the lap shoulder combination safety belt is latched into the buckle the cinch tongue will allow the lap portion to become shorter but holds the web...

Page 49: ...or so that the shoulder belt portion of the safety belt crosses your shoulder and chest 2 Be sure the belt is not twisted If the belt is twisted remove the twist 3 Insert the belt tongue into the proper buckle for your seating position until you hear a snap and feel it latch 4 Make sure the tongue is securely fastened to the buckle by pulling on the tongue The lap belt should fit snugly and as low...

Page 50: ...assembly Use only extensions manufactured by the same supplier as the safety belt Manufacturer identification is located at the end of the webbing on the label Also use the safety belt extension only if the safety belt is too short when fully extended Do not use extensions to change the fit of the shoulder belt across the torso Safety belt maintenance Check the safety belt systems periodically to ...

Page 51: ...y seats made especially for children Check your local state laws for specific requirements regarding the safe transportation of children in your vehicle Never let a passenger hold a child on his or her lap while the vehicle is moving The passenger cannot protect the child from injury in a collision Always follow the instructions and warnings that come with any infant or child restraint you might u...

Page 52: ...oes not fit snugly on both thighs or if the thighs are too short to let the child sit all the way back on the seat cushion when the lower legs hang over the edge of the seat cushion You may wish to discuss the special needs of your child with your pediatrician Follow all of the important safety restraint precautions that apply to adult passengers in your vehicle Do not leave children unreliable ad...

Page 53: ... Place seatback in upright position Carefully follow all of the manufacturer s instructions included with the safety seat you put in your vehicle If you do not install and use the safety seat properly the child may be injured in a sudden stop or collision Installing child safety seats in cinch tongue combination lap and shoulder belt seating positions typical seat shown The belt webbing below the ...

Page 54: ...e shoulder and lap portions together route the tongue and webbing through the child seat according to the child seat manufacturer s instructions Be sure that the belt webbing is not twisted 4 Insert the belt tongue into the proper buckle for that seating position until you hear a snap and feel it latch Make sure the tongue is securely latched to the buckle by pulling on the tongue Seating and safe...

Page 55: ...ake sure that the seat is held securely in place 8 Check from time to time to be sure that there is no slack in the lap shoulder belt The shoulder belt must be snug to keep the lap belt tight during a collision Attaching child safety seats with tether straps Most new forward facing child safety seats include a tether strap which goes over the back of the seat and hooks to an anchoring point Tether...

Page 56: ...bottom of the front passenger seatback Attach the tether strap only to the appropriate tether anchor as shown The tether strap may not work properly if attached somewhere other than the correct tether anchor 1 Position the child safety seat on the seat cushion 2 Route the child safety seat tether strap over the back of the seat and between the head restraint posts Seating and safety restraints 56 ...

Page 57: ...e retained properly in the event of a collision 5 Refer to the Installing child safety seats in combination lap and shoulder belt seating positions section of this chapter for further instructions to secure the child safety seat 6 Tighten the child safety seat tether strap according to the manufacturer s instructions Seating and safety restraints 57 ...

Page 58: ...cle This type of child seat eliminates the need to use safety belts to attach the child seat For forward facing child seats the tether strap must also be attached to the proper tether anchor See Attaching safety seats with tether straps in this chapter Your vehicle has LATCH anchors for child seat installation at the optional LATCH equipped front passenger seat The lower anchors for child seat ins...

Page 59: ...id LATCH attachments do not tighten the tether strap enough to lift the child seat off the vehicle seat cushion when the child is seated in it Keep the tether strap just snug without lifting the front of the child seat Keeping the child seat just touching the vehicle seat gives the best protection in a severe crash Each time you use the safety seat check that the seat is properly attached to the l...

Page 60: ...rmly apply the brake pedal until ready to drive the vehicle in the selected mode In addition follow the safety steps in Important safety precautions in this chapter 1 R Reverse mode The R Reverse mode is used to maneuver your vehicle out of parking spots or rough terrain where you cannot proceed forward A reverse warning will sound to alarm the driver that the vehicle will be backing up The maximu...

Page 61: ...paved roadways Your vehicle s maximum speed is 25 mph 40 km h and you should only operate your vehicle on roadways with a maximum speed of 56 km h 35 mph or less Park brake reminder The park brake reminder is a tone that sounds for 10 seconds when the drive mode selector switch is turned to the OFF position with the parking brake not set It will cease to sound after 10 seconds or when the parking ...

Page 62: ...ts Do not drive the vehicle with the weather enclosure side panels fully unzipped They will drag on the ground damaging the panels Any stowed panels should not contact the tires or ground to prevent damage to the panels 2 If equipped make sure the weather enclosure side panels are not fully unzipped or if stowed do not contact the ground or tires 3 Make sure all accessories such as headlamps are t...

Page 63: ...r key Always firmly apply the brake pedal until you are ready to drive the vehicle in the selected mode To operate the vehicle 1 Insert the key in the drive mode selector switch 2 Depress the brake pedal 3 Turn the drive mode selector key to the desired operating mode 4 Release the brake pedal Driving 63 ...

Page 64: ...celerator pedal When parking the vehicle and turning it off 1 Make sure the parking brake is set 2 Turn the drive mode selector switch to OFF and remove the key from the mode select switch to prevent unauthorized use Driving 64 ...

Page 65: ...ing habits Type of tire Turf tires reduce vehicle range Weather conditions Age of battery pack Climbing steep terrain Driving off road To maximize the vehicle s range follow these steps Keep the tires properly inflated Keep payloads as light as possible Avoid frequent full throttle usage Maintain a steady speed while driving Cruise at moderate speeds Select routes that minimize the number of start...

Page 66: ...g brake pull up on the handle push the button in on the end of the handle and lower the handle to the horizontal position The brake status indicator will turn off when the parking brake is fully released and the drive mode selector switch is turned to one of the run modes The parking brake is not recommended to stop a moving vehicle However if the normal brakes fail the parking brake can be used t...

Page 67: ...ystem may remain operational the system will stop your vehicle but your stopping distance will be greatly increased Regenerative Braking System RBS Another feature of your vehicle is the Regenerative Braking System RBS The RBS is designed to utilize the vehicle s forward motion to generate electricity and partially recharge the batteries for a nominal increase in driving range The RBS works when y...

Page 68: ...ed RBS will not be enabled because the battery pack cannot accept the additional current The contactor is designed to open if the battery pack voltage exceeds 80V Avoid driving situations where you will be driving down steep grades with a fully charged battery pack or the drive system and RBS will shut down The standard braking system is not affected but speeds may exceed 25 mph 40 km h If this sh...

Page 69: ...annot be started or driven Caution If you allow your vehicle to sit in conditions of 6 C 20 F or less with a state of charge of 20 one bar showing on gauge or less the batteries could freeze Allowing the batteries to freeze may cause permanent damage to the batteries and permanently reduce their capacity In cold conditions place the vehicle in an area greater than 0 C 32 F and allow it to warm up ...

Page 70: ...dance with all local codes and ordinances 1 Park your vehicle within GFCI charger cord length of a 120 volt AC 15A grounded 3 prong wall outlet 2 Place the drive mode selector switch in the OFF position remove the key and set the parking brake Note Make sure the power point if equipped is not in use Note Make sure that the inlet is clean and dry Note Never use a plug adapter or an extension cord 3...

Page 71: ...ss Note The humming noise you will hear is the transformer on the charger which will operate regardless of whether the vehicle is accepting the charge Note If the charge indicator fails to display make sure the service disconnect switch is in the ON position If the service disconnect switch is on while charging and the charge indicator fails to display follow the flow chart on the next page Chargi...

Page 72: ...working 120V AC outlet using procedure posted next to charge inlet on vehicle or on pp 65 66 of your Owner s Manual Use a circuit capable of carrying 15A without tripping the circuit breaker START Set parking brake Is the battery charge indicator showing on the gauge Batteries are charging Wait at least 12 hours for complete charge Vehicle is now fully charged Contact dealer for service Battery pa...

Page 73: ...let 4 Store the cord in a safe and dry location BATTERY CHARGING DURING VEHICLE STORAGE The seat stanchion front cover should be removed to access the service disconnect switch The service disconnect switch is located below and behind the parking brake lever within the seat stanchion battery cover It is a black rubber switch and faces the front of the the vehicle It is not encouraged to blindly re...

Page 74: ...h off will decrease The vehicle can be stored with the service disconnect switch off for six months if starting with a full charge however the vehicle should be charged monthly if possible With the service disconnect switch in the OFF position there is a minimal draw from the vehicle components The battery self discharge determines the storage time This is less than 5 per month at temperatures bet...

Page 75: ...ts To turn off the hazard lights depress the switch again With the hazard flasher switch depressed both turn signal indicators will flash on the instrument panel cluster 12V FUSES Change a fuse If electrical components are not working check the circuit fuse first to see if it is blown You can identify a blown fuse by the broken wire in the center of the fuse between two prongs Always replace a fus...

Page 76: ...age rated fuse as a replacement See the chart for the fuse amperage ratings and circuit descriptions Fuse Location Fuse Amp Rating Fuse color Circuit description 1 20A Blue Horn Flasher Brake 2 20A Blue Lights 3 10A Red Wiper Washer Gauge 3 After replacing the fuse check the component to verify that it is operating properly 4 Install and lock the hood Roadside emergencies 76 ...

Page 77: ...nkage system components may occur when positioning the jack pad The pad should be positioned carefully to ensure maximum contact under the frame When lifting a vehicle care should be taken to position the vehicle so that the jack pads do not damage the halfshafts steering linkage or suspension arms Damage to suspension and or steering linkage components may occur To lessen risk of personal injury ...

Page 78: ...Your vehicle is constructed with many aluminum components which may be damaged if The proper jack lifting points are not utilized Roadside emergencies 78 ...

Page 79: ...mber your roadside assistance center It is recommended that your vehicle be towed with flatbed equipment Do not tow with a slingbelt TH NK Mobility has not approved a slingbelt towing procedure It is not acceptable to tow the vehicle with the front wheels on the ground without dollies and the rear wheels off the ground If the vehicle is towed by other means or incorrectly vehicle damage may occur ...

Page 80: ...ack rubber switch and faces the front of the the vehicle It is not encouraged to blindly reach down through the driver s side opening on top of the seat stanchion cover when the cushion is removed It is not encouraged to blindly reach down through the driver s side opening on top of the seat stanchion cover when the cushion is removed Each corner of your vehicle is equipped with a tow tie down hoo...

Page 81: ...ic panels including the instrument panel If brake fluid is spilled on any surface wash it immediately with soap and water to prevent cracking discoloration or other damage The windshield and mirrors can be cleaned using a household commercial glass cleaner and soft lint free cloth UNDERBODY Flush the complete underside of the vehicle regularly Inspect for damage WAXING YOUR VEHICLE Waxing your veh...

Page 82: ...Remover B7A 19520 AA To avoid scratching the lamps do not use a dry paper towel chemical solvents or abrasive cleaners CLEANING THE INSTRUMENT PANEL Clean the instrument panel with a damp cloth then dry it with a dry cloth CLEANING THE GAUGE ASSEMBLY Clean the gauge assembly with a damp cloth then dry it with a dry cloth CLEANING AND MAINTAINING THE SAFETY BELTS Clean the safety belts with a mild ...

Page 83: ...an soft cloth to the clean the clear plastic window sections of the weather enclosure Use plenty of water to keep the clear plastic wet DO NOT use a strong detergent bleach or any abrasive cleaners to clean any part of the weather enclosure To clean the colored vinyl portions of the weather enclosure use a mild soapy cool warm water solution and a soft brush sponge or cloth Rinse the weather enclo...

Page 84: ...or less the batteries could freeze Allowing the batteries to freeze may cause permanent damage to the batteries and permanently reduce their capacity In cold conditions place the vehicle in an area greater than 0 C 32 F and allow it to warm up before charging Never charge the vehicle if the batteries may be frozen Allow the batteries to warm above 0 C 32 F first then charge Caution Do not park and...

Page 85: ...gainst possible splashing of acid solution In case of acid contact with skin or eyes flush immediately with water for a minimum of 15 minutes and get prompt medical attention If acid is swallowed call a physician immediately Always dispose of automotive batteries in a responsible manner Follow your local authorized standards for disposal Call your local authorized recycling center to find out more...

Page 86: ... They are 12 volt 6 cell batteries The battery water reminder indicator in the instrument cluster will illuminate to remind you to check the water level in the batteries Perform this maintenance in a well ventilated area that is dry and well lit To check the water level in your batteries 1 Pull straight up on the front of the front seat cushions to release the clips 2 Remove the two center push pi...

Page 87: ...al with another with any tool or metal object laid across the top of the battery This vehicle contains a high voltage electrical system Serious injury death and or property damage may result if this vehicle is not properly used charged or serviced as stated in this manual Read this owner s guide prior to use charging or servicing this vehicle Do not drill cut or modify any part of this vehicle as ...

Page 88: ...leted adding water make sure each battery cell cap is securely installed Wipe any spilled water off the top of the battery 7 Reinstall the body component s in reverse order of removal and tighten the bolts securely Maintenance free type batteries If your vehicle is equipped with maintenance free batteries it does not require additional water during its life of service Removing the caps could void ...

Page 89: ... brake fluid 1 Remove the scrivet and remove the driver side storage tray 2 Inspect the brake fluid level at the side of the reservoir 3 Remove the brake reservoir cap to add brake fluid as necessary Always use High Performance Dot 3 brake fluid Use of other non Dot 3 fluid could result in loss of brakes 4 Reinstall the brake reservoir cap Wipe off any excess brake fluid 5 Reinstall the driver sid...

Page 90: ...Label located on the roof panel towards the rear of the vehicle Improperly inflated tires can affect vehicle handling and can fail suddenly possibly resulting in loss of vehicle control Tire rotation Because your vehicle s tires perform different jobs they often wear differently To make sure your tires wear evenly and last longer rotate them as indicated in the scheduled maintenance guide If you n...

Page 91: ...for highway service TH NK recommends that any replacement tires you purchase carry the DOT marking showing they are approved for highway service DO NOT replace with non OE tires designated NHS Not for Highway Service OE tires are available through your TH NK dealer Tires that are larger or smaller than your vehicle s original tires may also affect the accuracy of your speedometer PART NUMBERS Comp...

Page 92: ... AA WSB M1C239 A Brake fluid Motorcraft High Performance DOT 3 Motor Vehicle Brake Fluid C6AZ 19542 AB ESA M6C25 A and DOT 3 Seat tracks Multi Purpose Grease DOAZ 19584 AA or F5AZ 19G209 AA ESA M1C93 B or ESR M1C159 A Lock cylinders Penetrating and Lock Lubricant Motorcraft XL 1 None Gearbox 80W90 Premium Rear Axle Lubricant XY 80W90 QL WSP M2C197 A Half shaft splines CV Joint Grease High Temp E43...

Page 93: ...g soda water solution Dispose of waste water properly Tires Check air pressure and adjust as necessary General vehicle Wash battery compartment and underside of vehicle Dispose of waste water properly Semi annual service by a qualified technician only Brake system Check brake shoes replace if necessary Brake linkage and pivots Lubricate brake slides Check brake cables for damage replace as require...

Page 94: ...cated in refill capacities chart Inspect front wheel bearings repack as necessary 16093 kilometers 10 000 miles Tires Rotate the tires VEHICLE DIMENSIONS Vehicle dimensions 2 passenger mm in 4 passenger mm in 1 Overall length 2 642 104 2 898 114 1 2 Overall width 1 433 56 4 1 433 56 4 3 Overall height 1 720 67 7 1 720 67 7 4 Wheelbase 1 726 67 9 1 980 77 9 5 Track Street tires 1274 50 1 1274 50 1 ...

Page 95: ...Maintenance and specifications 95 ...

Page 96: ... Certification label be affixed to a vehicle and prescribe where the Certification label may be located The Certification label is located on roof panel towards the rear of the vehicle Vehicle identification number The vehicle identification number is on a metal tag located on the driver side instrument panel Maintenance and specifications 96 ...

Page 97: ...epair attempt in some states In the United States a warranty dispute must be submitted to the Dispute Settlement Board before taking action under the Magnuson Moss Warranty Act or to the extent allowed by state law before pursuing replacement or repurchase remedies provided by certain state laws This dispute handling procedure is not required prior to enforcing state created rights or other rights...

Page 98: ... unless a service or product concern is being reviewed items not covered by the New Vehicle Limited Warranty including maintenance and wear items alleged personal injury property damage claims cases currently in litigation vehicles not used primarily for family personal or household purposes except in states where the Dispute Settlement Board is required to review commercial vehicles vehicles with...

Page 99: ...application is reviewed and if it is determined to be eligible you will receive an acknowledgment indicating The file number assigned to your application The toll free phone number of the DSB s independent administrator Your dealership and a TH NK Mobility representative will then be asked to submit statements To properly review your case the Board needs the following information Legible copies of...

Page 100: ... be requested by the Board as well Making a decision Board members review all available information related to each complaint including oral presentations and arrive at a fair and impartial decision Board review may be terminated at any time by either party Every effort is made to decide the case within 40 days of the date that all requested information is received by the Board Since the Board gen...

Page 101: ...red 1 800 232 5952 or by writing to the Center at the following address Ford Motor Company Customer Relationship Center 16800 Executive Plaza Drive P O Box 6248 Dearborn Michigan 48121 ORDERING ADDITIONAL OWNER S LITERATURE To order the publications in this portfolio contact Helm Incorporated at HELM INCORPORATED P O Box 07150 Detroit Michigan 48207 Or call For a free publication catalog order tol...

Page 102: ...gation and if it finds that a safety defect exists in a group of vehicles it may order a recall and remedy campaign However NHTSA cannot become involved in individual problems between you your dealer or TH NK Mobility To contact NHTSA you may either call the Auto Safety Hotline toll free at 1 800 424 9393 or 366 0123 in the Washington D C area or write to NHTSA U S Department of Transportation Was...

Page 103: ...D for hearing impaired 1 800 232 5952 INTRODUCTION Ford Motor Company and your selling dealer thank you for selecting one of our quality products Our commitment to you and your TH NK vehicle begins with quality protection and service When you need warranty repairs your selling dealer would like you to return to it for that service but you may also take your TH NK vehicle to another TH NK dealershi...

Page 104: ... warranty coverage is provided by Ford Motor Company or Ford Motor Vehicle Assurance Company call the Customer Relationship Center at 1 800 252 4221 The warranty coverage you receive and your dealer s handling of any warranty covered repair will be the same regardless of the warranty provider IMPORTANT INFORMATION YOU SHOULD KNOW If you need customer assistance Your TH NK dealer is available to as...

Page 105: ...lect or inadequate maintenance and may help increase the value you receive when you sell or trade your Think vehicle It is your responsibility to make sure that all of the scheduled maintenance is performed and that the materials used meet TH NK engineering specifications Failure to perform scheduled maintenance as specified in the Owner s Guide will invalidate warranty coverage on parts affected ...

Page 106: ...ay require a tax on a portion of warranty repairs Where applicable law allows the tax must be paid by you the owner of the vehicle During the Bumper to Bumper Warranty period dealers may receive instructions to provide no cost service type improvements not originally included in your Owner s Guide intended to increase your overall satisfaction with your vehicle Sometimes TH NK may offer a special ...

Page 107: ...mplied warranties For example you may have an implied warranty of merchantability that the TH NK vehicle is reasonably fit for the general purpose for which it was sold or an implied warranty of fitness for a particular purpose that the TH NK vehicle is suitable for your special purposes These implied warranties are limited to the extent allowed by law to the time period covered by the written war...

Page 108: ...ils of battery coverage for percentage Ford will pay What is covered The New TH NK Vehicle Limited Warranty coverage is provided by Ford Motor Company or Ford Motor Vehicle Assurance Company a subsidiary of Ford Motor Company These coverages include Bumper to Bumper Coverage Battery Coverage Safety Restraint Coverage and Corrosion Coverage Bumper to Bumper Coverage Under your New TH NK Vehicle Lim...

Page 109: ...ticipation basis For the 13th month through 18th month in service Ford Motor Company will pay 60 of the cost of the replacement battery For the 19th month through 24th month of service Ford Motor Company will pay 40 of the cost of the replacement battery For the 25th month through 30th month of service Ford Motor Company will pay 20 of the cost of the replacement battery For the 31st month through...

Page 110: ...Coverage which lasts for 5 years regardless of miles driven only applies if the corrosion causes perforation holes in body panels If corrosion does not cause perforation holes and is not the result of usage and or environmental conditions paint damage is covered under the terms of the Bumper to Bumper Warranty 3 years regardless of miles driven For damage caused by airborne material environmental ...

Page 111: ...eterioration of paint trim upholstery and other appearance items that result from use and or exposure to the elements Here are examples stone chips scratches some examples are on paint and glass dings dents cuts burns punctures or tears road salt tree sap bird and bee droppings lightning hail windstorm earthquake water or flood Damage caused by improper maintenance Your New TH NK Vehicle Limited W...

Page 112: ... puncture or tire repair is not covered In addition damage from improper inflation or alignment tire chains racing spinning as when stuck in snow or mud improper mounting or dismounting is not covered Other items and conditions not covered Your New TH NK Vehicle Limited Warranty does not cover non Ford parts of your TH NK vehicle for example parts including glass installed by body builders or manu...

Page 113: ...rom the New TH NK Vehicle Limited Warranty but the program s time period runs concurrently with Bumper to Bumper Warranty Coverage three years regardless of miles driven If you need towing after Bumper to Bumper coverage has ended Ford can arrange roadside assistance and charge your credit card unless the problem is covered by another TH NK warranty Ford will pay the tow charge under the other war...

Page 114: ...tten notification of any defects or non conformities that you have experienced with your TH NK vehicle This will give us the opportunity to make any needed repairs before you pursue the remedies provided by your state s law In all other states where not specifically required by state law Ford Motor Company requests that you give us the written notice Send your written notification to Ford Motor Co...

Page 115: ...e brake system 67 Break in period 2 C Capacities for refilling fluids 92 Certification Label 96 Changing a tire 77 Charging 66 69 73 Child safety restraints 51 child safety belts 51 Child safety seats 52 attaching with tether straps 55 in front seat 53 in rear seat 53 LATCH 58 Cleaning your vehicle exterior lamps 82 instrument cluster lens 82 instrument panel 82 interior 83 safety belts 82 washing...

Page 116: ...ecifications 22 replacing bulbs 15 turning on and off 12 I Ignition 60 Infant seats see Safety seats 52 J Jack 77 positioning 77 K Keys positions of the ignition 60 L Lamps bulb replacement specifications chart 22 headlamps 12 replacing bulbs 15 19 21 Lane change indicator see Turn signal 14 Lights warning and indicator 4 Limited warranty 107 Lubricant specifications 92 M Maintenance and Care 93 9...

Page 117: ...ecard holder 29 Seat belts see Safety restraints 46 Seats 45 child safety seats 52 Specification chart lubricants 92 Starting your vehicle 60 62 Sunroof moonroof 25 Sweater basket 33 Sweater net 33 T Tires 90 checking the pressure 90 replacing 91 rotating 90 Tires servicing 90 Transaxle fluid refill capacities 92 lubricant specifications 92 Trunk expander 34 Turn signal 14 V Vehicle cover 44 Vehic...

Page 118: ...formation 103 106 Washer fluid 24 Waxing your vehicle 81 Weather enclosure 34 41 44 Windows rear wiper washer 23 Windshield washer fluid and wipers checking and cleaning 24 operation 23 Wrecker towing 79 Index 118 ...

Reviews: