Forcepoint Next Generation Firewall 6.3 or higher | Quick Start Guide
e)
Save your changes.
9)
Configure routing.
10)
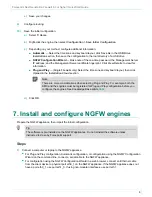
Save the initial configuration.
a)
Select
Home
.
b)
Right-click the engine, then select
Configuration
>
Save Initial Configuration
.
c)
Depending on your method, configure additional information.
■
Automatic
— Select the time zone and keyboard layout, click
Save As
in the
USB Drive
Installation
section, then save the configuration to the root directory of a USB drive.
■
NGFW Configuration Wizard
— Make note of the one-time password, the Management Server
IP address, and the Management Server certificate fingerprint. Click
View Details
to view this
information.
■
Plug and Play
— (Single Firewalls only) Select the time zone and keyboard layout, then click
Upload
in the
Installation Cloud
section.
Note
There are more considerations when selecting Plug and Play. For example, both the
SMC and the engines must be registered for Plug and Play configuration before you
configure the engines. See Knowledge Base article
d)
Click
OK
.
7. Install and configure NGFW engines
Prepare the NGFW appliance, then import the initial configuration.
Tip
The software is pre-installed on the NGFW appliances. Do not reinstall the software unless
instructed to do so by Forcepoint support.
Steps
1)
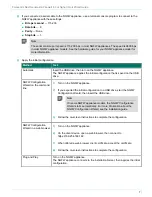
Connect a computer or laptop to the NGFW appliance.
■
For Plug and Play configuration, Automatic configuration, or configuration using the NGFW Configuration
Wizard on the command line, connect a serial cable to the NGFW appliance.
■
For configuration using the NGFW Configuration Wizard in a web browser, connect an Ethernet cable
from the client device to physical port eth0_1 on the NGFW appliance. If the NGFW appliance does not
have a port eth0_1, use port eth1_0. If using non-modular interfaces, use port eth1.
6
Summary of Contents for NGFW
Page 1: ...Next Generation Firewall 6 3 or higher Quick Start Guide Revision I ...
Page 9: ......
Page 10: ......
Page 11: ......


