40 GB/MT
®
Before using / Start-up / Maintenance and Cleaning
… / Safety notices for chargers / Working instructions for sawing / Before using
Secure the work piece
. Use clamps or a
vice to firmly hold the work piece. This results
in a safer grip than with your hand.
Wait for the power tool to stop before
putting it down.
The tool being used could
catch, resulting in losing control over the pow
er tool.
Lock the on/off switch to the off posi-
tion before working on the power tool
(e.g. maintenance, tool change, etc.),
and when transporting or storing.
Risk
of injury if the on/off switch is accidentally acti
vated.
Protect the power tool from heat, e.g.
also from continuous sunlight, fire,
water and moisture.
Risk of explosion.
Wear the dust mask when using the tool.
If the mains power cable of this appliance is
damaged, it must be replaced by the manufac
turer or its service department, or a similarly
qualified person to prevent hazards.
Safety notices for chargers
Persons (including children) who lack the know-
ledge or experience to use the tool or whose
physical, sensory or intellectual capacities are
limited must never be allowed to use the tool
without supervision or instruction by a person
responsible for their safety. Always supervise
children to ensure they do not play with the tool.
The charger is only suitable for
indoor use.
Working instructions for sawing
Check the material you wish to cut for foreign
objects such as nails, screws, etc. and remove
these.
Immediately switch off the tool if the saw blade
is jammed. Spread the previously cut slit with a
suitable tool and remove the sabre saw.
Saw the material with an even feed motion.
Original accessories / tools
Use only the accessories specified in
the operating instructions.
Using tools or
accessories other than those recommended in
the operating instructions could result in injury.
Information about saw blades
You may use any saw blade with
1
/
2
" (12.7 mm)
universal shaft. Saw blades in various lengths opti-
mised for any purpose are available from your retailer.
Before using
Removing / charging / inserting
the battery pack
Note:
The battery is partly charged at the time of
delivery. Charge the battery before use. Li-Ion bat-
teries can be charged at any time without reducing
the life. Interrupting the charging process does not
damage the rechargeable battery.
1. To remove the battery pack
3
press the release
buttons
4
and slide the battery pack
3
out
of the tool.
2. Insert the rechargeable battery pack
3
into
the rapid charger
12
.
3. Insert the mains plug into the mains socket. The
status LED
14
will light up red.
4. The green status LED
13
shows charging is
completed and the battery pack is
3
ready
for use.
5. Slide the battery pack
3
into the tool.
Checking the battery charge
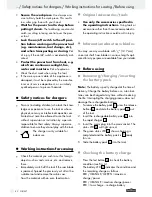
Press the test button
16
to check the battery
condition (see Fig. A).
The battery LED
15
indicates the condition and
the remaining charge as follows:
RED / ORANGE / GREEN = maximum
charge / power
RED / ORANGE = medium charge/ power
RED = low charge – recharge battery
Summary of Contents for FAAS 10.8 A1
Page 3: ...1 3 2 C D A B 4 5 6 7 8 9 10 12 14 13 11 15 16 10 8 11 ...
Page 4: ...F G E ...
Page 44: ...44 ...

