


GETTING ST
ARTED
SAFETY
/
SPECIFICA
TIONS
ASSEMBL
Y /
INST
ALLA
TION
OPERA
TION
TROUBLESHOOTING
MAINTENANCE /
REP
AIR
REPAIR (CONTINUED)
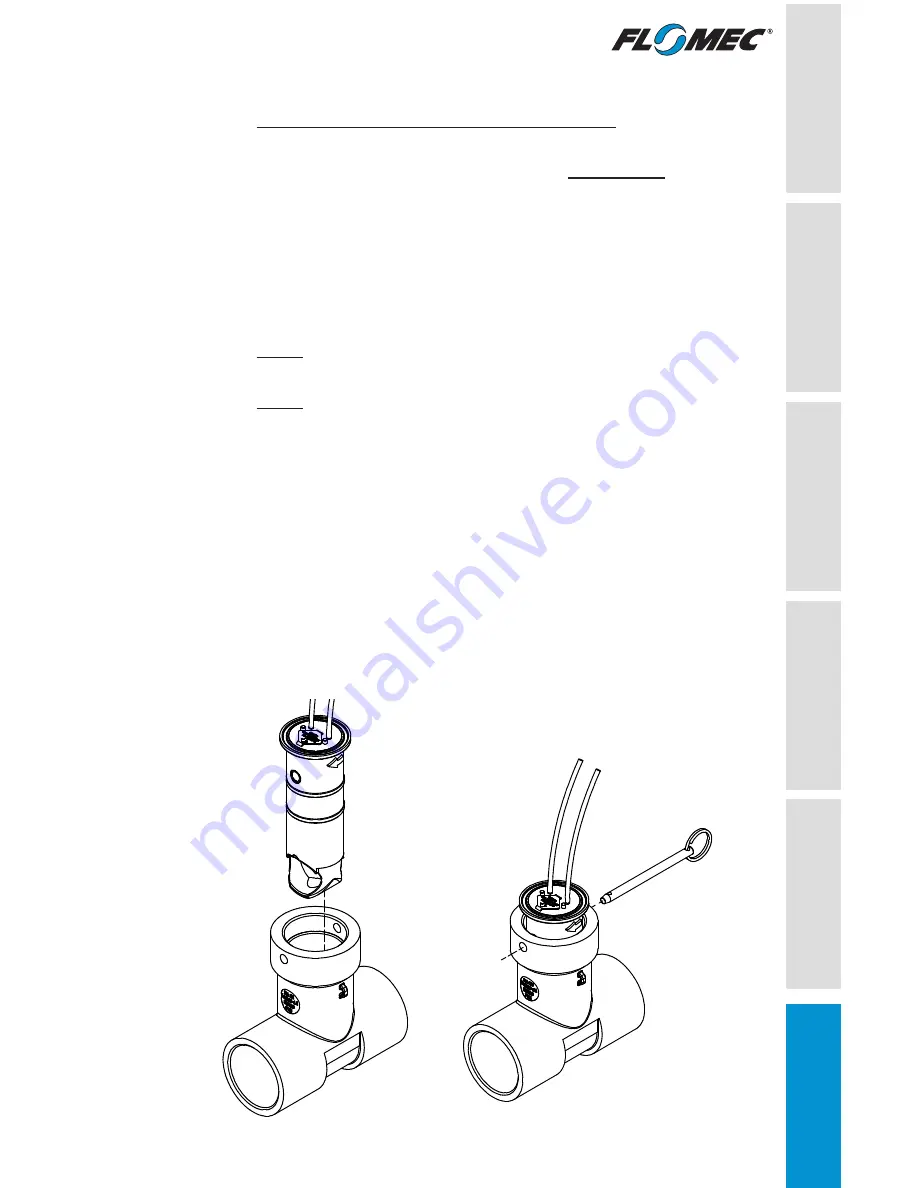
Install New or Replacement Insert Into Tee
1. The Tee insert bore must be clean before installing the insert and the
(2) black O-rings on the insert should be fully lubricated.
2. Orient the insert over the insert bore so that the arrow on the insert is
pointing in the direction of flow.
3. Insert the insert straight down into the Tee.
4. Push down on the insert flange and twist slightly to install, and to
align the retaining pin holes in the insert with the holes in the Tee (see
Figure 15).
NOTE: The FLOMEC Multi-Tool (p/n 146055-501) can be used to make
installing new insert easier (see Figure 18).
NOTE: The O-rings on the outside of the QS200 Retrofit Insert are square
profile O-rings. When installing in another brand of Tee, if the insert fits
too tight into the Tee, replace the square profile O-rings with the round
profile O-rings included with the QS200 Retrofit Insert. Their installation
could make installation easier in tight fitting Tees. The O-rings must be fully
lubricated before insert installation.
5. Next, replace the quick release pin (see Figure 16).
6. Using the splicing and wiring information (see WIRING
CONNECTIONS and WIRING DIAGRAM in the INSTALLATION
section), connect the wiring from the new insert to the wiring cable of
the controller.
7. Energize the insert and verify that it is operating properly (see
Troubleshooting section if required).
19
PAGE 9 & 17
PAGE 16 & 17
Figure 15
Figure 16