This document does not contain any export-controlled information.
Installation andUser Guide
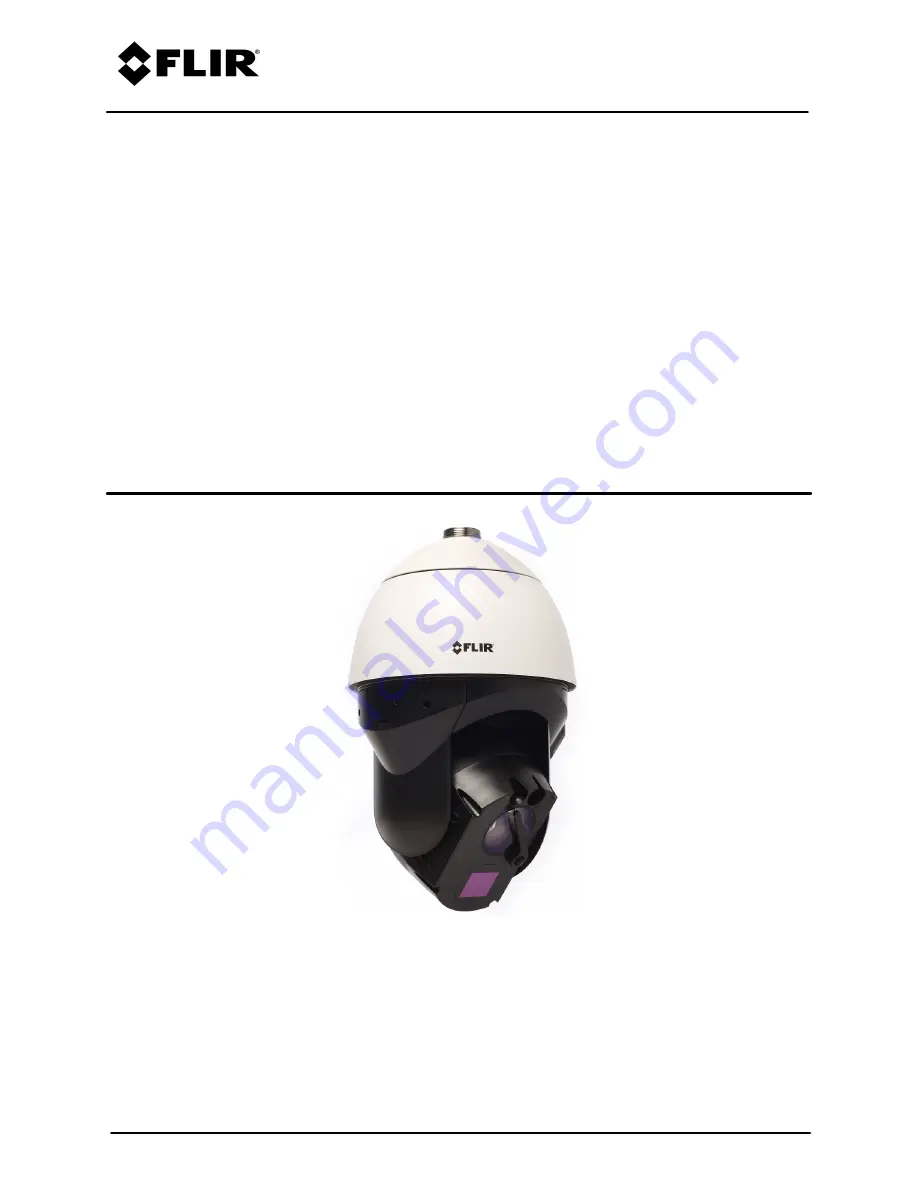
Elara™ DX-SeriesCamera
i
427-0300-00-12 - Revision 110 - May 2021
Page 1: ...This document does not contain any export controlled information Installation and User Guide Elara DX Series Camera i 427 0300 00 12 Revision 110 May 2021...
Page 2: ...t to part 15 of the FCC Rules These limits are designed to provide reasonable protection against harmful interference when the equipment is operated in a commercial environment This equipment generate...
Page 3: ...on Register your Product with FLIR at https customer flir com For warranty information see https www flir com support center warranty security flir security product warranties Product Registration and...
Page 4: ...X ARMX G3 12 2 6 2 Wall Mount Bracket with Power Box CX ELBX G3 14 2 6 3 Gooseneck Mount with Power Box CX GSNK G3 16 2 6 4 Mount Adapters 17 2 6 5 Corner Adapter CX CRNR G3 17 2 6 5 1 Pole Adapter CX...
Page 5: ...1 Date Time Page 42 4 2 Users Page 43 4 3 Cloud Page 44 4 4 Audio Page 45 4 5 I O Devices Page 45 4 6 Cyber Page 47 4 7 Certificates 47 4 7 1 802 1x 48 4 7 2 TLS HTTPS 49 4 7 3 Services 49 4 7 4 ONVIF...
Page 6: ...rity solution The FLIR Thermal Fence provides automated perimeter surveillance intrusion detection and alert capabilities for perimeter security applications The FLIR Thermal Fence gives you instant a...
Page 7: ...specified operating temperature range can cause permanent damage Related Documentation Elara DX Series Quick Install Guide FLIR CGI Interface Description 2 1 Nexus CGI WebSockets Manual FLIR Sensors...
Page 8: ...Elara DX Series Product Information Page on FLIR com 3 Scroll down to see the camera s specifications and related documents 4 Click Go to Product Support to open the camera s support page FLIR Elara D...
Page 9: ...Microbolometer Pixel Pitch 12 m Frame Rate NTSC 30 Hz or PAL 25 Hz 8 3 Hz available Optical Characteristics Model Thermal FOV Focal Length DX 350 50 38 4 3 mm DX 324 24 18 9 1 mm DX 312 12 9 18 mm DX...
Page 10: ...VDC 24 VAC Audio I O Bi directional via terminal block connection Illumination Up to 200m NIR illumination Distance Up to 200m 656ft 6 30 90 Peak emission wavelength 850 nm Lens Window Wiper Wiper is...
Page 11: ...ofile S IEC 62368 Visible Light Camera Sensor Type 4K UHD 1 1 8 Progressive CMOS Lens Field of View HFOV 61 8 2 15 VFOV 36 65 1 2 Focal Length 6 5mm 202mm Zoom Optical Zoom up to 31x Digital Zoom E Zo...
Page 12: ...n and maintain secured camera access communications infrastructure tamper proof outdoor boxes etc All electrical work must be performed in accordance with local regulatory requirements 2 1 Supplied Co...
Page 13: ...system should be installed with security measures regarding physical access by trusted and un trusted parties Network Security The unit transmits over IP to security personnel for video surveillance P...
Page 14: ...Out B1 12 Alarm In 1 6 Alarm Out B2 13 Ground Alarm I O 7 Not used 14 Audio In AC24V IN Connector Pin Definition 1 AC 24L 2 Ground 3 AC 24N Warning This product contains a battery that is soldered to...
Page 15: ...uld be connected only to a PoE network inside a building and not routed outside the building If the camera is installed outdoors with an external power supply the power supply must be installed with p...
Page 16: ...sing a safety lanyard 1 Before attaching the mounting accessory to the mounting surface attach the safety lanyard to a secure anchor point on the mounting surface or on the accessory 2 through the mou...
Page 17: ...into the camera The screw prevents the camera from rotating 9 Try to rotate the camera and make sure it is not possible to rotate the camera Warning If the camera can be rotated it could become loose...
Page 18: ...wn You might need to cut a slit in the sponge Step 2 Place the larger black sponge inside the bracket as shown Route the cables through the pre cut cross in the sponge Step 3 Route the cables through...
Page 19: ...2021 CX ARMX G3 dimensions 2 6 3 Wall Mount Bracket with Power Box CX ELBX G3 What s in the Box Item Details Qty Wall mount bracket with power box CX ELBX G3 1 Parts package NO 3 Allen Key 1 NO 5 All...
Page 20: ...ponge Step 2 Route the cables through the bracket Step 3 Follow camera instructions to assemble the pendant cap Use the Allen key and a hex head cap screw to assemble and firmly affix the camera s pen...
Page 21: ...No 5 Allen key 1 No 6 Allen key 1 M4x8 hex cap double washer 2 Quick install guide Summarized below 1 Step 1 Fix backplate on mounting surface Step 2 Assemble power box and tighten screws with No 6 Al...
Page 22: ...or the camera Corner Adapter CX CRNR G3 Pole Adapter CX POLE G3 2 6 5 1 Corner Adapter CX CRNR G3 90 degree exterior angle corner adapter for CX xxxx G3 mounts Item Details Qty Corner mount adapter CX...
Page 23: ...together Step 2 Tighten hex head cap screws clockwise Step 3 Fix assembled corner adapter to the wall Step 4 When using a wall mount bracket pictured affix the wall mount bracket onto the corner adapt...
Page 24: ...5 ring 3 Accessory bag Stainless streel truss head screw M8 20 4 Stainless steel truss head screw M8 30 4 M8 washer 4 M8 screw nut 4 M8 spring washer 4 Quick install guide Summarized below 1 Step 1 Wh...
Page 25: ...s at the same time see the VMS documentation To configure the camera for the first time do the following Configure for Networking Install and Test the Optional Wash Kit Attach the Camera to a VMS 2 7...
Page 26: ...t click the camera and select Login In the DNA Login window type the password for the admin user If you do not know the admin user password contact the person who configured the camera s users and pas...
Page 27: ...ions manual This section and this guide contain important information about installing the washer and using it specifically with the DX Series camera Connection of the board Connect the following J9 t...
Page 28: ...zle so that it sprays liquid over both camera lens windows when the camera is in what will be its washer position Activating the camera s wiper when the lens windows are dry causes irreparable damage...
Page 29: ...ilt position as the washer position You can also specify a wash spray duration between 0 10 seconds 4 Activate the washer Under Washer click Start Make sure the washer activates Important If the initi...
Page 30: ...amera are on the same network If you do not know the camera s IP address you can use the DNA tool to discover it 2 On the login screen type a user name and the password When logging in to the camera f...
Page 31: ...lt and Zoom PTZ You can toggle controlling the camera s pan and tilt between Emulated Joystick When the mouse pointer is over live video it becomes a directional arrow To move the camera you can Click...
Page 32: ...efault parameters In some cases such as when an IP video stream is sent over a wireless network it can be useful to tune the video streams to reduce the bandwidth requirements To modify the parameters...
Page 33: ...ince the last I frame A smaller I Frame Interval results in higher bandwidth more full frames sent and better video quality A higher I frame Interval means fewer I frames are sent and therefore can re...
Page 34: ...0 250 554 stream1 Visible 2 rtsp 192 168 0 250 554 stream2 Thermal 1 rtsp 192 168 0 250 554 stream3 To maintain compatibility with legacy systems the stream names are aliased as ch0 stream1 ch1 stream...
Page 35: ...the darker areas would be completely dark WDR can produce more detail in both the dark and the bright areas of the image o Wide Dynamic Range Set the level of digital Wide Dynamic Range dWDR to Off Lo...
Page 36: ...ects Four settings are available Off Low Mid High o 2D Noise Reduction Analyzes individual frames pixel by pixel and frame by frame to eliminate environmental noise and deliver optimized image quality...
Page 37: ...1 300 1 3500 1 100 1 500 1 10000 1 100 1 425 1 10000 1 120 1 725 1 32000 1 120 1 600 1 32000 Iris Size The iris works in tandem with the shutter to determine how much light enters the sensor Defining...
Page 38: ...he region of interest ROI By default the ROI is Full screen the camera s AGC algorithm considers the entire image In some cases defining an ROI that excludes a portion of the screen can improve the im...
Page 39: ...Tip Changes to the default contrast setting affect scenes with little temperature variation more than they affect scenes with greater temperature variation Sharpness DDE Gain Enhances image details an...
Page 40: ...settings If an optional washer pump is connected to pins 3 and 4 Alarm Out A1 and A2 on the camera s 14 pin terminal block connector the washer controls on the Wiper Page activate it through local ou...
Page 41: ...ber from 1 128 Selecting an index number currently associated with a preset position overwrites the existing preset position c Specify a unique descriptive name for the preset position You can use alp...
Page 42: ...ntinuously track an object passing under the camera When a tilting camera reaches its maximum angle it pans 180 and then continues tilting to keep tracking the object Note If a preset position or a po...
Page 43: ...SD Page The OSD page provides separate on screen display settings for visible and thermal video The camera can overlay onto the video its name and the date and time with either black or white text wit...
Page 44: ...tion if defined o Set Sets the camera s current pan and tilt as its washer position Wash Spray Duration Specify the amount of time the washer turns on when you click Start under Washer between 0 10 se...
Page 45: ...y presets have been defined after changing the camera s orientation go to the PTZ Page and redefine them After making any change on the Georeference page click Save to save the changes The camera can...
Page 46: ...reset the camera to its factory defaults reboot the camera and configure other parameters 4 1 Network Page When a user assigned the expert or admin role clicks System Settings the Network page appear...
Page 47: ...ode is set to Static specify Name Server 1 The primary domain name server that translates host names into IP addresses Name Server 2 A secondary domain name server that backs up the primary DNS You ca...
Page 48: ...signed the admin role can add users and change or set all passwords Users assigned the expert role only see the user currently logged in and cannot add edit or delete a user To maintain security of th...
Page 49: ...s pages menus controls and settings admin including the default admin user Can access and use all of the camera s web pages including adding editing deleting users but cannot delete the default admin...
Page 50: ...le Multicast Can be set to On default or Off When On specify the destination address and port and the time to live TTL Audio Out When audio is On you can adjust the audio line output gain from 0 100 p...
Page 51: ...appears for each pin I O pin number Type Input or Output State the pin s current state Open or Closed For each pin you can define the following Idle State Open or Closed Alarm Auto Ack Yes or No Enabl...
Page 52: ...1X you need to generate or upload a valid certificate You can Use the camera s web page to generate a self signed certificate Upload a self signed certificate Upload a certificate signed by a third pa...
Page 53: ...Certificates or click 802 1x To upload a certificate for TLS HTTPS To upload a certificate for 802 1X 2 If you are uploading a self signed certificate under Public Key and then under Private Key a Cli...
Page 54: ...mmediately take effect To apply the changes click Save and then reboot the camera 4 7 4 Services Enable or disable digest authentication for the FLIR CGI control interface The default setting is On en...
Page 55: ...actions also up to seven 2 For each auxiliary command action specify the ONVIF command name 3 For each auxiliary command action and separately for each ON and OFF output action select one of the follo...
Page 56: ...re Info page you can Specify a unique name for the camera Upgrade the camera s firmware Reset the camera to its factory defaults Reboot the camera Define a log level and download system information En...
Page 57: ...k Partial Reset to keep the current settings on the Network page and return all other settings to their factory defaults Click Reboot to cause the camera to power cycle and reinstall configuration fil...
Page 58: ...its and to keep it clean If the front window of the camera gets water spots wipe it with a clean soft cotton cloth dampened with fresh water Do not use abrasive materials such as paper or scrub brushe...
Page 59: ...target of uniform temperature allowing the thermal sensor to correct for ambient temperature changes and provide the best possible image Unable to Communicate over Ethernet First check to ensure the p...
Page 60: ...ntrolled information FLIR Systems Inc 6769 Hollister Ave Goleta CA 93117 USA Corporate Headquarters FLIR Systems Inc 27700 SW Parkway Ave Wilsonville OR 97070 USA Support https support flir com Docume...