25
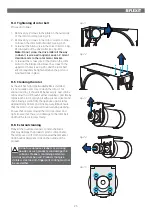
9.4 Tightening of rotor belt
Proceed as follows:
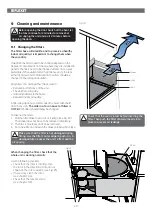
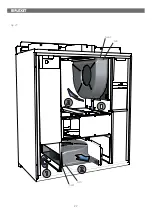
1. Remove qty. 2 screws in the plate on the outer side
of the rotor cassette (see Fig. 31).
2. Remove qty. 4 screws in the rotor cassette in order
to loosen the rotor motor bracket (see Fig. 32).
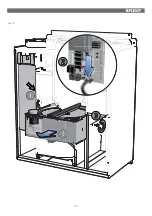
3. Screw out the Allen screw in the drive roller (see Fig.
33) and pull out the drive roller (see Fig. 34).
Note:
Do not screw the drive roller all the way
in when it is screwed in again. Leave 1-2 mm of
clearance mm to the rotor motor bracket.
4. Screw out the screws (qty. 4) that fasten the rotor
motor to the bracket and move the screws to the
uppermost holes (see Fig. 35), and the rotor belt
will consequently be tightened when the parts are
mounted back in place.
9.5 Cleaning the rotor
As the unit has high impermeability filters installed,
it is not usually necessary to clean the rotor. If, for
various reasons, it should still be necessary, dust can be
removed with a soft brush. Further cleaning is possible by
removing the rotor, spraying it with a grease solvent and
then blowing it clean from the opposite side. Distance
approximately 60 mm and max. pressure 8 bar. Ensure
that the motor is not exposed to water during cleaning.
Ensure that all seals around the rotor are intact and
tight. Ensure that there is no damage to the rotor belt,
and that the rotor rotates freely.
9.6 External
cleaning
Many kitchen surface cleaners contain chemicals
that may damage the product’s plastic components.
Therefore use a soft cloth moistened with warm water
and a neutral detergent to clean the outside of the
product.
Do not use abrasive cleaners or scouring
powder, as such products can damage the
surfaces. Cleaners containing ammonia
or citrus must not be used. Products that give
stainless steel an anti-fingerprint coating must not
be used either.
Fig. 31
Fig. 32
Fig. 33
Fig. 34
Fig. 35


