background image


RS200 manual GB 2009


www.flexiforce.com 

20

manual

GB 

rev.0 Feb-09


GREASING DOOR PARTS 


RE-ADJUSTING THE DOOR 


Open and close the door for checking all the settings.  

When the door panel is not hanging completely horizontally in the lifting cables in (almost) closed 
conditions there are several options for fine adjustment. 
A.


Loosen the securing bolts of the cable drum and the drum relative to the tube shaft.  

B.


When a coupling is employed this may be adjusted to ensure a better horizontal setting. 

 
Horizontal movement of the door can be limited  
(to max. 5mm) by installing 2065 distance rings on the  
roller shafts. 


Summary of Contents for RS200

Page 1: ...B 2009 www flexiforce com 1 manual GB rev 0 Feb 09 RS200 Hardware system for residential garage overhead doors Built in height 200mm springs in front INSTALLATION MAINTENANCE USAGE All rights reserved FlexiForce 2009 ...

Page 2: ...other than the fitters Other people children may get in the way or endanger themselves during the installation GUARANTEE CONDITIONS AND TERMS The general terms and conditions of delivery and payment issued by the Metaalunie and designated as METAALUNIE CONDITIONS are fully applicable to all our quotations contracts and their implementation We expressly reject all other terms and conditions On requ...

Page 3: ...exiForce components We wish you every success with the installation of this hardware set If anything is unclear or should you have queries you should of course contact Flexi Force B V or your supplier This set has to be completed with the assembled door sections Panels brands and types according to the list of approved panels NB FlexiForce has introduced a new system for shaft installation so call...

Page 4: ...s for correct and rapid assembly 5 Applied fixation materials 5 RS200 System overview 6 Installing vertical track system 7 Installing horizontal track system 8 Shaft system installation 11 Panel Hardware installation 14 Cables Torsion springs 17 Finishing the door 19 Optional E operation 23 Panel assembly 24 Troubleshooting 27 Dismantling the overhead door 28 Maintenance and replacement of parts 2...

Page 5: ...d in the drawings of this manuals Below an overview of the applied fasteners and optional alternatives 1055BV self tapping screw Alternatives 1055D screw 6 3x25mm with drill point Max torque 10Nm key 10 1053BV screw 6 3x35mm 1053D screw 6 3x35mm with drill point 1054 25 1054 35 screw with socket hex cap drill point 1054W 25 1054W 35 screw with socket hex cap RAL9010 Optional 1055CAP10 white RAL901...

Page 6: ...rs Shaft system with torsion springs spring break devices drums spring fittings cables etc RS200H10etc Horizontal double track set Connection horizontal tracks RSV10etc Vertical set with track side seal and vertical angle Door panels sections With end caps hinges bottom brackets bottom astragal and seal top roller carriers windows etc RS200 top view ...

Page 7: ...RS200 manual GB 2009 www flexiforce com 7 manual GB rev 0 Feb 09 INSTALLING VERTICAL TRACK SYSTEM ...

Page 8: ...009 www flexiforce com 8 manual GB rev 0 Feb 09 VERTICAL TRACK SET HORIZONTAL TRACK SET OPTIONAL REINFORCEMENT HORIZONTAL TRACK SET For heavy doors the horizontal track could be optionally reinforced with plate RX560R L ...

Page 9: ...RS200 manual GB 2009 www flexiforce com 9 manual GB rev 0 Feb 09 INSTALLATION WALL CONSOLES Traditional installation SuperClick installation ...

Page 10: ...RS200 manual GB 2009 www flexiforce com 10 manual GB rev 0 Feb 09 CONNECTION HORIZONTAL TRACKS OPTIONAL L days opening width 134mm SUSPENSION HORIZONTAL TRACK TO CEILING CLICK ...

Page 11: ... 09 SHAFT SYSTEM INSTALLATION DOOR W 3000mm CENTRAL SHAFT SUSPENSION 3 ALTERNATIVES USA MINI 312RM 312R Central shaft suspension Torsion springs with spring fittings and spring break devices Cable drums No key way FF4X8 FF400 8 S FF0402 Without key way tube shaft ...

Page 12: ...rs CENTRAL SHAFT SUSPENSION W 3000mm Traditional installation SuperClick installation Torsion springs with spring fittings and spring break devices Cable drums With key way FF 4 13 FF05NL12 etc Central shaft suspension With coupler and 2 bearing plates 310CL CR or USA MINI With key way tube key wayed shaft Max 23 Nm ...

Page 13: ...RS200 manual GB 2009 www flexiforce com 13 manual GB rev 0 Feb 09 FIXATION TO THE LINTEL Traditional installation SuperClick installation ...

Page 14: ...RS200 manual GB 2009 www flexiforce com 14 manual GB rev 0 Feb 09 PANEL HARDWARE INSTALLATION ...

Page 15: ...RS200 manual GB 2009 www flexiforce com 15 manual GB rev 0 Feb 09 Alternative hinges 411 series ...

Page 16: ...s 1055BV securing the top roller holder 417S so that it can be displaced with a slight tick Press the top panel against the side upper seal and slide the top roller holder as far as possible downwards and fix all screws minimum play between door panel and seal The bearing roller lies snugly in the rounding of the bearing tracks Alternative top roller carrier adjustable 419S series ...

Page 17: ...anual GB rev 0 Feb 09 CABLES TORSION SPRINGS Cable running behind the rollers to the cable drums Without key way Fix shaft with clamp Hook the cable connection in the drum Rotate the drum for winding the cable Position drum on the shaft Max 10Nm ...

Page 18: ...erienced and properly trained overhead door fitters Use correctly fitting and properly maintained tension levers FlexiForce code RES TB Number of turns on the torsion springs Height H 4 panels 5 panels 2000mm 7 1 turns 6 8 turns 2125mm 7 6 turns 7 3 turns 2250mm 8 0 turns 7 7 turns 2375mm 8 4 turns 8 7 turns 2500mm 8 5 turns 9 2 turns 5 panels 6 panels 2750mm 9 4 turns 9 2 turns 3000mm 10 3 turns ...

Page 19: ... from the 1st tension lever to the 2nd tension lever Remove the 1st tension lever from the slot Turn the 1st tension lever a quarter turn such the spring is tensioned Repeat until number of turns is achieved Then fix the spring plug to the shaft Check the door balance and adjust the springs if necessary equally both springs FINISHING THE DOOR Max 25 Nm ...

Page 20: ...letely horizontally in the lifting cables in almost closed conditions there are several options for fine adjustment A Loosen the securing bolts of the cable drum and the drum relative to the tube shaft B When a coupling is employed this may be adjusted to ensure a better horizontal setting Horizontal movement of the door can be limited to max 5mm by installing 2065 distance rings on the roller sha...

Page 21: ...RS200 manual GB 2009 www flexiforce com 21 manual GB rev 0 Feb 09 SAFETY LABELS ON THE DOOR LABEL GB etc A A ...

Page 22: ...ull rope with a power operated door at any time This can cause serious injuries or danger to the user of the door Place your CE identification plate on the door mandated together with any warning labels required Hand over necessary documents to the end user o User manual o Dismantling instructions included in this manual o Maintenance instructions included in the user manual o Service log book o D...

Page 23: ...der to maintain the closing peak force of the door within the CE standards the attachment point of the drawbar should be fixed at the proper position Ask your supplier for the correct position NB The person installing the door must check thoroughly if the combination between this door and the selected operator is safe to use ITTR approval report Keep in mind the max peak force that is allowed when...

Page 24: ...RS200 manual GB 2009 www flexiforce com 24 manual GB rev 0 Feb 09 OPTIONAL TANDEM ROLLERS ...

Page 25: ...AND Kingspan panel Tecsedo panel Metecno panel 40ES500L R 40ES610L R 40TS500L R 40TS610L R 40FS500L R 40FS610L R 40ES500WL R 40ES610WL R RAL9010 40TS500WL R 40TS610WL R 40FS500WL R 40FS610WL R 40EM500L R 40EM610L R 40TM500L R 40TM610L R 40FM500L R 40FM610L R 40EM500WL R 40EM610WL R RAL9010 40TM500WL R 40TM610WL R 40FM500WL R 40FM610WL R ...

Page 26: ...RS200 manual GB 2009 www flexiforce com 26 manual GB rev 0 Feb 09 INSTALLING BOTTOM ALU SEAL ...

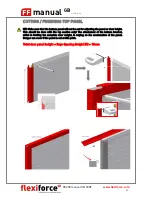
Page 27: ...el will not be cut for adjusting the panel or door height This should be done with the top section only The attachment of the bottom bracket which is holding the complete door weight is relying on the construction of the panel Danger can occur if the panel is cut at this point Total door panel height Days Opening Height H 15mm ...

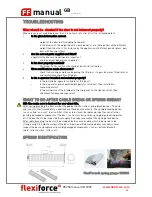
Page 28: ...s the installed e operator suitable for this door Is the e operator power adjusted properly for this door See installation manual operator Is the connection of the drawbar to the top panel on the right position See attachment and manual operator WHAT TO DO AFTER CABLE BREAK OR SPRING BREAK NB Also make sure to instruct the user about this After spring breaking the door will be stopped by the 656 s...

Page 29: ...the 2nd tensioning iron fully into the next tensioning aperture 6 Take over the tensioning of the spring from the 1st tensioning iron with the 2nd tensioning iron 7 Remove the 1st tensioning iron from the aperture 8 Turn the 2nd tensioning iron a quarter turn in the direction required 9 Insert the 1st tensioning iron fully into the tensioning aperture 10 Take over the tensioning of the spring from...

Page 30: ...HANIC 4 Grease the bearings of the shaft MECHANIC 5 Grease the hinge pins MECHANIC 6 Grease the lock MECHANIC 7 Protect the panels with carwax USER 8 Grease the rubbers slightly with vasaline USER After 3 months 1 Complete inspection visualy MECHANIC 2 Check balancing system and adjust if needed MECHANIC 3 Grease all the above mentioned points if needed MECHANIC Every 6 months or after every 750 c...

Page 31: ... Check the hinges on breaking MECHANIC 7 Check the panels on damage wear and roust MECHANIC 8 Check the spring breaking device acc to instructions in manual MECHANIC 9 Check and test the safety edge system with operator MECHANIC 10 Check the manual operation of the door MECHANIC 11 Grease the springs MECHANIC 12 Check side seals on damage or wear and tear MECHANIC 13 Check top seal on damage or we...

Reviews: